
How to set up Xero Integration
Xero Integration is an Advanced Module
What does the Xero API integration with Odyssey allow you to do?
- Pushing of Odyssey's Booking level Client record + Charges|Discounts to create an Invoice in Xero, done on a booking-by-booking basis. This is best suited to operators using the Charges & Discounts as their client pricing model, rather than Odyssey's 'Quoted' pricing model.
- Pulling of payment information from Xero to Odyssey, creating payments on the payments tab within Odyssey. This is done on a booking-by-booking basis, and the intention is to script this to run on a regular basis; more details on script frequency to come
To configure Xero integration with Odyssey
Please be aware that you can join your Xero company to your live Odyssey file, or
the Xero DEMO company to your Odyssey Sandbox (if you have one) or your Live Odyssey file
Please take care about which selections you make.
(All existing Xero customers have access to a Xero Demo company. It is accessed by logging in as a user of their existing Xero account, and then going to the top left menu bar, clicking on MyXero, and choosing Demo company from there. Note that the Xero Demo company automatically gets wiped every 28 days. Learn more about using Xero's Demo company here)
Get your Xero Demo company, or your live Xero company ready
Log into either your live Xero company, or the Xero Demo Company, and Create Products in Xero to match Odyssey Charges | Discounts
- Create Products in the Xero Demo, to exactly match Odyssey's Costs | Discounts.
-
The Odyssey Cost name must be 100% identical to the Xero Code field, same capitalisation, no extra spaces, etc. (Odyssey does not automatically create the products in Xero, when an invoice is pushed. The product must already be in Xero)
(In Xero go to Business/Products and Services, Tick they sell it. Tax Sales code = GST, Add a sales account GL Code)
Here's an example of what your Xero product should look like:
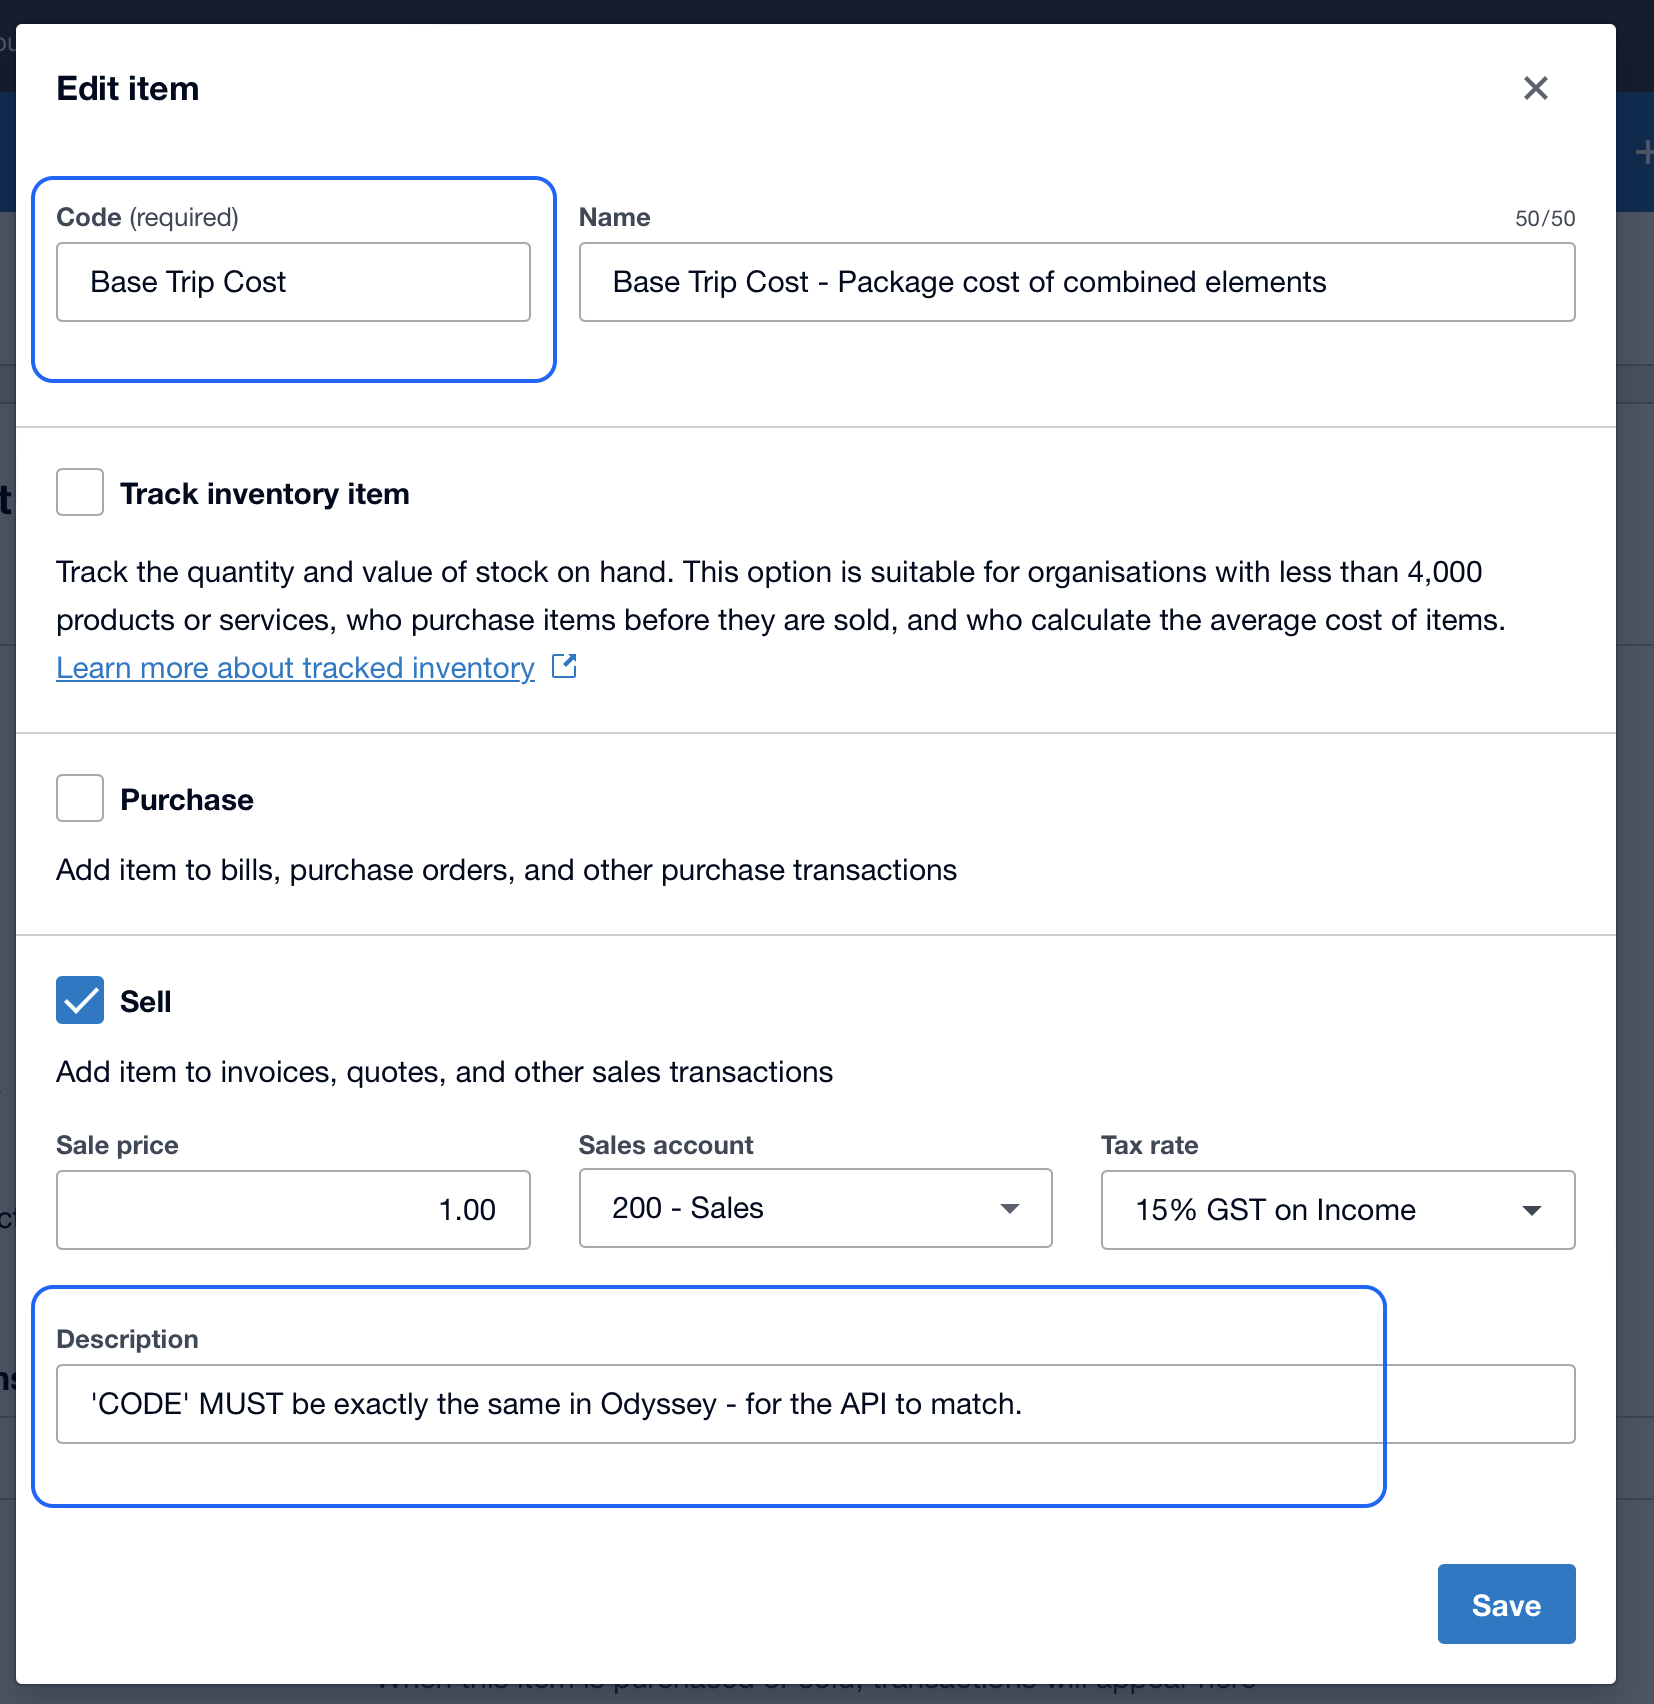
- Note: Each Odyssey Cost | Discount must have the appropriate Xero GL account entered, for the specific trail.
The Xero GL code is the important part, copy and paste that from Odyssey. Learn more about General Ledger codes and the Chart of Accounts in Odyssey here
Get your Odyssey file ready
Log into either your Odyssey Sandbox, or your live Odyssey file, and enter GL Codes on Costs | Discounts (in the latest development this may not be required, please check in with us)
For demonstration purposes, just enter a few general ledger codes to match any key Xero GL codes that you are going to Push data to. E.g. For base trip costs, ensure that you have entered the correct Xero GL code. (Each GL Code must relate to a specific trail)
If you are going to connect your live system with Xero, all the Costs | Discounts will need to have the appropriate Xero products created and matching Xero GL codes entered.
To make the connection
In Xero
- go to [ https://developer.xero.com ] click login, and use your usual Xero login details
-


- you may get an option to log in to either your live Xero file, or the Demo Xero file here. Please be very careful about which selection you make

- an authentication code may have been sent to your phone, if so, follow any instructions that Xero provide in order to continue
- Click [ New App ]

Next enter these details as shown in the pic below:
- Enter a name [ Odyssey ]
- In the Company or application url field enter [ https://myodyssey.app ]
- paste in the [ RedirectURL ] https://tigeen-xero.com/index.php/xero_oauth_endpoint
- Click [ Create app ]

You'll now be presented with a view like this...

From the menu options on the left... click on the [ Configuration ] option.
- COPY the [ Client id ] when it displays. (Store this somewhere temporarily, as you will need to paste it into Odyssey shortly... you don't want to loose it before it's in Odyssey)
- Click the [ Generate a secret ] button
- COPY the [ Client Secret 1 ] when it displays. (Store this somewhere temporarily, as you will need to paste it into Odyssey shortly... you don't want to loose it before it's in Odyssey)

- Click [ Save ] (this Save button may not be able to be activated.. possibly this step is not required)
Don't worry if you click off these fields and the Client Secret content appear to be hidden, this is meant to happen... and it's why we advised you to copy the details, (in the steps above)

In Odyssey

Go to : Main Menu | Admin | Settings | API Settings | Xero

Click on the [ Xero ] button
- Enter the [ Xero Client ID ] from the previous Xero Developer step above
- Enter the [ Xero Client Secret ] from the previous Xero Developer step above
- Don't worry about the last box ( Odyssey Xero User id ), we will have populated that for you...


The final step involves authentication, as a onetime set-up
- Click on the [ Authenticate ] button
- You may see this screen, just click 'OK'

- On the new browser window or tab that has opened... click the large [ Connect to XERO ] button

- You may get a 2-Factor Authentication message like this... you will need to follow any instructions Xero provide, in order to continue.

- Log-in details are then required in order to ensure you have the authority to make this connection

- Finally from Xero, a confirmation screen.

Click the [ Allow access ] button and you will be shown the final screen for this process...

GREAT news, your Xero account and Odyssey have successfully been connected - Yay
Note: There is a script which runs every 15 minutes in Odyssey to refresh the Xero security token, so that this authentication remains active.
- Close this window, there is nothing more to do - your set-up is complete.
You can now Push & Pull the relevant details between Xero & Odyssey.
Back in Xero now, you should be able to see that Odyssey is a Connected App


Set up work to do in Odyssey, and Xero
Please read our page on the set up work to do in Odyssey and Xero, here