
"Walk-in" Clients
de
The Walk-in function is designed to accommodate a client who has not previously booked into Odyssey, but comes to your Depot requesting a shuttle for themselves and/or their bike. Optionally they may also be wishing to hire a bike. A bag movement function is also under development.
Once a Walkiin has been added, it is listed in the Trip/Departure Dashboard (visible to Reservations staff), Booking Dashboard (visible to Reservations staff), the Depot | Trips by Month list, Daily Diary and Manifest and Briefings screens, etc.
From these locations it can be edited, names added or removed, bike sizes and serial numbers added, dates moved, or the entire booking deleted. It can be searched for and modified, in the same way as regular bookings.
To add a 'Walkiin/Counter Sale'
- From Depot | Departure Dashboard, click the + Walk-in button
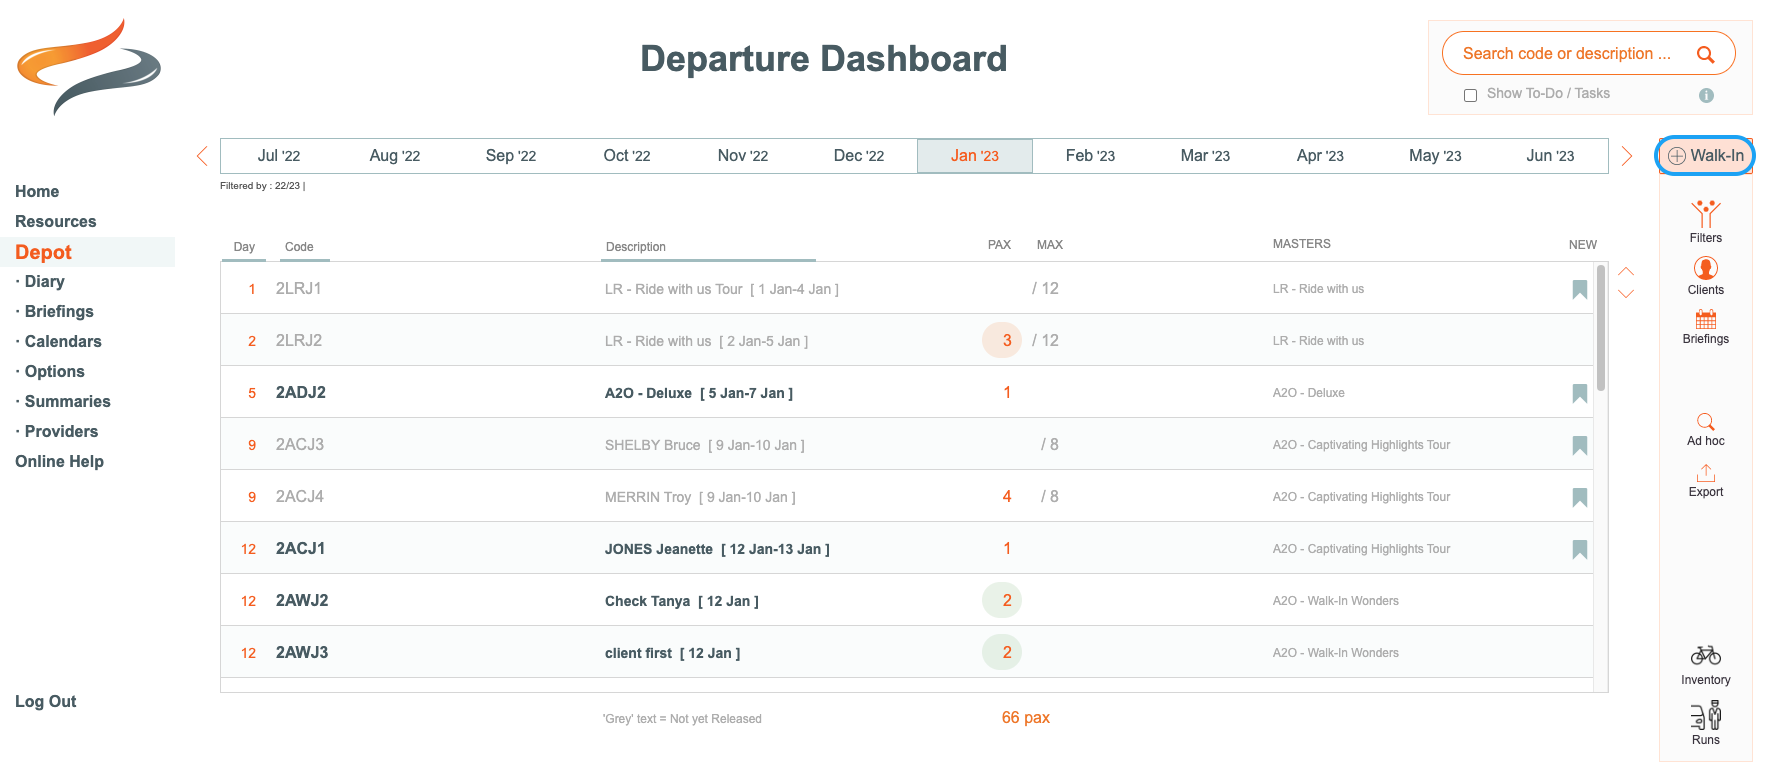
- Select which service your walk in client has requested; either Bike Hire, PAX shuttle, or Both

Bike Hire

- Select the trail from the Trail drop down list. Note that each extra field will appear as you complete the previous field.
- Select the Walkin Master for this trail. For example, this could be A2O Walk in, or Lake Dunstan Walk in
- Select the date the booking is required
- Select the Bike Model to hire
- Select the number of clients on this "walkin" booking from the drop down list
- Select the duration of the hire
- Click Continue

Clients
On the Clients tab which appears next, there is a line for you to record details for each passenger. Passenger 1 has their own line, then Passenger 2, etc.
- Click into the first name field, and enter the first name of this passenger
- Click into the last name field, and enter the last name of this passenger
- Click into the email field, and enter this passenger's email address
- Click into the phone field, and enter this passenger's phone number
- Click into the height field to enter this passenger's height
- Tick the tickbox if the client has returned the waiver form
- Tick the tickbox if the client has paid
Click the more button at the end of each row to reveal a pop up box

- Enter the client's fitness/experience from the drop down list
- Select a different booking status if the client's booking is not confirmed
- Click the delete button to delete the booking
Repeat for each client, moving to the second and subsequent records, if required
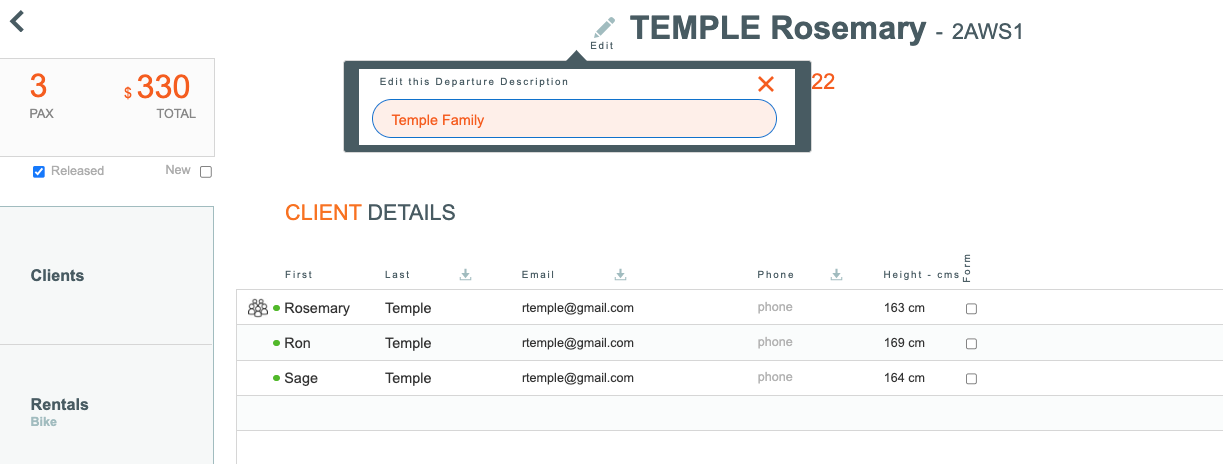
Changing the Walk-in Departure name
The default Walk-in Departure name will be the name of the first booking. If you wish to change the Departure name:
- On the Client tab, Click the Edit button below the Walk-in Name, and enter a new name for this Departure, if required.
Rentals

- if required, the bike model can be reselected for any client
- A bike size will have been chosen, based on the client's height. This can be overridden if required
- If you have the bike serial number, it can be entered
- Untick the charge tickbox if this bike hire is not chargeable
- To clear out the bike booking details, click the small x beside the bike booking

- and then to enter fresh bike booking details, click the small + beside the bike booking

Emails

- The Depot staff are able send a range of emails (up to 10) to these Walk in clients.
- Click once in the box beside each client's name, for the corresponding email template. A tick will appear.
- Click the Send button at the bottom of the window
Notes | Changes

Notes
There are three Notes fields available for recording Inclusion Text, Notes for the Office, and Notes for Finance.

Printing options
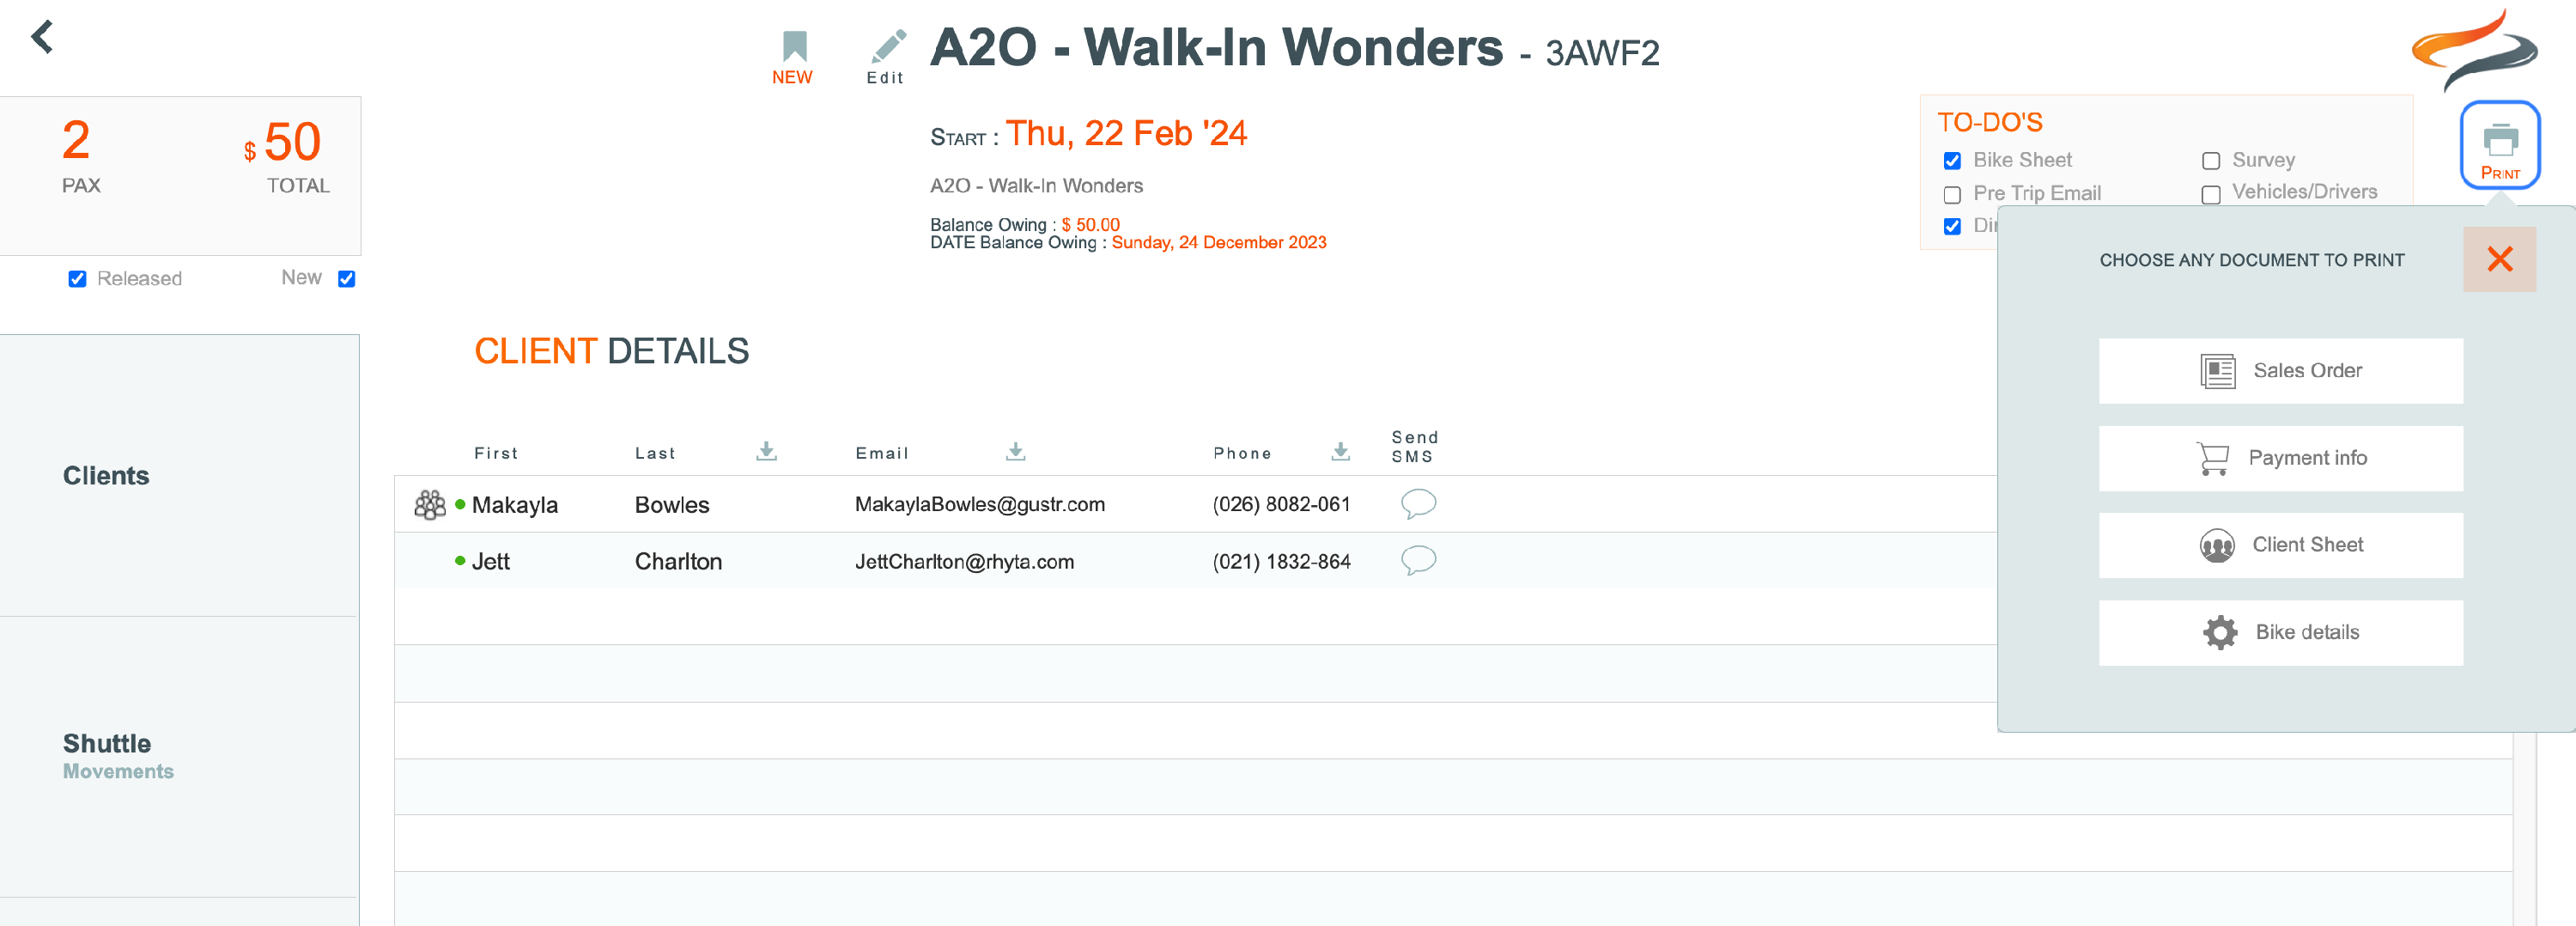
Learn about the printing options here:
Add an Unaccompanied Bag - coming soon!
PAX Shuttle
This service allows you book a passenger shuttle booking


Both (Bike Hire and PAX shuttle)

