
Company Settings - Trail / Activity / Category / Country
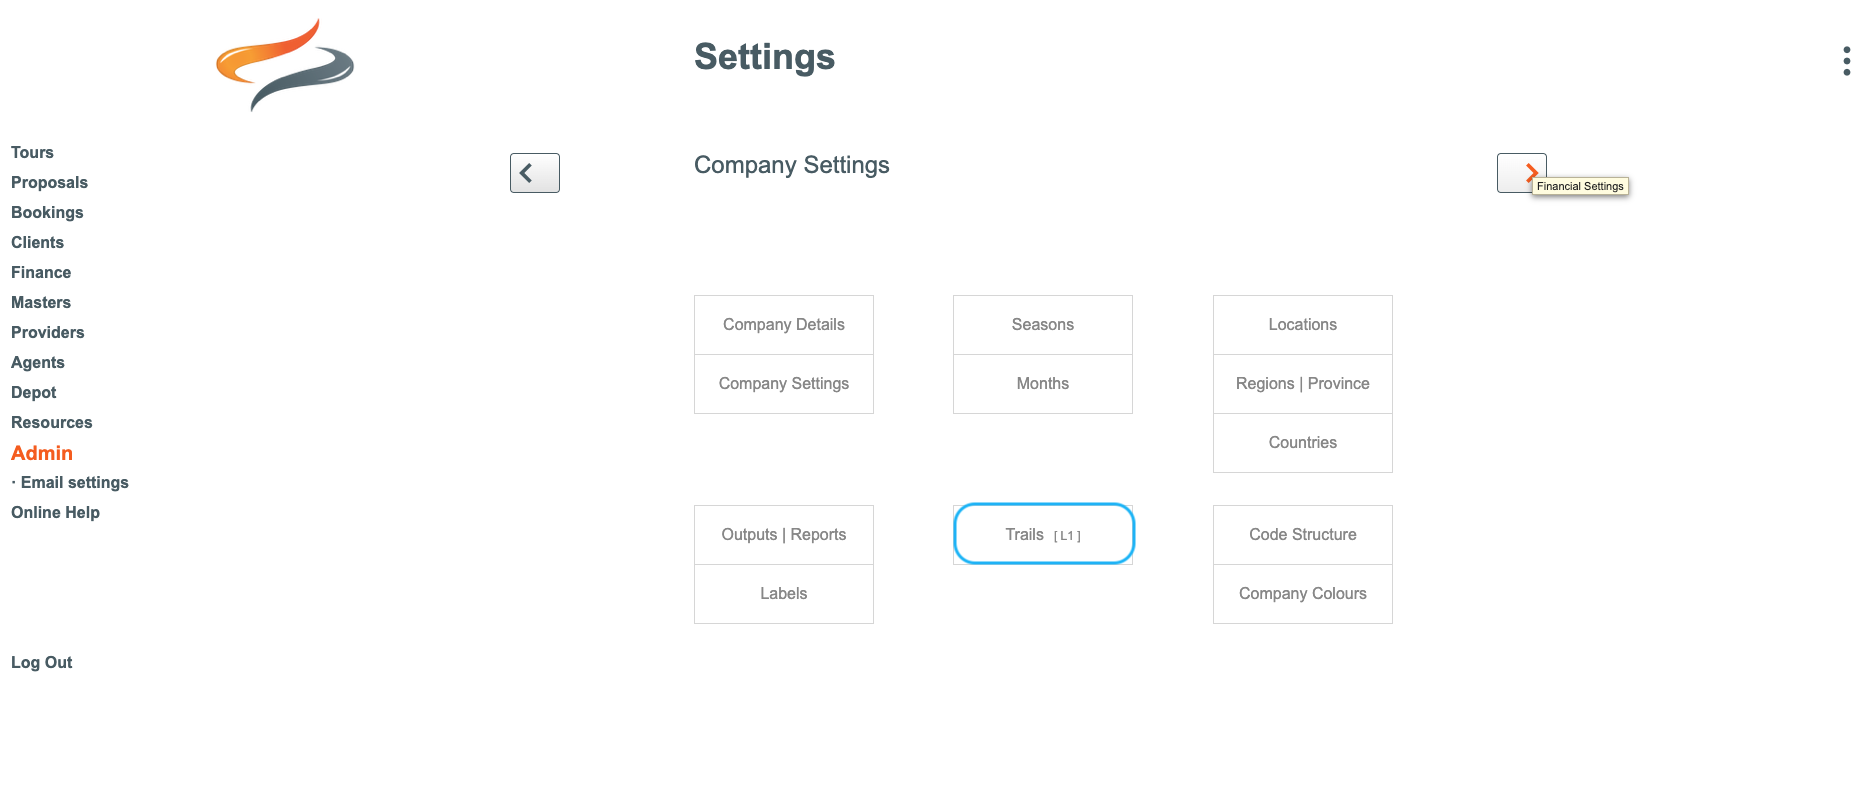
From the Main Menu, choose Admin | Company Settings | Trails [L1]
Trails (or Activity / Locations / Countries or Categories), are the uppermost level of the data structure in Odyssey. (We call this Level1).
- This term is editable by your business, at the set up stage of Odyssey. By being able to rename this Level 1 setting to the term that most suits your business, all of your filtering, reporting/search/charting options within Odyssey, can be tailored to the term that most suits your requirements.
- They can be used in email communications with clients and providers.
- All Masters, Departures, and Bookings are based on L1 Trails (Activities, Locations, Categories or Countries).
To access the settings:
- From the Main Menu | Main Menu | Admin | Company Settings | L1 Trail (or Activity, Country, Category, etc).
- Learn more about how other Odyssey clients might label their L1's here
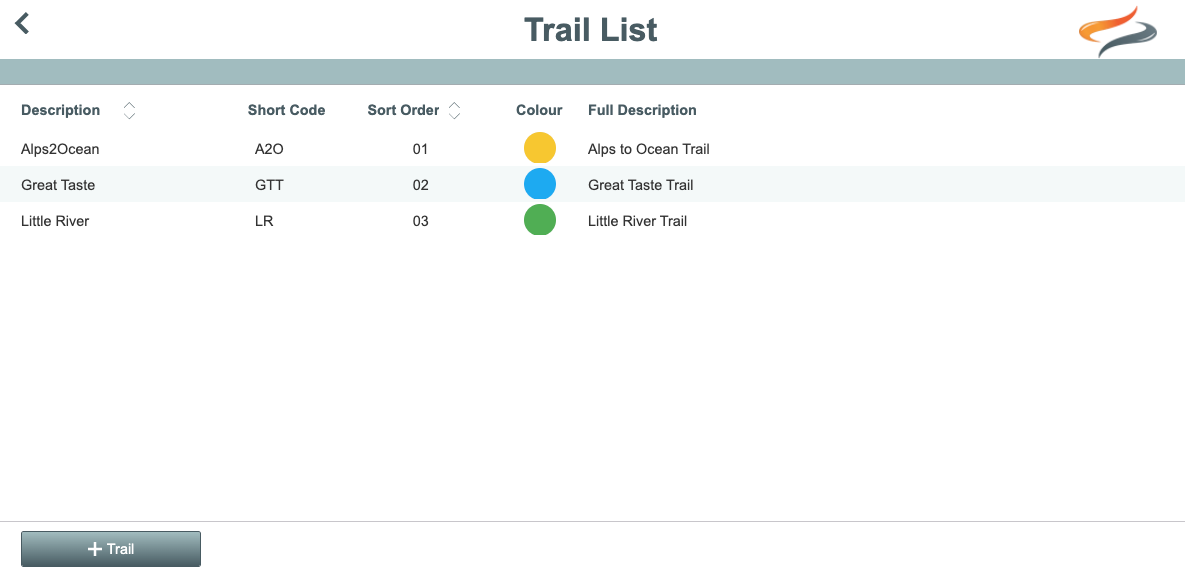
- Click once on a Trail to see the Detail
- Trails can have a Depot or meeting location attached to them.
To create a new Trail
- From the Main Menu | Main Menu | Admin | Company Settings | Trail (or Activity, Country, Category, etc)
- Click + Trail
Please advise Creative Technology (support@myodyssey.app) if you create a new trail, as we may need to modify email templates, online forms, or other tasks relating to the Ody Trips app
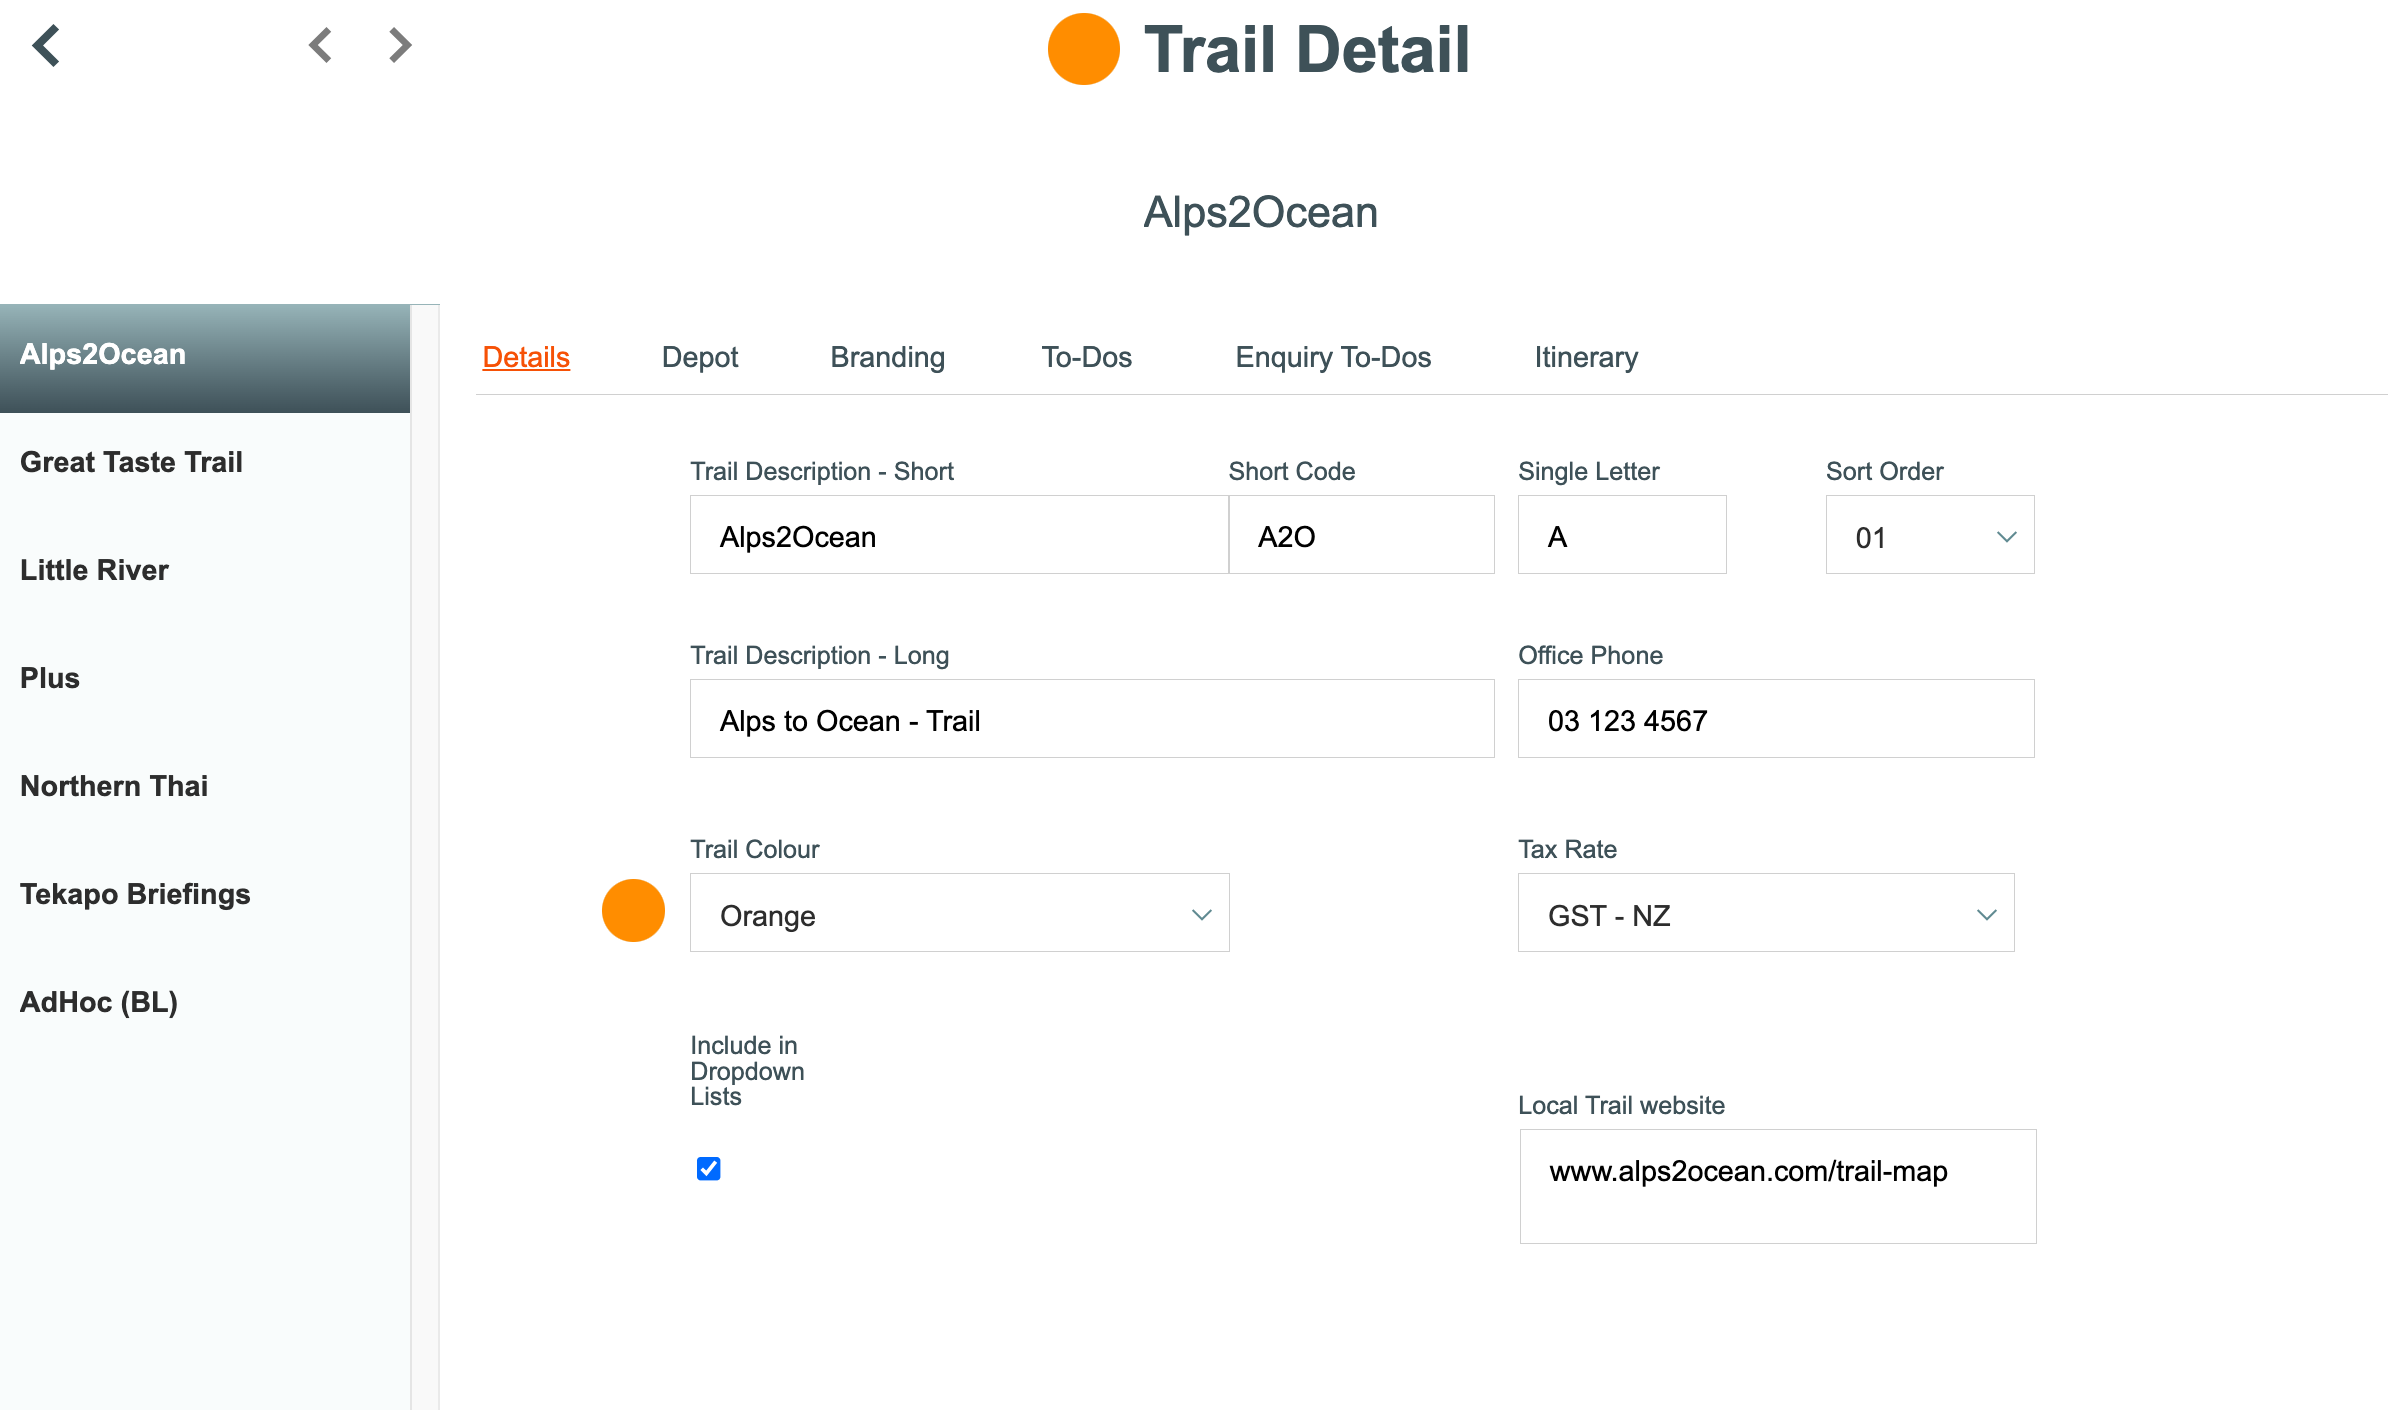
Trail Detail
- Enter a Trail Short Description, and Long Descriptions. These descriptions are used in various locations throughout Odyssey, and the short description is used where space is limited. The long description is used in email communications with Clients.
- Enter a unique Short Code for the Trail. The Trail short code is used to form part of the Departure Code. Learn more about the departure code structure Here
- Enter a unique Single Letter code for the Location or Trail
- Select a sort order for the Trail. The sort order field determines the order of this item in the Level 1 (Trails/Categories/Countries List) and the Masters List. Dropdown lists of masters are generally sorted in alphabetic order.
- Enter the name of the depot which controls this trail activity, along with an email address, and contact numbers for the depot
- The status of the Trail can be changed from Active to Archived or Deleted if the item is no longer in use
Trail Depot
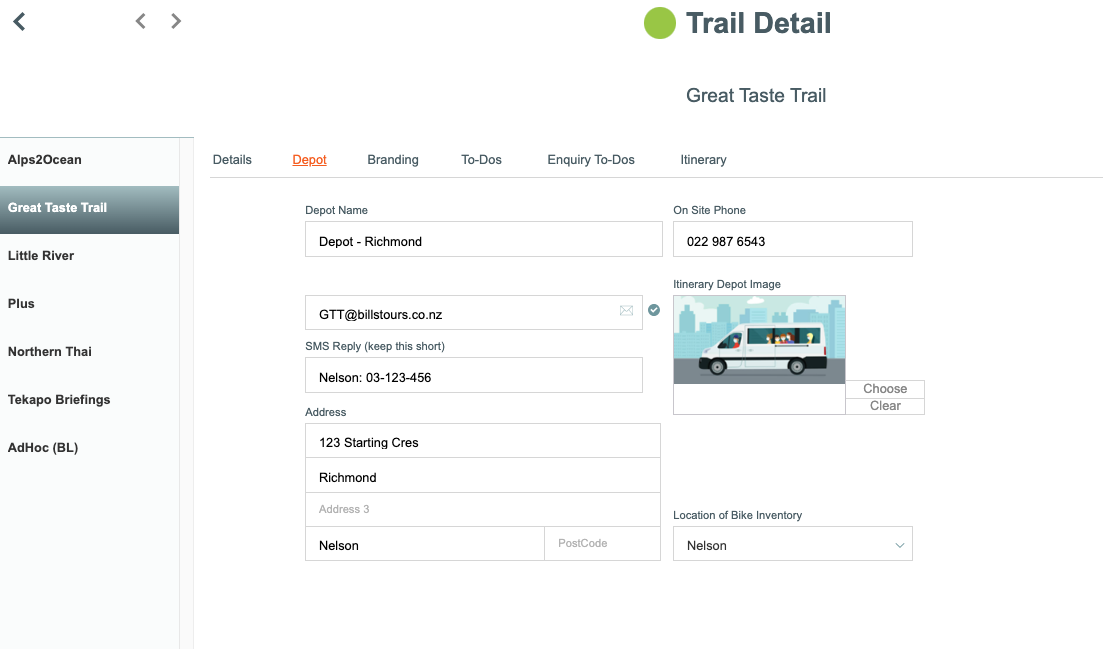
- Enter a Depot name. This is critical as it won't appear in dropdown lists without it!
- Enter address details for the local depot, include an image to use on the Itinerary, if required. and GST Rate.
- Enter the On Site Phone number. This is the phone number used on Bag / Luggage Labels for "If found please call"
Trail Branding
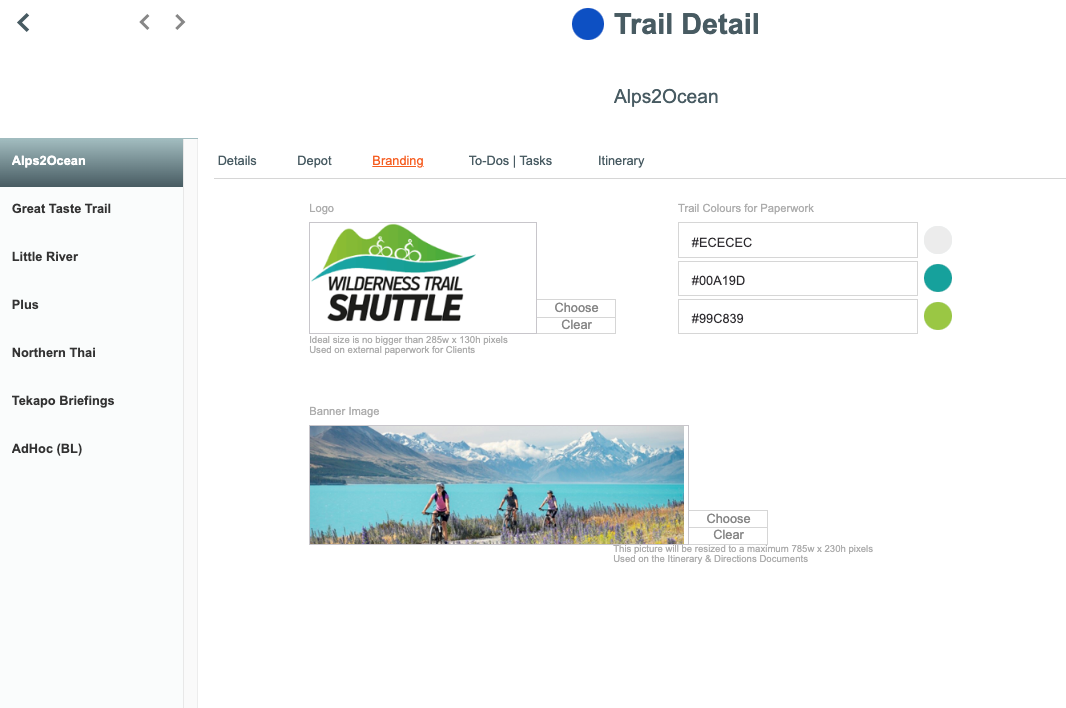
- Add the hex colours you would like to associate with this Trail from a branding perspective. These are the colours which is used in your dashboard charts to identify the trail, and also drive colours used in two outputs, Itinerary accent colours, and the Booking form accent colour.
- Learn more about hex colours, and find your own, here
- Click the Choose button and select a file from your filing system for a Banner Image to be used in Itineraries, or drag and drop the file straight in.
- These Depot branding colours get used in Itineraries, the booking form, and Online proposals.
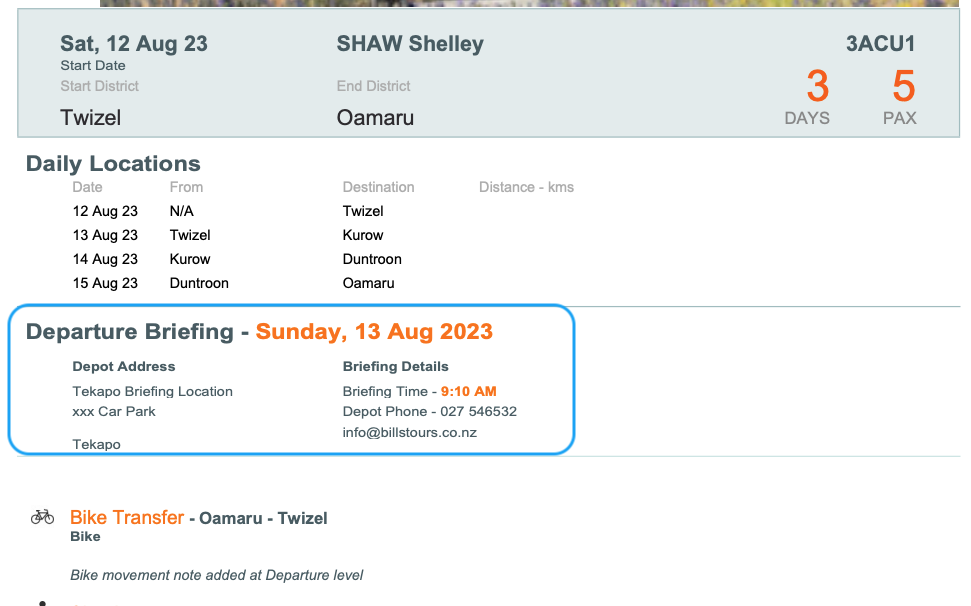
Briefing locations
- Occasionally, briefings aren't operated at one of your Depots but use a more public space, such as a car park in a different town to your Depot.
- To manage these alternate briefing locations, we suggest you create a new trail (following the steps above), and instead of a Depot name (on the Depot tab), use the name of your briefing location; for example "Tekapo Carpark". It is critical to enter the Depot name, or the alternate briefing location will not appear in the briefing drop down list.
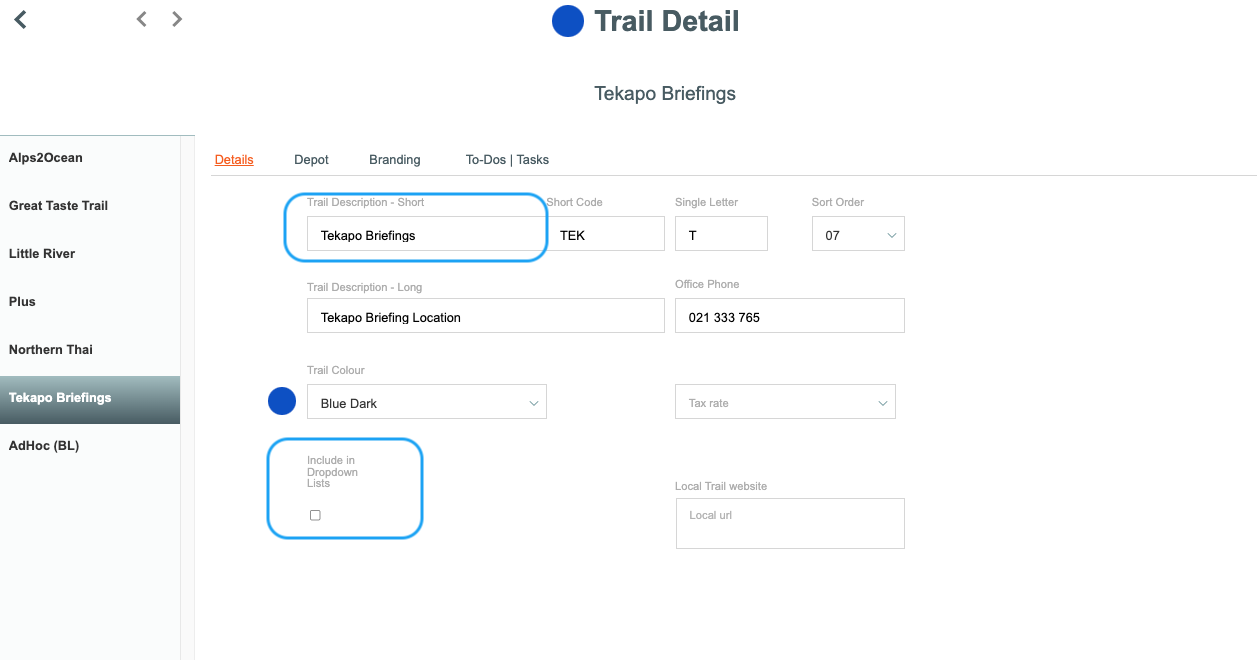
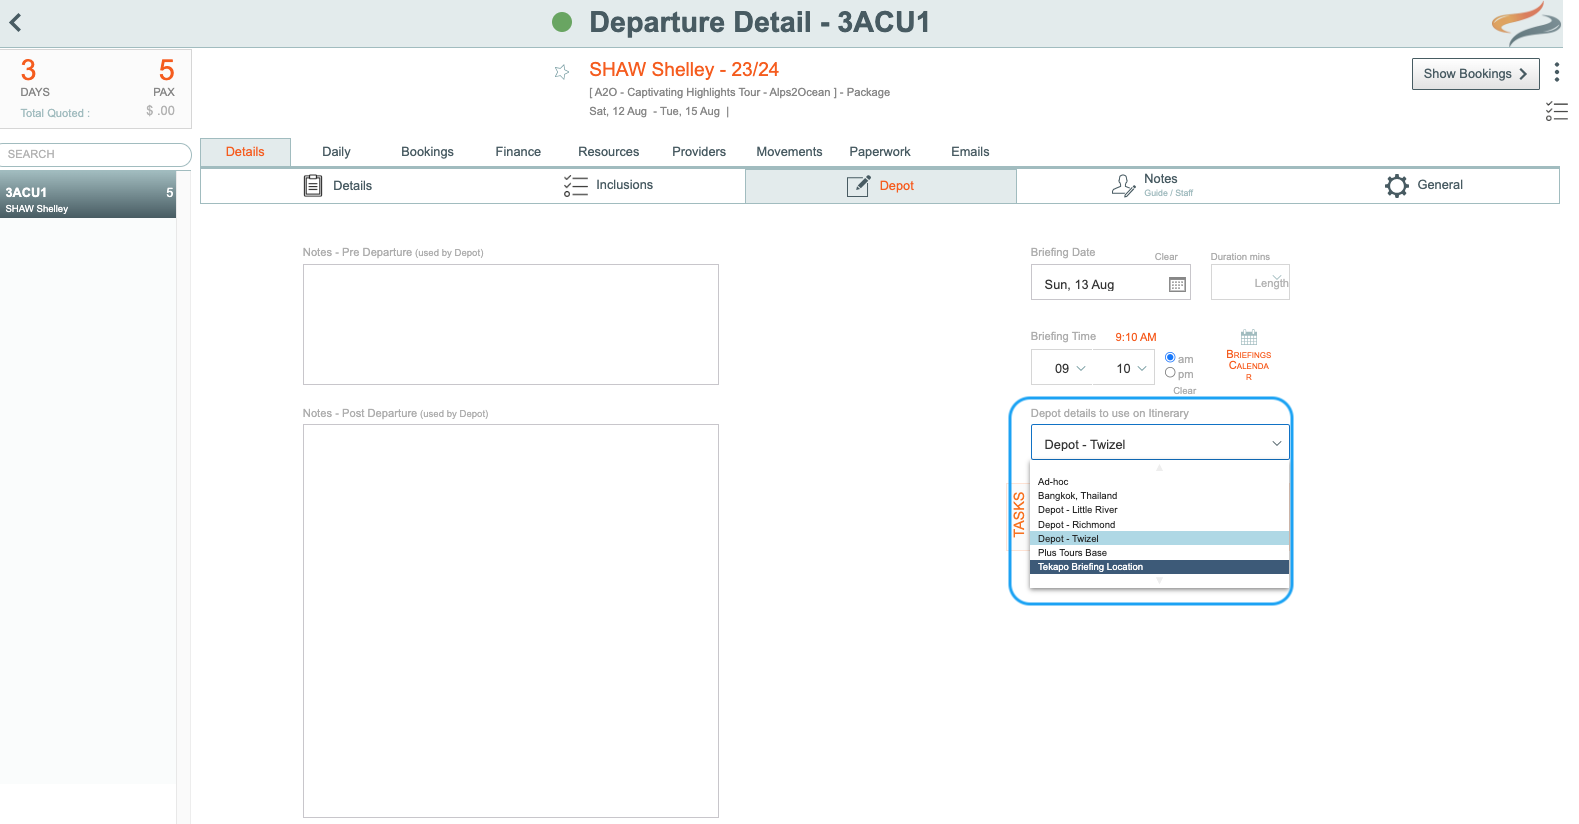
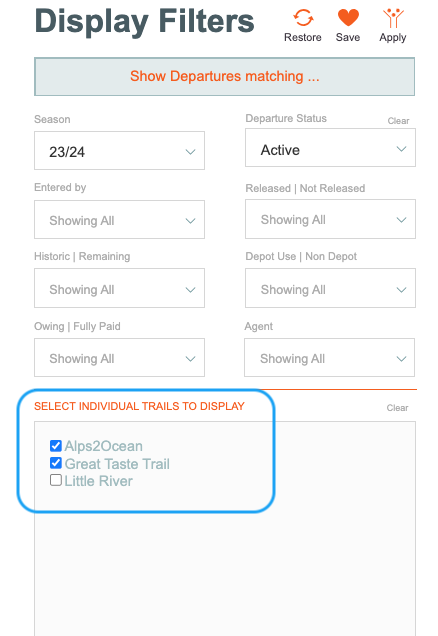
To ensure this briefing location doesn't become available in drop down lists of REAL trails, do not tick the tickbox that says Include in the Dropdown lists (It will however, be available in the drop down lists for briefing locations on the Departure | Details Depot tab, see image below)
The branding tab will also have to be populated with the Company Logo, and banner image, as these are used on the Itinerary.
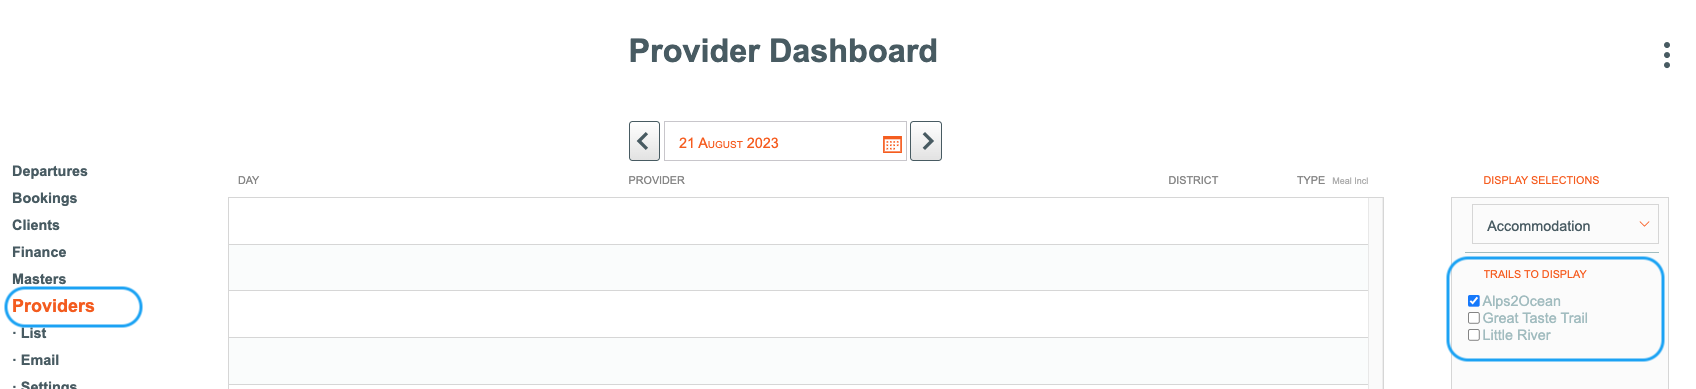
This extra "Depot name/briefing location" will now be available in the Departure | Details | Depot | Briefing location dropdown list
To do Tasks
Tasks are actions that your own business can define, based on your own business model and needs. Each Trai/Country/Category (Level 1 of your Data Pyramid) can have up to 6 tasks for Customer Service, and up to 6 Tasks for Depot related functions defined here in the Company Settings.
Any Tours/Departures/Trips based on masters built on these trails, then have these tasks assigned to them, and the tasks can then be ticked off as each task is completed.
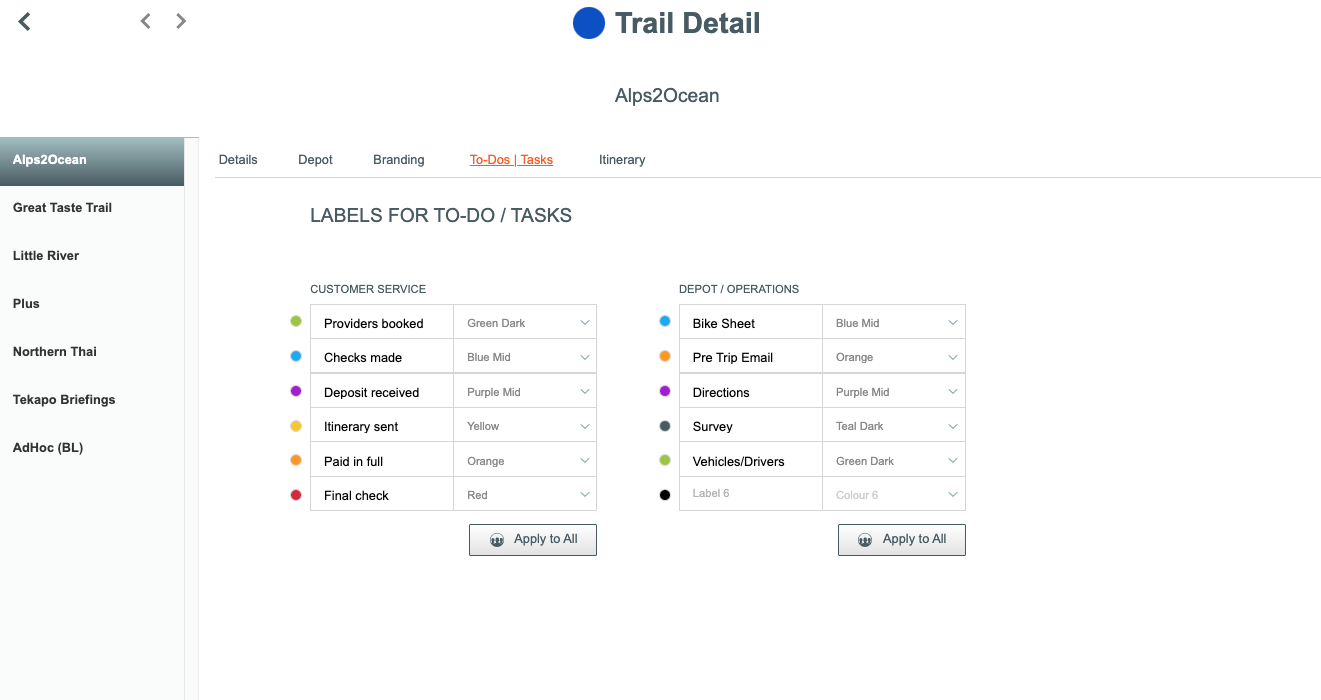
Learn more about To Do Tasks here
Itinerary
Users of the Advanced Mobile App Module will need to complete the URL fields on the Itinerary Tab.
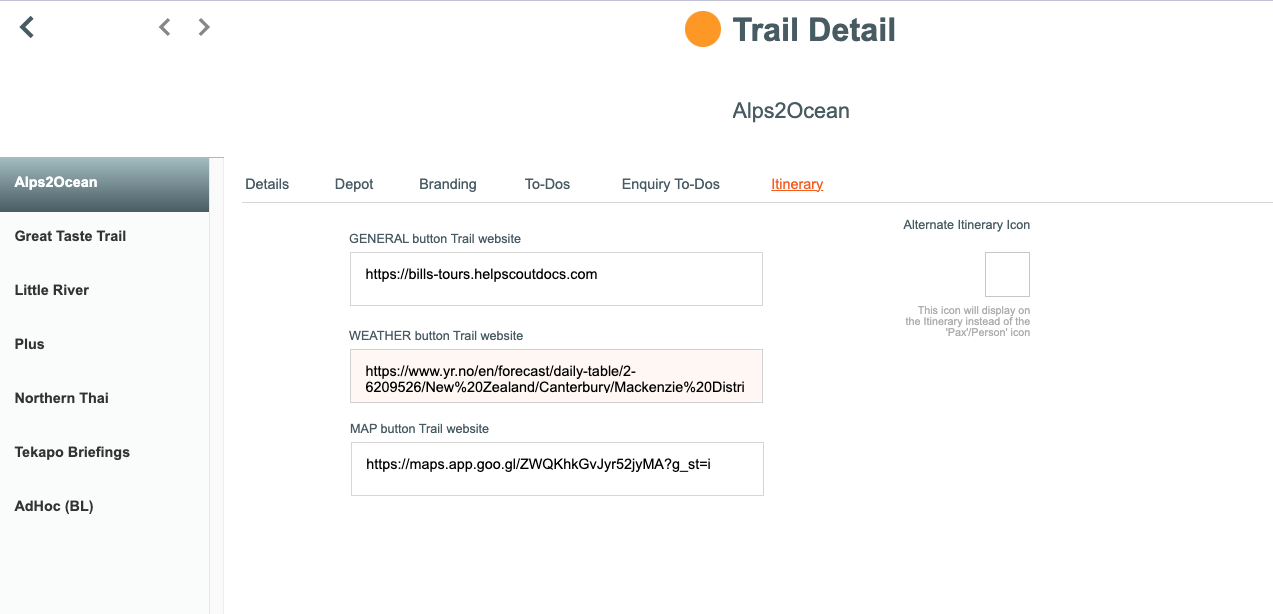
General button: If your business uses a separate Client Information Platform for information you wish to provide your clients, e.g. how to change a bike tyre, what to do in case of emergency, etc, ask us to enter the URL for each specific trail's link on the repository/intranet. e.g. https://yourcompany.helpscoutdocs.com. Generally, this field is locked, and users can't access it. If you don't use the Client Information Platform, a link to your own website can be used here instead. Ask us to enter it for you.
Weather button: Paste a link to your preferred weather URL here, e.g. Yr.No Learn more about weather URL's here.
Map button: Paste a link to your preferred map URL for this trail here
The Alternate Itinerary Icon is designed to give Odyssey clients the option of using a bag icon, rather than a PAX icon, to represent bag movements only.
Where and how are Trails or L1's used?
What happens if you want to change the structure of your existing L1's?
Learn more about this topic here