
Booking List
The Booking List provides an overview of all bookings (or passengers, depending on your terminology).
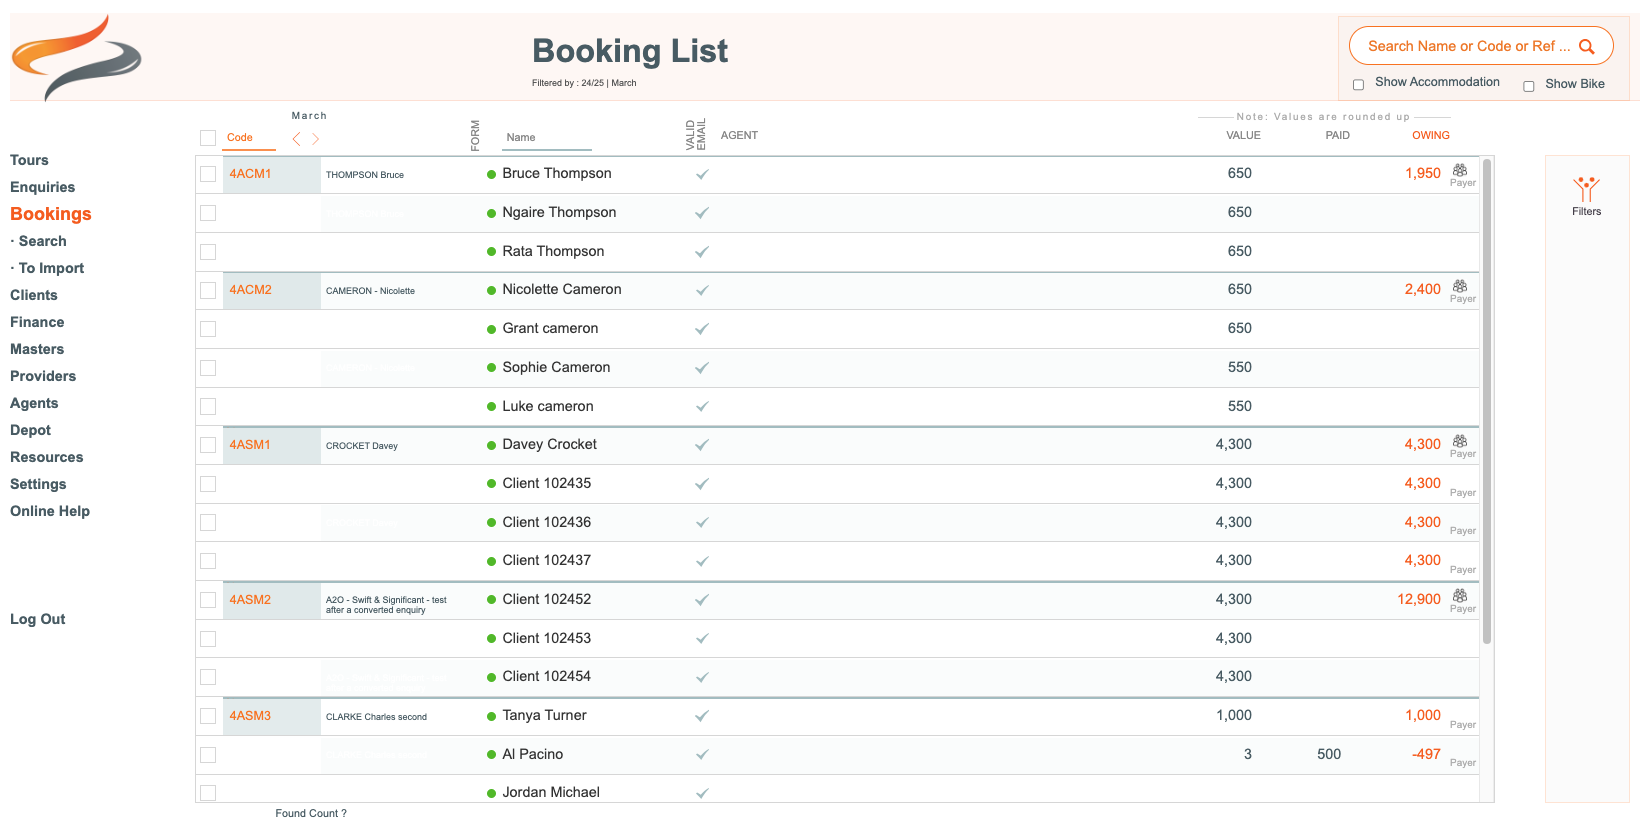
- The booking list displays a list of each booking, per departure.
- The Tour Code and Description is shown, along with the name of each client who is booked on this tour
- On the Booking record, there is a coloured dot to indicate the status of the booking (learn more about the status from the Quick Access menu), and each Departure's organiser has a multi-person symbol beside their name
- you can view if the Client has a valid email address entered
- if the booking has come through an Agent
- the value of the booking, how much has been paid, and the balance owing
- who is marked as a Payer
- If Show Accommodation is selected, you can view the preferred room type, who the client is sharing with
- If Show Bikes is selected, you can view the client's height and Bike size, the (Waiver) Form field,
- the Trip Code, the client's email address, the Notes field, whether the Departure is Costed or Quoted, and a figure Owing.
Managing the Booking List
The list can be sorted by Trip Code, booking name, and balance owing
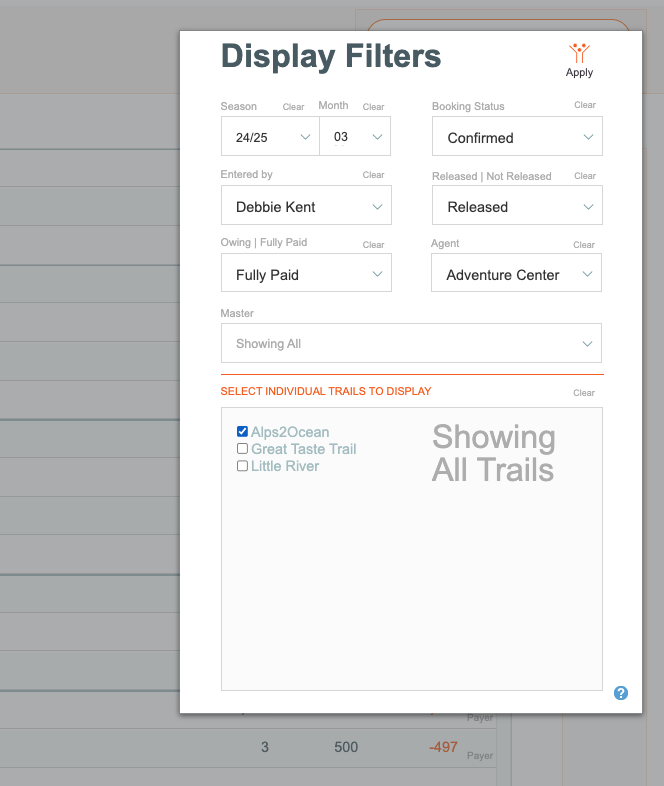
- If your booking list is extensive, you may prefer to filter it to make it shorter, so there is a range of filtering options on the right hand side, to allow you to filter by month, Trail, or season.
- A record count is displayed, to show you how many records are currently showing in the list
- The list can be sorted by Booking name, or Trip Code, in ascending or descending order, by clicking on the small triangles beside the field names
To find a specific record
- Click into the search box, and type a client's name
- Press enter

A list of booking records that matches your search criteria appears. Click on a booking from the list, to review it.