
Resource - Runs
Runs
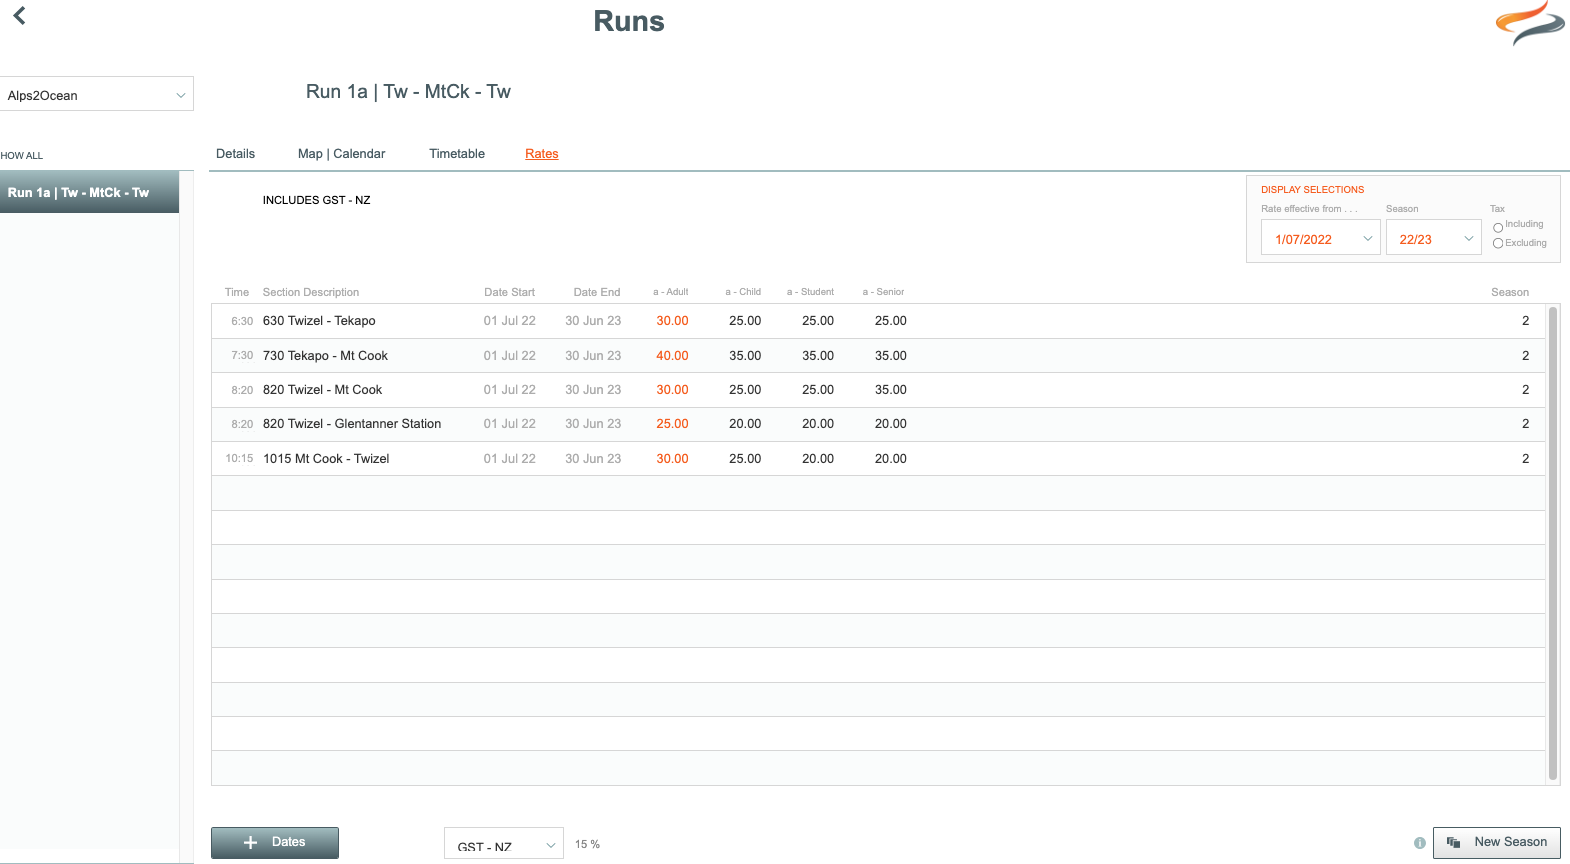
Each time specific run that a Shuttle/Route operator performs needs to be added into Odyssey.
This is done in the Resources | Routes | Route Timetables and Rates area.
Please advise us at support@myodyssey.app if any new runs are being added, as there is a configuration task that we need to perform in order for your data to display.
To add a new run
- Click the + Run button

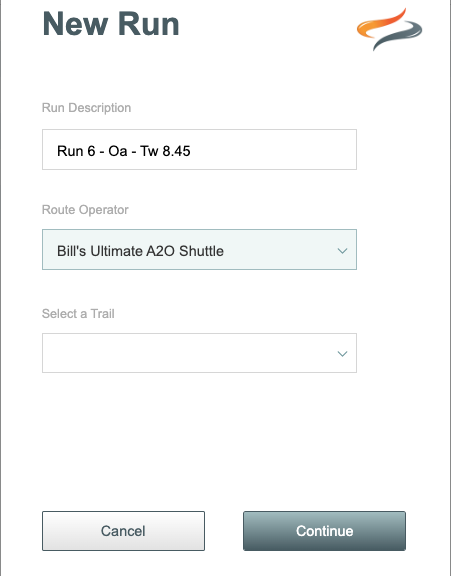
- Enter a description for your run
- Choose the Route Operator from the drop down list
- And select a trail from the drop down list
- Click Continue
Run | Details
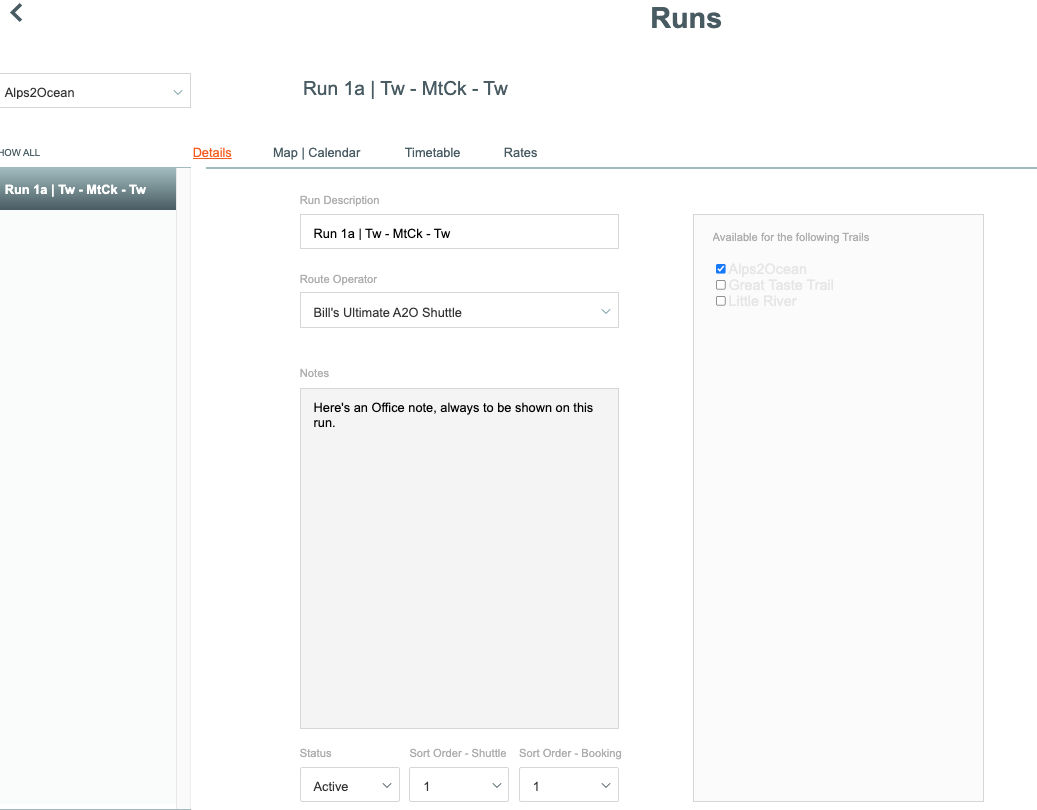
Run Description - Enter a brief description of the run; our clients find it helpful to include a Run number or identifier to help categorise, identify or sort runs together.
Route Operator - select a Route Operator from the drop down list. Learn more about Route Operators here
Notes - Enter any Office notes in relation to this run
Status - normally this is Active; select archived if you no longer use this run
Trails - put a tick on any Trails (L1) that this run operates on. This is important, as some of our clients operate runs over multiple trails
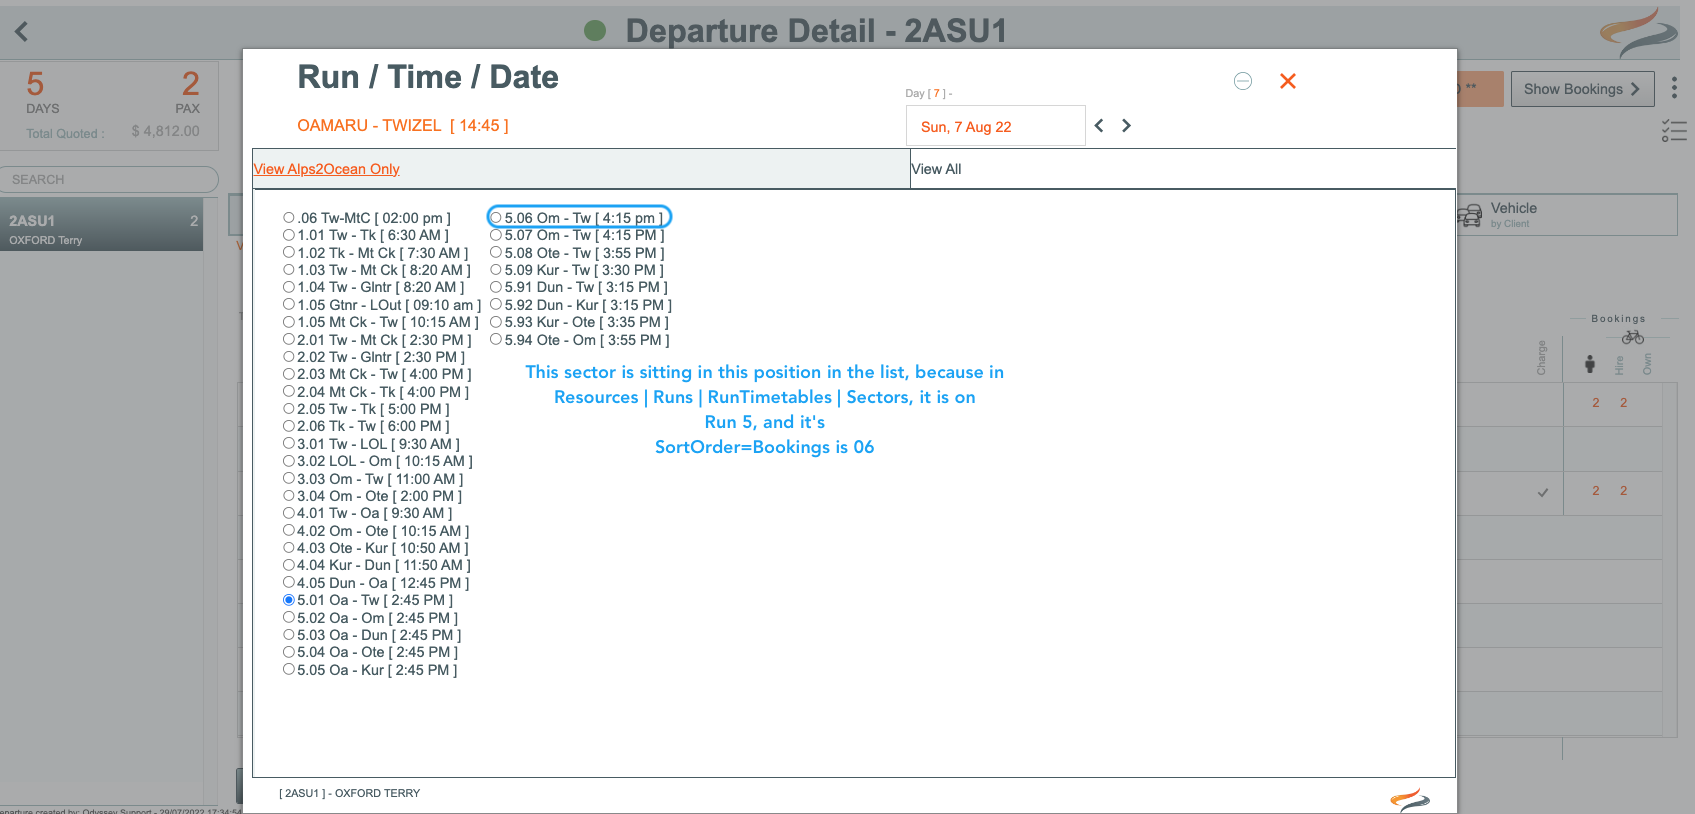
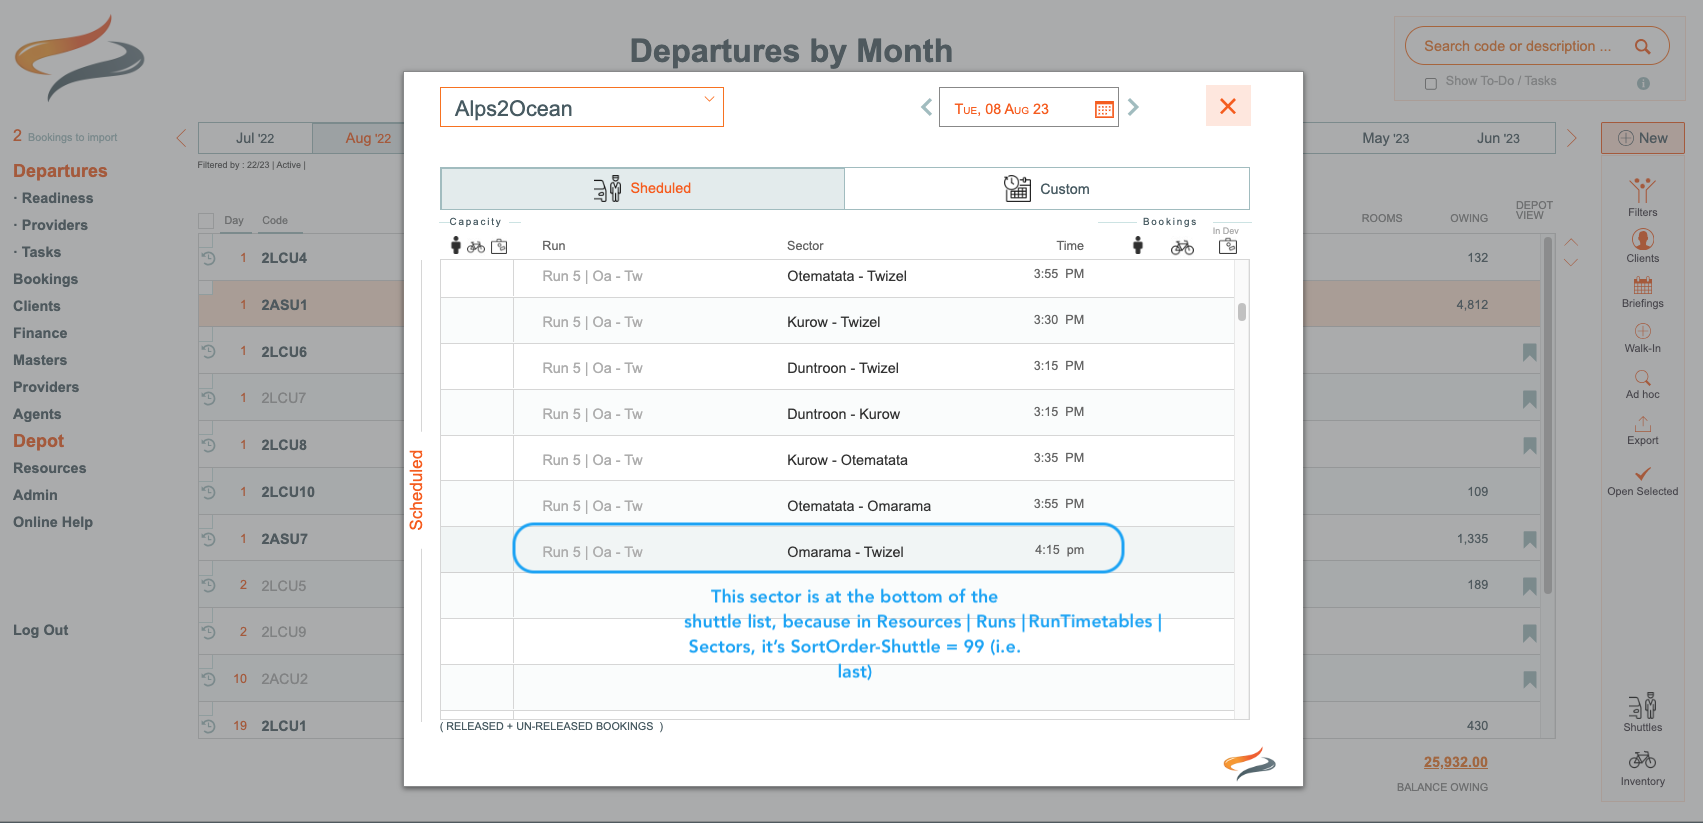
Sort Order - There are two sort order fields. The SortOrder-Shuttle controls the sort sequence of this run in shuttle availability views. The SortOrder-Bookings controls the sort sequence of this run when making bookings and selecting from drop down lists or the radio button list. This provides our users with maximum flexibility in controlling the sequence of the runs in shuttle views and dropdown lists - grouping together in whatever way whatever suits. These drop down list extend to 31.
The sort order field is an important one to use, as once there is a Sort Order value, Odyssey is able to compile the data into the run lists, and display the records you are expecting to see, including the Capacity of the Assigned vehicle + the numbers of Pax, Bikes etc from the Booking records. :-)

Run | Map/Calendar

Have you notified us at support@myodyssey that you have created the new run? We need to build dated manifest records for this run, before the run will show on the manifest. It's not necessary to let us know about new timetable info.
Run | Timetable
The timetable lists the different sectors in the run, i.e. the intended stops/path along the way

To create a new Sector
- click the + Sector button
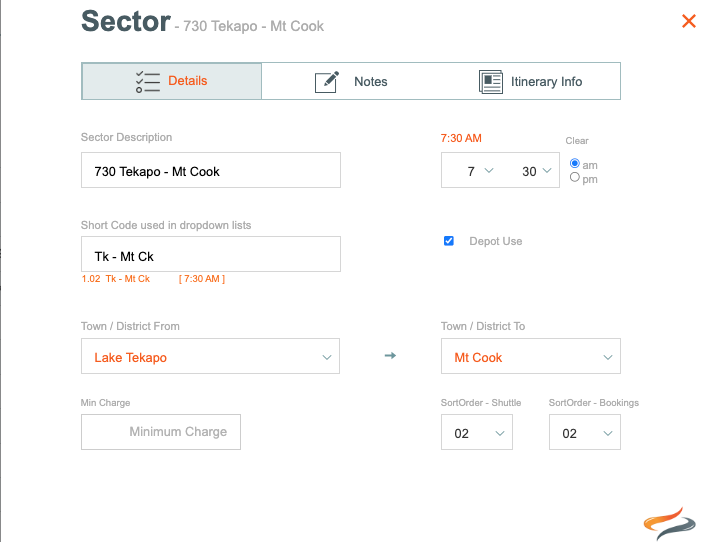
- Enter a Sector Description. Our clients find it helpful to include a time indicator here
- Enter an expected arrival time
- Enter a short Code to be used in dropdown lists when choosing this sector
- Tick if the Depot will use this sector, and if you would like it to show in any Itinerary movements
- Select a district from and to, from the drop down lists
- Status - select Active. Archived can be used if this sector is no longer in use, to remove it from drop down lists
- There are two sort order fields. The SortOrder-Shuttle controls the sort sequence of this sector in shuttle availability views. The SortOrder-Bookings controls the sort sequence of this sector when making bookings and selecting from drop down lists or the radio button list. This provides our users with maximum flexibility in controlling the sequence of the sectors and dropdown lists - grouping together alphabetically, or by run, whatever suits. These drop down list extend to 110. See screen pics below which demonstrate where the two sort orders are used.
- enter a minimum charge
Notes

Office notes are for your internal communications in relation to this bag movement.
Website link: If this product has it's own URL, it can be included here
Account Code: enter a GL Code here if using the Xero advanced module
Record Status: Products can be marked as Active, or Archived
Itinerary Info

Itinerary text
Enter any text which is specific to this Run Sector, for inclusion in the Itinerary.
Photo
The Run Sector photo can be used in Itinerary PDF communications with clients. Drag a file into place from your desktop, or click the choose button and select a file from your computer, then click upload, and upload.
Printing on the Itinerary
Tick the tickbox if you want the Run Sector Text to be displayed on the Itinerary by default
Tick the tickbox if you want the time for this sector to be displayed on the Itinerary by default
Mobile App icon
From the drop down list, choose which Icon will be used for this Run Sector in the Mobile App.