How to manage Custom Movements (Transfers) in Connecteam
Connecteam is an Advanced module
The Depot or Operations Manager will be responsible for coordinating all sorts of movements - bag movements, shuttle runs, vehicle relocations, and custom shuttles.
How to set up Custom Transfers in Odyssey
- In Odyssey, Custom Transfers can either be managed from the
-
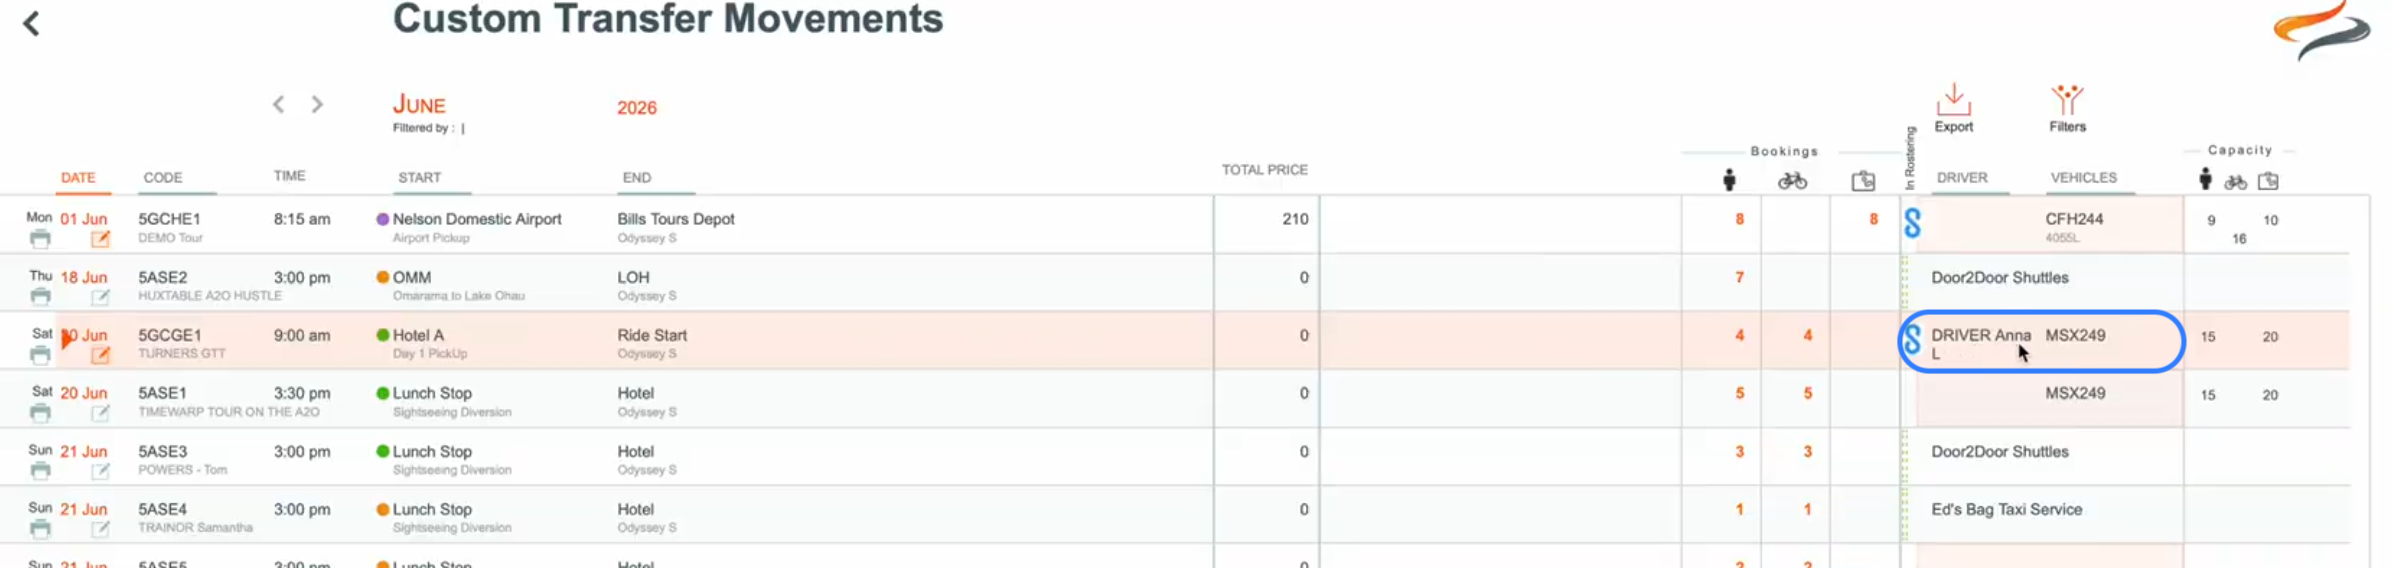
Main Menu | Depot | Diary | (select your trail and date from the RHS) | Custom Transfer Movements. This method allows you to view one day's worth of movements at a time.
or alternatively to view a whole month's worth of Custom Transfers, from the
- Main Menu | Tour | Movements | Custom Transfer | View Full Month


This view shows all of the custom shuttle movements for this month. Learn more about Custom Shuttles here

Notes:
- Click on a record to view more details
- In our example, some transfers have already been pushed to Connecteam, indicted by the small blue icon next to the vehicle/driver name
- Any custom transfers which have already been assigned to an external transfer operator can be ignored, as they will manage their own staff rostering. We are only assigning our "own" company's movements to Connecteam
- We are looking for records which haven't yet been assigned a driver, to push the record to Connecteam. (These records will be in a peach coloured field)
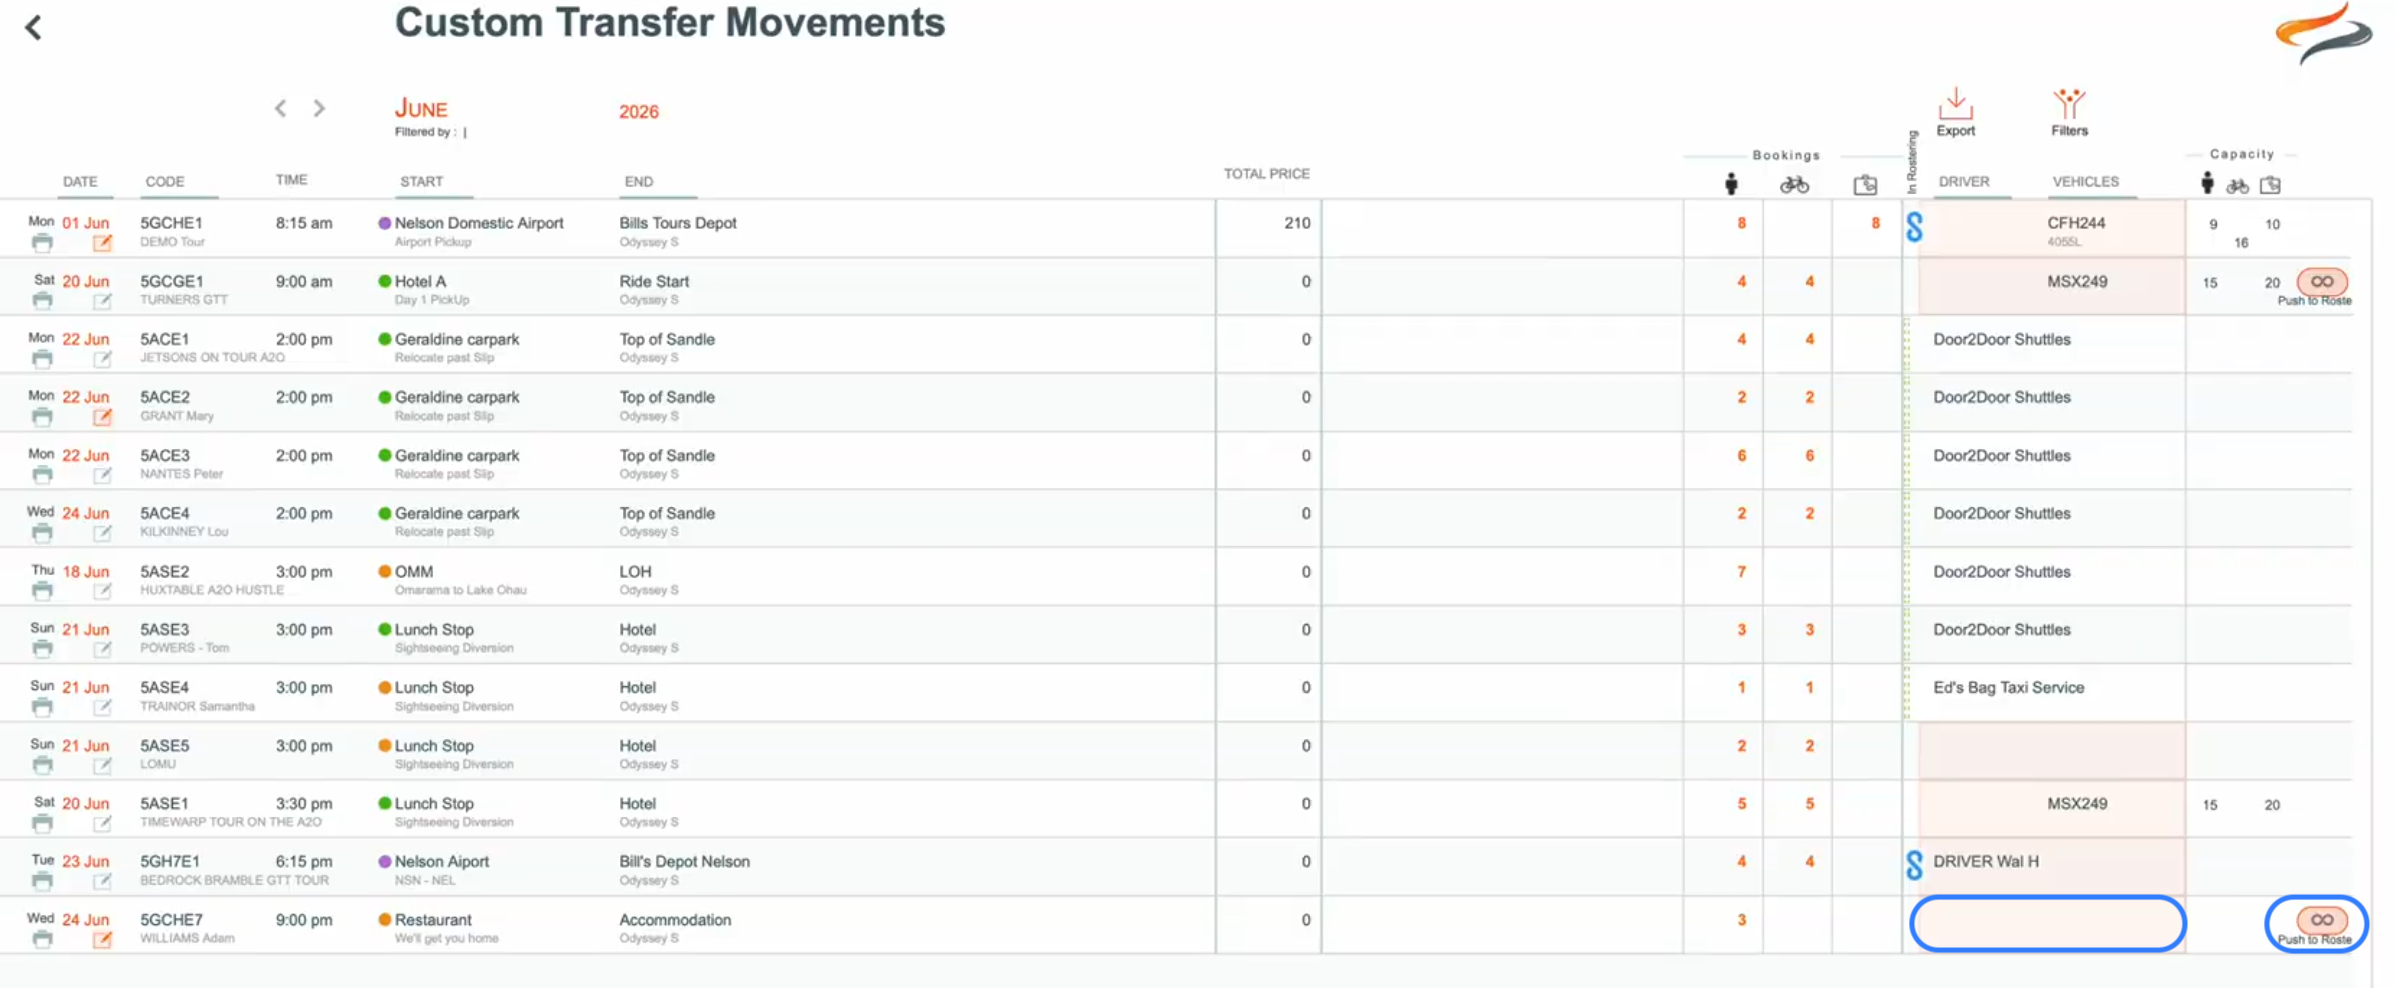
- Try clicking the Push to Roster button; if it works the Connecteam Icon will appear.
- If it doesn't push, it may be that some more detail is required in your custom movements settings, e.g. has the new Duration field been entered?
- How long will it take to move from the Start Location to the End Location? Enter that amount of time into the Duration field. Click the button to Push to the Roster from there.
- If it still doesn't Push, ensure that the time of the transfer, and am/pm have been entered

- Driver notes, a driver name, or a vehicle could also be added in Odyssey prior to pushing to Connecteam
NOTE: When a custom transfer has been pushed to Connecteam, a peach field around the time and duration fields will indicate that these settings should now be edited with caution. Each company will have it's own protocols as to how to deal with these situations; perhaps you need to consult with the Depot or Operations manager before making these changes.

In Connecteam
- This custom shuttle run has has now been pushed to the Connecteam Roster.
- It will appear as an unassigned shift, as the driver had not been assigned in our example

- Note that the custom transfer is shown in green, where as briefings for example, are in red
- Click once on an entry in Connecteam to see the details.

- Assign this custom transfer to a team member, by dragging it from the unassigned shift, to one of the drivers.
- Add any changes to the Vehicle,or Notes can be made here, and Saved.

- This custom transfer is currently unpublished, so that the Depot Manager can review and confirm the rostering schedule. This process is known as Publishing.
- Once the Depot Manager has reviewed the Rostering schedule, they can Publish each shift, or click Publish at the top RHS

Back in Odyssey
We can now see that Anna has been assigned this Custom Transfer