
How to set up Bike Inventory
Inventory is an Advanced Module
Odyssey's Bike Inventory system allows you to manage and allocate your bike stock. Before you can begin to allocate stock, you will need to add your stock items to Odyssey, and if necessary, customise some settings to suit your business.
First you need to define the models, then sizes of assets, then create an inventory of every stock item. Different statuses can be assigned to stock items ( ), and the bike models can be assigned to Masters that require them.
Add the Bike Models used within your company

Learn more about adding bike models here
Bike Size options
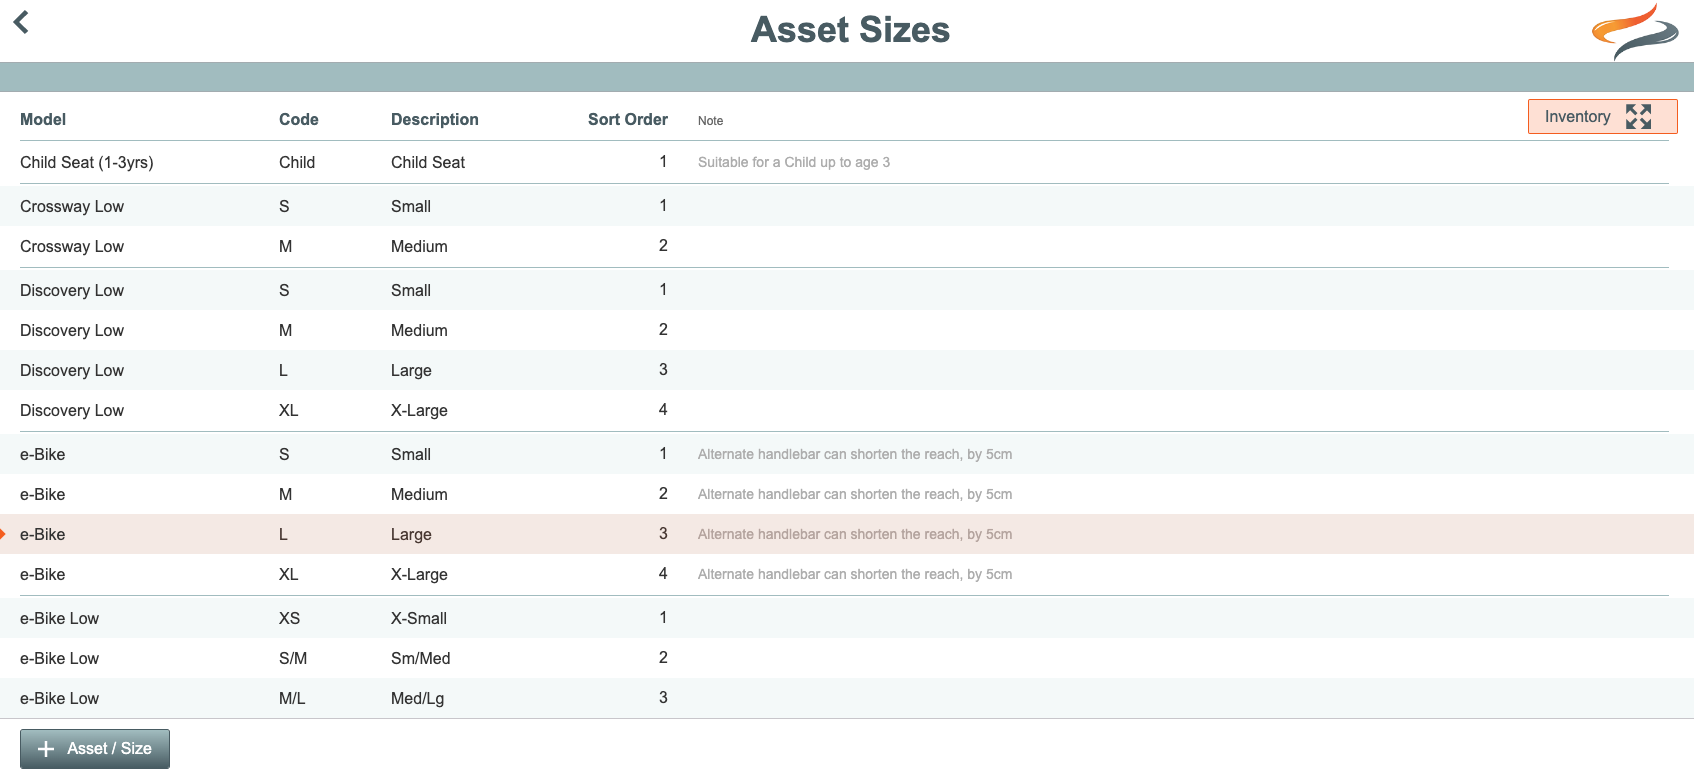
In order to be able to choose a bike size when creating your inventory stock items, you need to be able to select from a list of asset sizes. There is a table to be populated to create the inventory of bike sizes. (Note, these sizing settings are different to the sizing chart table for each bike type)
To learn how to add and manage Asset sizes, click Here
Inventory

Add each of your individual stock items into the asset inventory in Main Menu | Settings | Resources | Inventory Sizes. This is one record for each bike that you have in stock, and includes it's unique identifier.
Learn about the Asset Inventory Here
Inventory Status
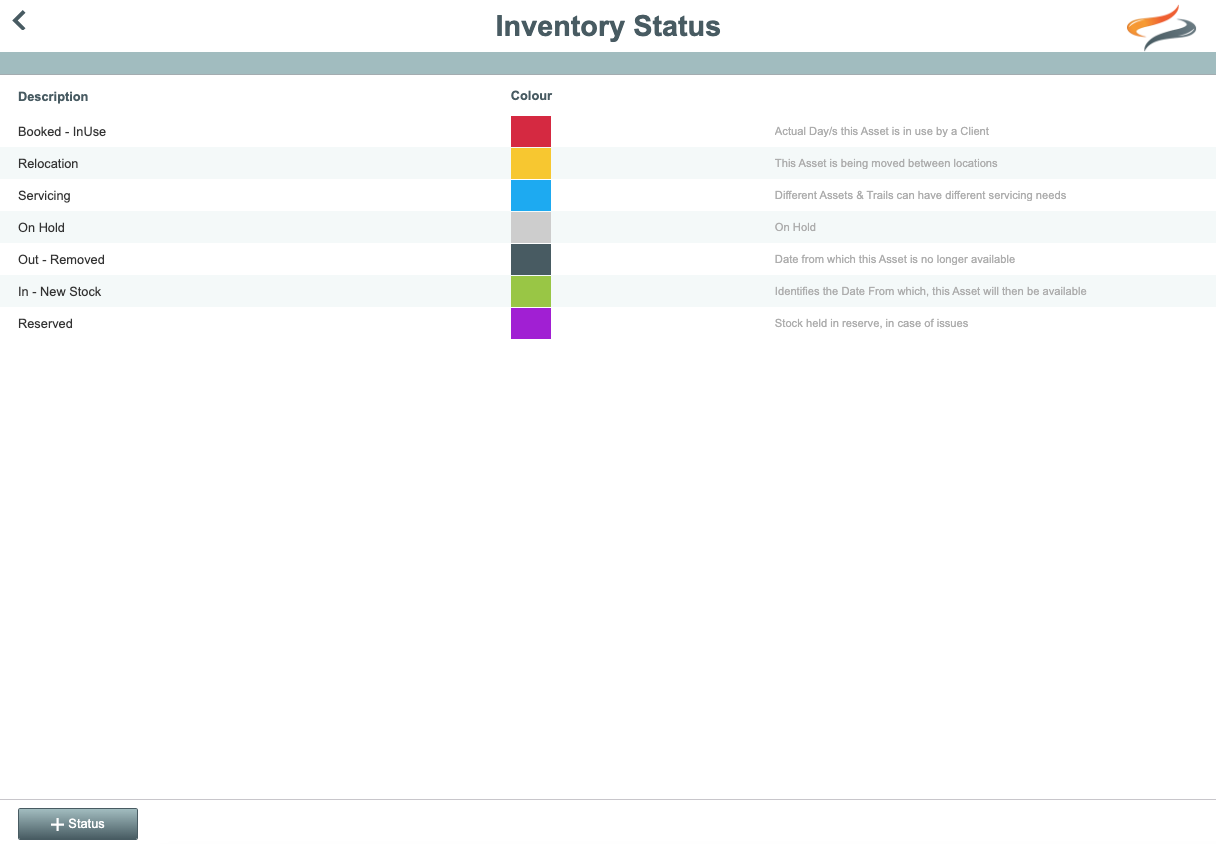
Once stock items have been added to your system, and allocated to bookings, they can have different statuses, for example "booked", "relocation", or "servicing", along with different colour codes which will appear in your live inventory list. This would be a good time to review these statuses, and colours, to tailor them to your business.
To learn more about Asset Status, click Here
Trip Masters

Every time a bike is allocated to a booking, the bike will most likely need to have a day or so either side of the actual booking to allow for any setup/prep work to be done prior to the trip, or cleaning/servicing/relocation after the trip. Each trail or trip taken can differ in these requirements, as they may be further away from your depot, or be a harder or longer trail or trip. Odyssey allows you to assign pre and post days on each trip master. Learn more about pre and post days on Trip Masters Here