
How to use the Bike Inventory system
Inventory is an Advanced Module
The focus of the Bike Inventory module is to ensure that your Reservations and Sales teams don't run the risk of over allocating stock.
Odyssey's Bike Inventory system allows you to manage and allocate your bike stock. It is available from multiple locations within Odyssey, via the pop-up, quick access menu.
To learn how to set up Inventory Management, click Here
To access Bike Inventory
Odyssey's Asset Inventory system can be accessed in these ways:
- From the Main Menu | Departure Dashboard | Options panel
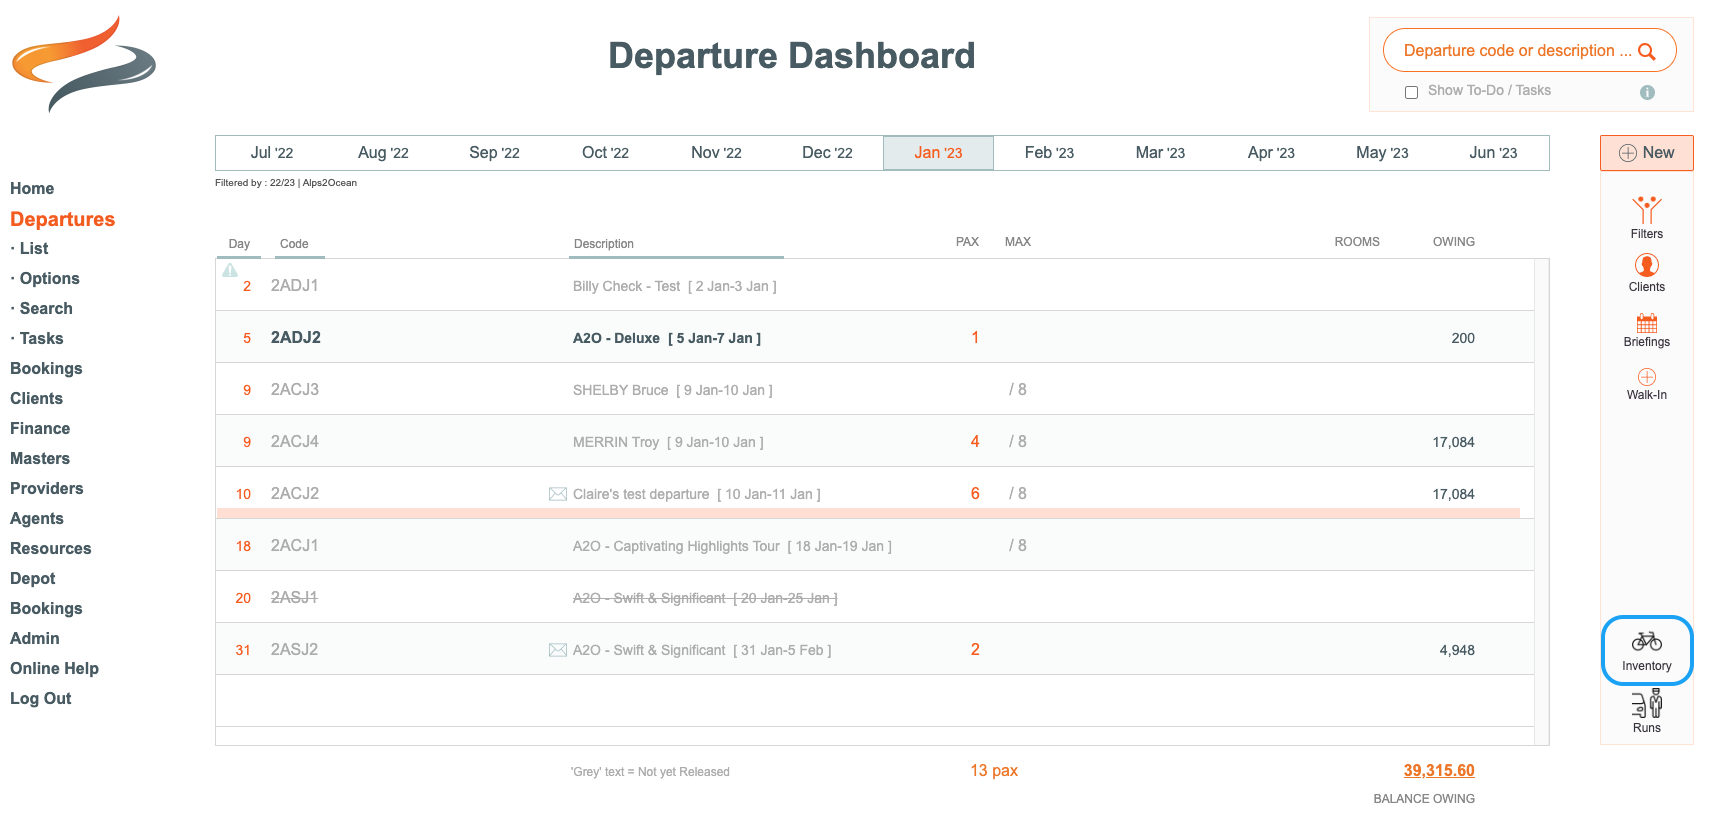
- or from the Tour
- either on the Tour | Resources | Bike | selected booking | Allocate all or Allocate Manually buttons:

- or from the Tour | Booking | selected client | Resources | Bike menu


Features:
The asset inventory window has the following features:
- at the top left, a search button to enable you to search for a bike, tour or customer
- the currently selected month, with left and right arrows to allow you to navigate through the months
- the currently selected filters, bike type, size and depot locations
- all the bike stock, based on the selections are listed, (along with the ability to collapse selected bike models when the list is extremely long), the height/size range of that bike, and the bike identifier
- the + button which enables you to make operational assignments, such as putting a bike on hold, booking it out for servicing, relocation, or removing it from stock

- a calendar view showing over a month's worth of bike allocations which have either been automatically or manually created.
- The key to each bike allocation is as follows:
- Red = Booked
- Yellow/orange = Pre trip days allocated days for relocation
- Blue = Post trip days allocated for servicing or relocation
- (These colours can be changed via the Asset Status settings)
- The key to each bike allocation is as follows:
- clicking on a booking will open a pop up window to allow you to view the client's bike details, along with any bike notes that have been entered on the booking

- a status legend is available from the ... menu; this provides a description of each colour coded block

Pre & Post days can be allocated per Master
Pre and Post days can be allocated at Master level.
This allows for each Bike type to have a different number of Pre / Post days, eg:
- There maybe a difference between the amount of servicing each different Bike model requires
- Or based on the duration of each Master, there maybe different amounts of POST servicing required... ie: less days for a small number of hire days, or more days if it was in use for longer.

Before bike assignments can be made:
- Before a Bike allocation can be made:
- on the client's Booking | Resources | Bike record, enter a client's bike preference and height

- then a button will appear offering you to click to make the daily records AND auto allocate a bike

- click the button, and the daily records will be created
- and a bike assignment will be made for this client
- Alternatively, once you have entered a client's height and preferred bike, the auto allocate button can be used at Trip level.
- if there is a red alert !! message ( saying "Missing Daily Hire Records") to the right of a client's name, this indicates that daily hire records have probably not been created for that client.

To allocate a bike while on a Tour
- From the Tour | Resources | Bike Menu click either
- the Allocate All button
- or the Auto Allocate button on each client's record
Using the Auto Allocate button
- Clicking the Auto Allocate button on each client's bike record, gives you control over which client you wish to auto allocate a bike to. Perhaps other clients are still deciding on their bike preference, or haven't submitted their height, or confirmed that they are coming on the trip.
- The unique bike identifier code will be allocated to each day of this client's trip, and the Inventory system dynamically updated.
Using the Allocate all button
- Clicking the Allocate all button will automatically assign the appropriate bike type and size, with it's bike identifier number, to each day of every client's booking on this tour, into the Inventory system.
-
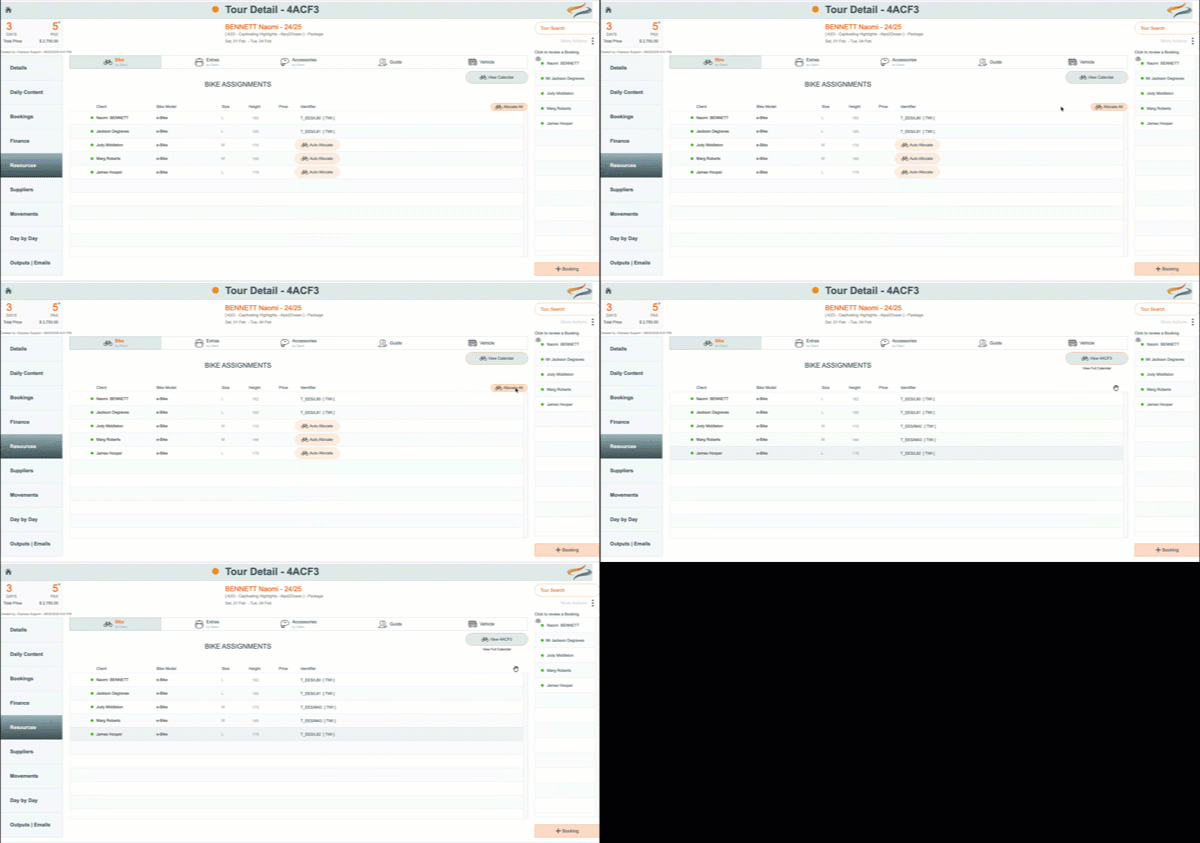
Tour | Resources | Bike menu, showing the Auto Allocate and Allocate All buttons
To Auto allocate a bike while on a booking
- From the Tour | Booking | selected booking | Resource | Bike tab, click the Auto Allocate button
- Odyssey will automatically go and find an empty spot on a suitable bike model and size for that location on that day
- The unique bike identifier code will be then allocated to each day of this client's trip, and the Inventory system dynamically updated.

To manually allocate a bike while on a booking
- From the Tour | Booking | selected booking | Resource | Bike tab, click the Manually Allocate button
- You will be taken to the Bike Inventory calendar
- the calendar has already been filtered for the appropriate selections of location, bike model and size
- drag the record that appears in the peach coloured area of the screen (that details the bike type, size etc) down into your preferred bike identifier record
- the block can be dragged around to different bike identifier records, until you have found the exact spot you wish to leave it
- The unique bike identifier code will then be allocated to each day of this client's trip, and the Inventory system dynamically updated.


Using Operational functions to put a bike on hold, reserve it, mark it out of stock etc

Odyssey allows your operational staff to mark specific items of stock out for specific periods. This could be because a bike has to be taken away for servicing, is being held for specific clients, reserved for say staff training, or needs to be put on hold for operational reasons. Perhaps it can't be located, or has been stolen.
To put a bike on hold, reserved, mark it out of stock for servicing, etc.
- Access the inventory system by any of the methods described here
- Identify the stock item you wish to reserve, put on hold, mark out of stock etc
- click the + symbol to the right of the bike identifier number
- a pop up window will appear, where you can select the reason the bike is being assigned
- enter a start date and an end date for the assignment period
- enter any specific notes you wish to store which explain the assignment, e.g. a name or trip code if this is for a client who has tentatively booked a trip, or record the reason it is being assigned
- click the Create button
- the block can be moved around to different bike identifier records, and the dates can be edited by clicking on the block
-
clicking on the block also allows you to assign pre or post days assigned to these Operational assignments
