
Previous Personalised Text page
Email - Personalise
Personalisation of emails is part of the Advanced Email Module
Personalising emails
When sending emails, it is possible to include some personalisation, and also attachments.

To include a personalised intro or closing paragraph before sending an email
- Click on a specific Departure, go to Emails | Providers/Customer Service, etc, and click on the specific Booking or Provider for whom you wish to include a personalised introduction or closing paragraph.
- Hover over the Provider or Client's name until it goes orange, then click
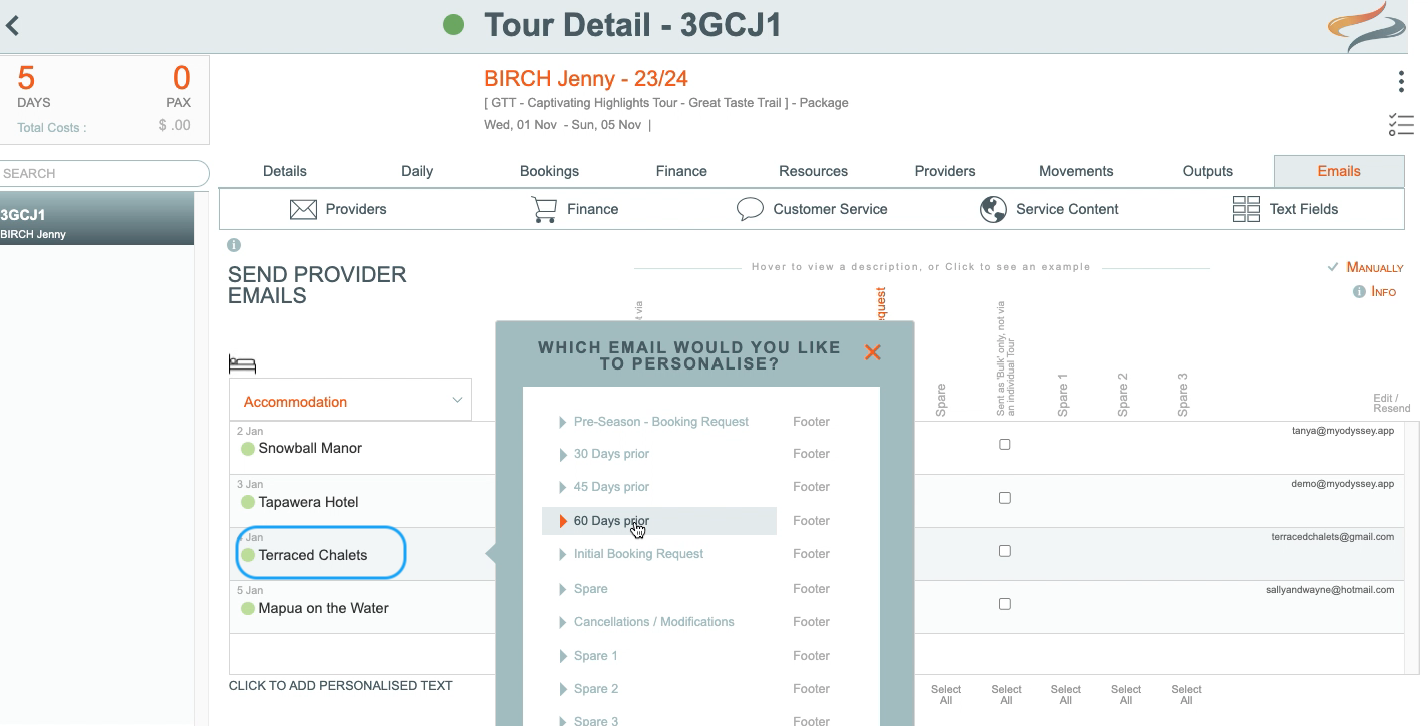
- Select the email template that this text will be attached to, in the example above, it's going to be the 60 days prior email template (This selection is required because each email template can have different personalised text)
- Enter any optional Personalised text to be added into the email, and then Save as Intro, or Save as Footer Text:


-
Intro text: could say “Hi Mandy, great chatting to your earlier about your adventure with us!” or "We are delighted you are joining Jo Bloggs on this fabulous cycling tour. The cost is $xx, based on twin share, but we are pleased to offer you a 4% returning client discount."
Footer text: could say “Thanks again Mandy, and we look forward to meeting you face to face on Thursday next week.”
- Note that there are a range of text formatting options in this area, much like Word. Text can have a range of character formatting applied, such as bold, italics, underline, font colours, styles and sizes. Paragraph formatting can include indentation, paragraph alignment, numbering or bullet points and line space. Tables can be inserted, rows and columns added or deleted. Links to web pages can be included. A word count is included.
After Saving as Intro or Footer text, you can switch to a view which shows you exactly how the text will appear in your email.

- Click x to close the window.
- Send the email using the usual send process, click Here to learn more.

Email with sample intro text included at the top
Editing personalised text
- Copy all of the text from this here
- Open the Edit Personalised Text field
- paste the text into this field, and you can then edit it.
- Note that the pasting process may cause you to have lost some formatting, such as text colour, so double check if you have used text colour

To include a table with payment details for this Departure:
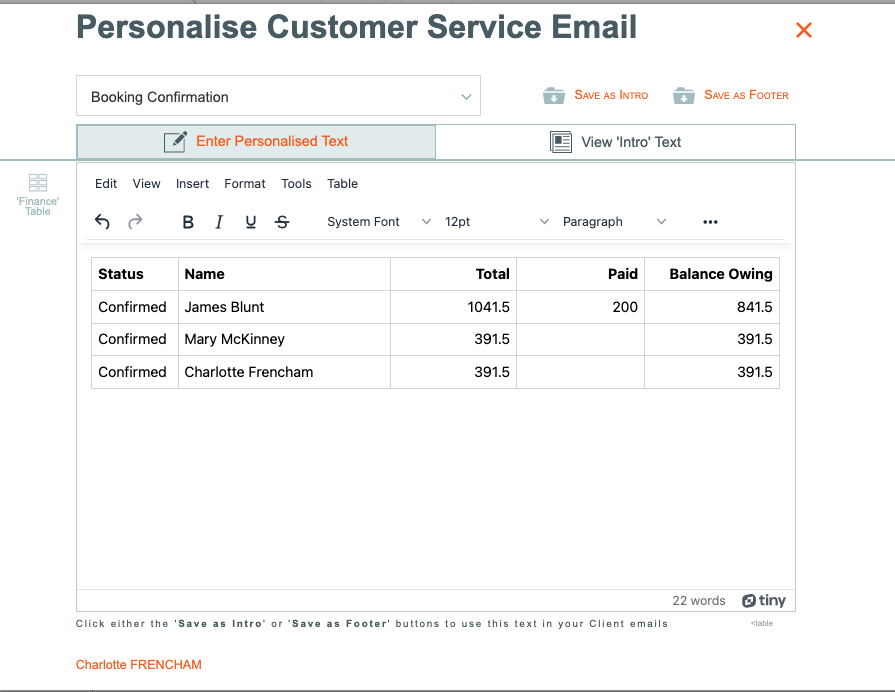
After selecting the email type, click the "Finance Table" button
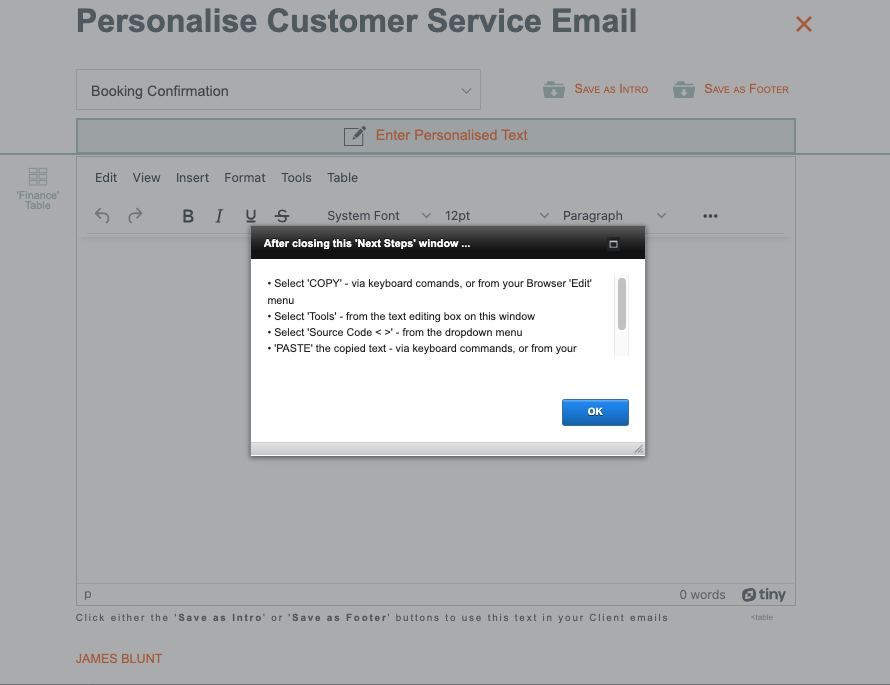
The steps you need to take next are advised to you. They are:
- After closing this window, Select COPY via keyboard commands, or from your Browser's Edit menu
- Select Tools from the text editing box on this window
- Select Source Code <> from the dropdown menu
- PASTE the copied text - via keyboard commands, or from your Browser's edit menu
- Click SAVE. This will create a table format of these records

Of course, this table can now be edited, deleting any columns or rows as required.