
Tour / Departure - Resources
Resources can include Bikes, Extras, Guides and Vehicles. Your views might look slightly different, as views to some of these resources may be turned off at Master level, depending on the Master, and your business model.
From the Main Menu, select the Tour | Resources tab.
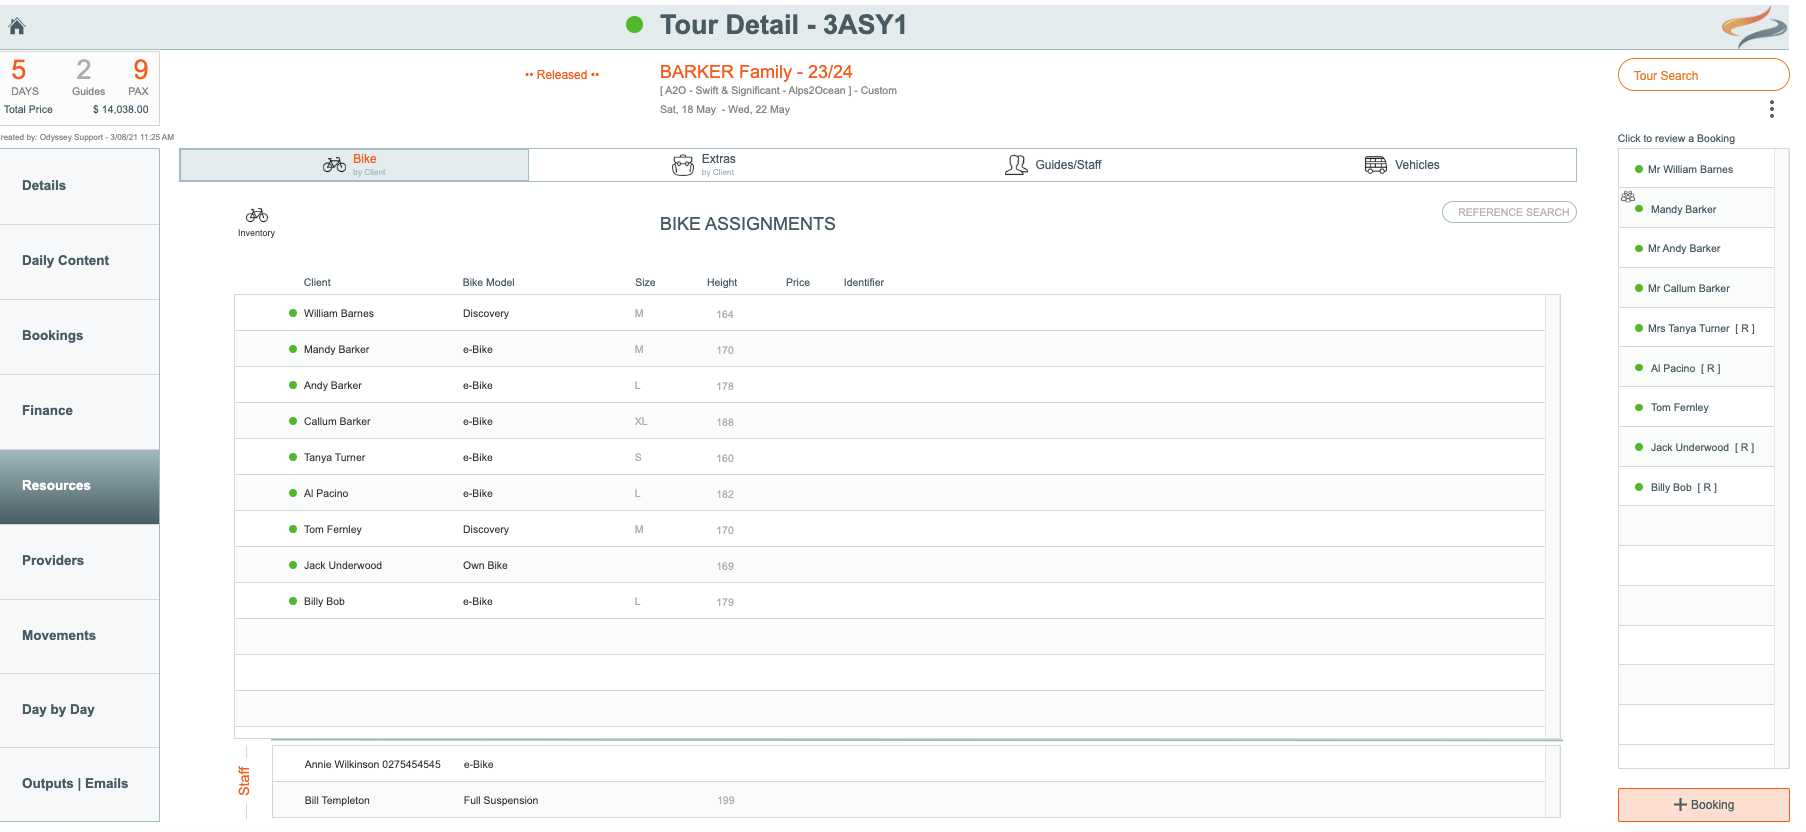
Bike
At Tour level, this is a SUMMARY view, which will show you what Bike assignments have been allocated to the clients in the Booking area.
When a new client is added to a Tour / Departure (or even when an Tour / Departure is created with numbers of PAX) , the "included" bike from the Master will be added to the Client's Resource | Bike details, and summarised here at Tour level.
Plus, it will create all of the Bike Hire day records AND if it's been defined on the Master, it will also create the Pre & Post day bike records (which are not shown to the user - unless they use the Inventory Module)...
- Clicking on the individual client name listed, will take you to the Client's booking to enable changes to be made.

- If there is an alert on the Tour /Departure | Resources tab, this is to indicate that some information is missing at the booking/client level, e.g. a booking doesn't have a bike selection made, or the number of hire days populated

- These alerts can be resolved by clicking once on the client’s name to update their booking.
- Once the appropriate selections have been completed, the alert will disappear.
Learn more about making changes to client level bike resources here
If your business uses the Asset Inventory module, there will also be a Resources search box on this page
Accessories
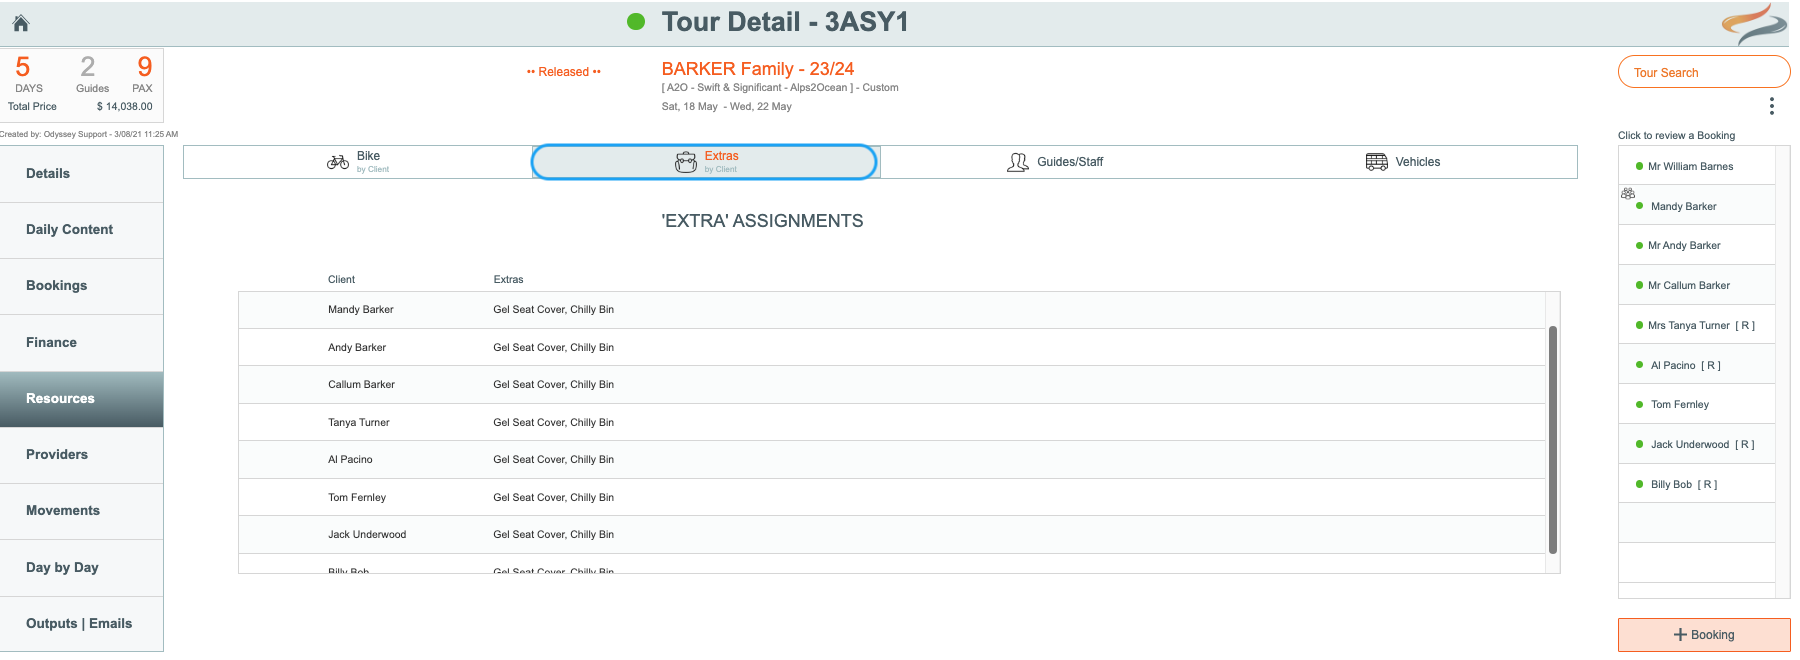
Extras
Extras are optional and chargeable items that the clients can select.
The Tour | Resources | Extras view is a SUMMARY view, which will show you what Extra assignments have been allocated to the clients in the Booking area.
The Booking level's drop down lists of the extra items available to select, are driven from the selections made within the Master.
Learn more about making changes to client level extra resources here
Guides / Staff
For guided trips, staff can be allocated from the Main Menu | Tour | Resources | select the Guides/Staff tab
To learn about assigning guides to a tour, please click here
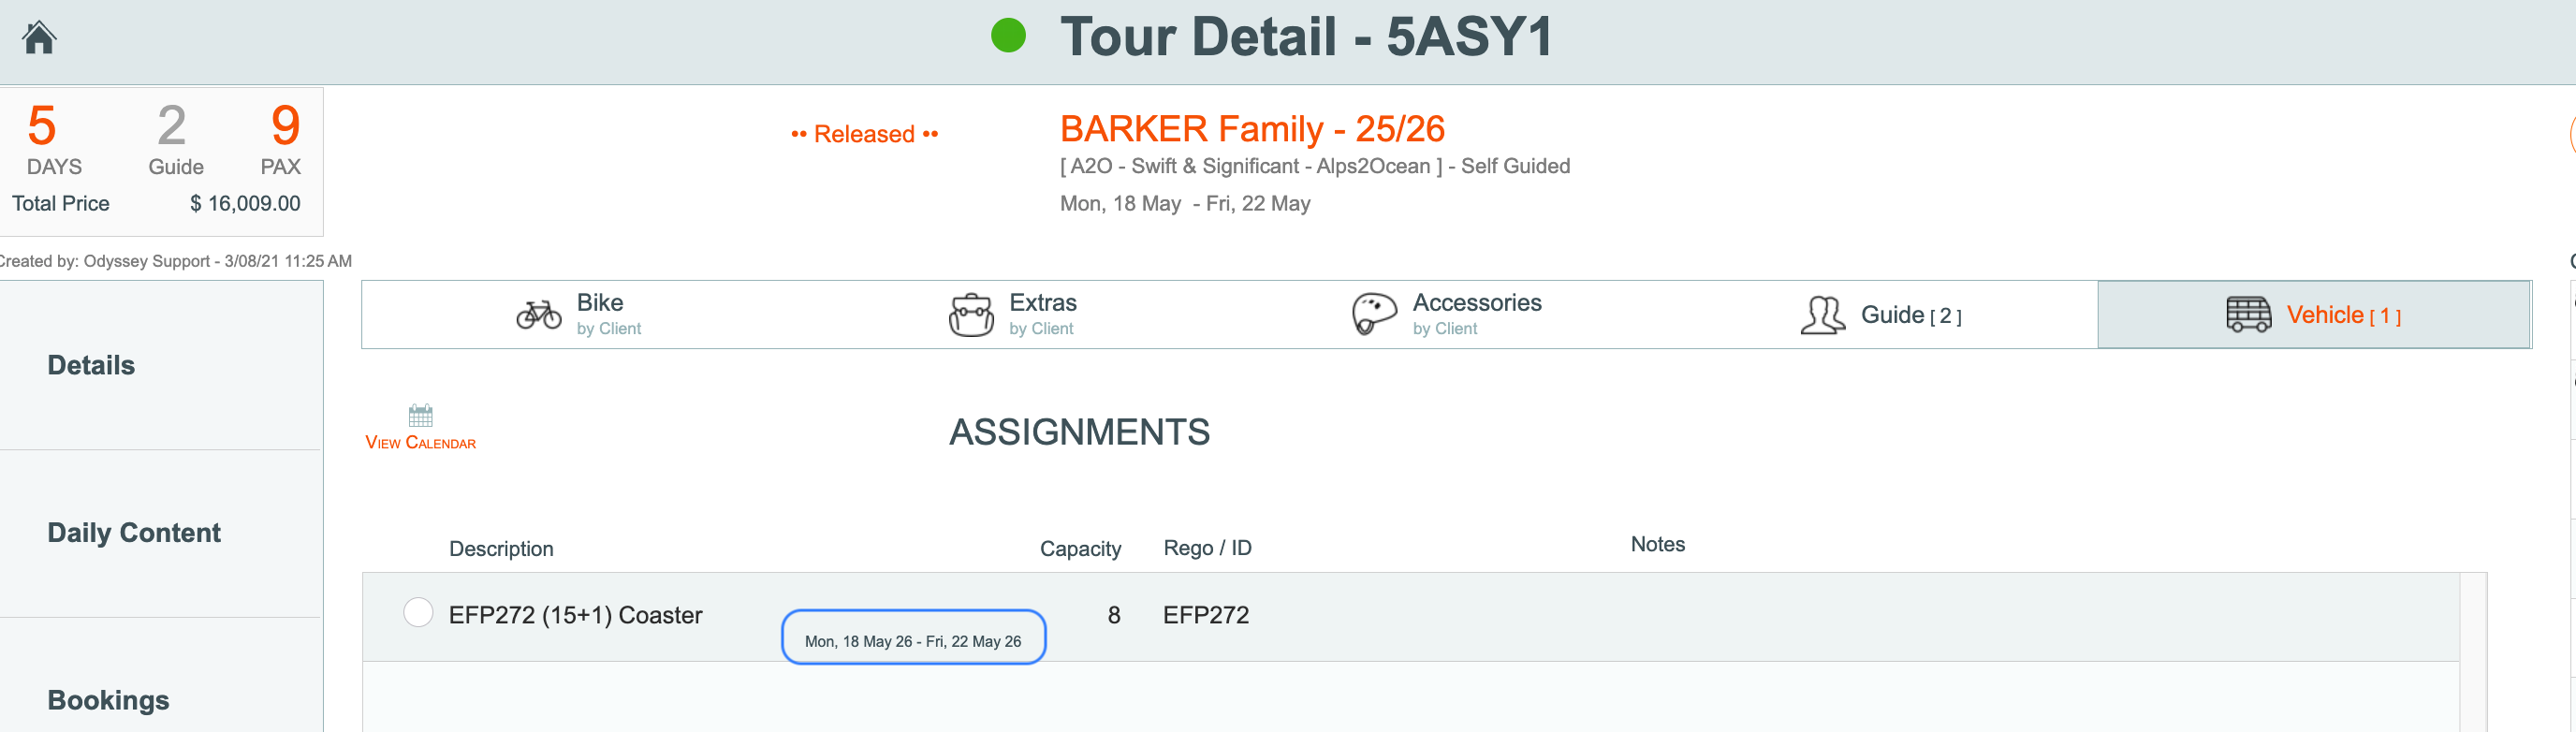
Vehicles
Vehicles assigned to this tour (generally for guided tours) are managed here.
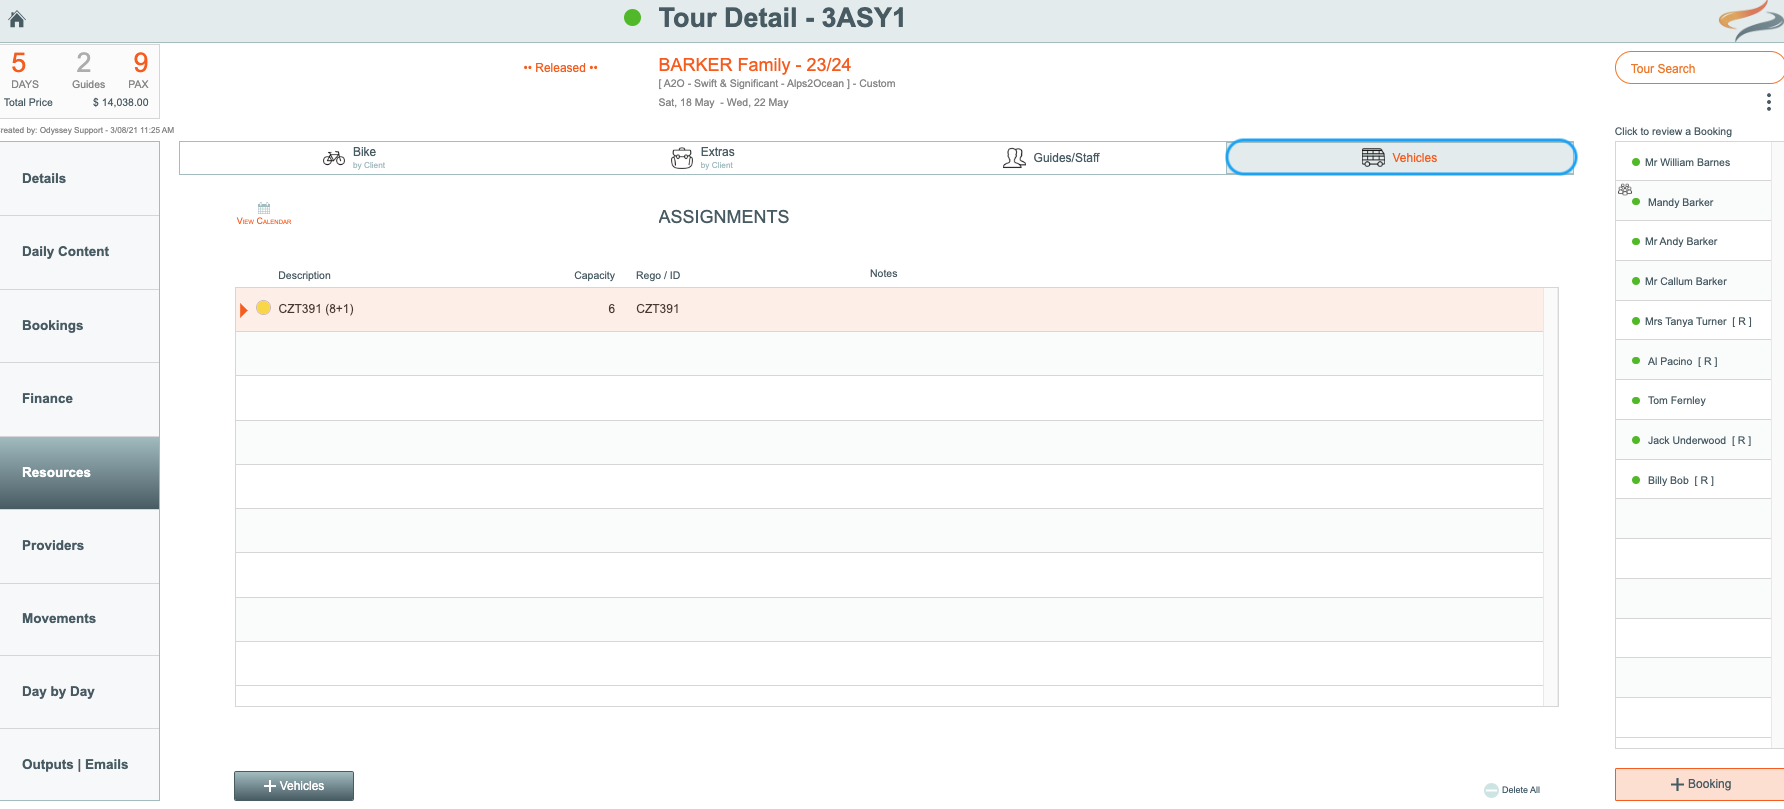
To add a vehicle
- From the Main Menu | Tour | Resources | Vehicle tab
- click the + Vehicles button
- Select the appropriate vehicle from the dropdown list. The the vehicle's capacity, its registration will all be automatically populated. Add or edit any office notes and comments.
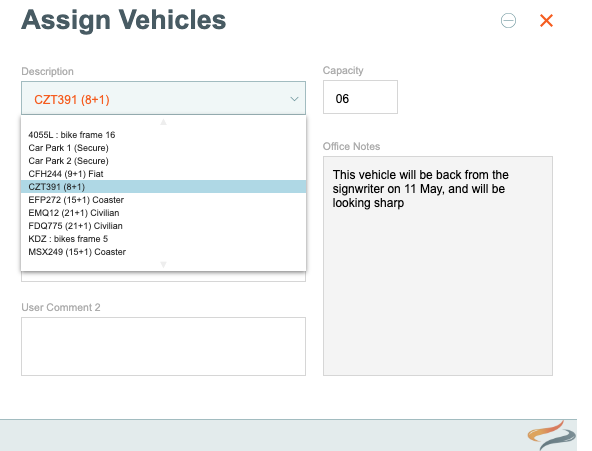
- Add or edit any office notes and comments.

-
The vehicle will automatically be assigned to the tour, for the full duration of the tour; these date details will be noted beside the Vehicle description on the Tour | Resources | Vehicle record.

- If you wish to change the dates that the vehicle is assigned for, the dates can be changed by clicking on the record and adjusting the Start and/or End date of the assignment, by either +/- number of days. e.g. if a vehicle isn't required on the last day of the trip, adjust the end date to read -1 from the "Adjust End" drop down list.
-
The new required dates also display under the selection fields, so the user can see the effect of the options they have made.
Also the portal view displays the dates each Garmin is being allocated.

- To swap an existing vehicle, click on it in the list, and select a different vehicle.
A vehicle calendar is accessible from each tour, allowing you to check the availability of any/all vehicles
Learn more about simple calendars here

Learn more topics about Resources here.