
Master - Daily Content | Itinerary Settings
The settings on the Master | Daily Content | Itinerary Settings allow you to to control whether Briefing, Welcome, Finally, and Inclusions text shows on a Tour.
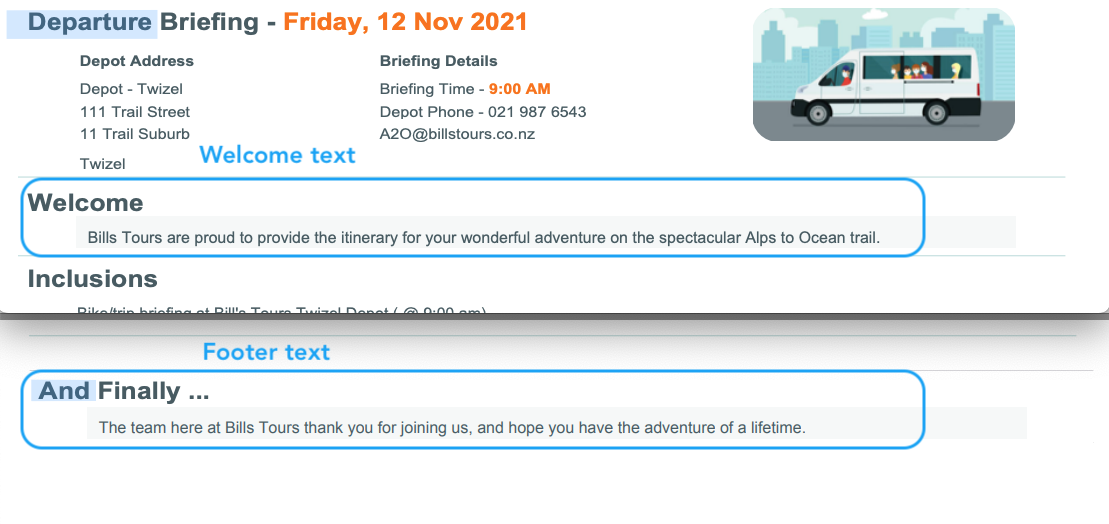
The text in these fields on the master will be pushed through to any Departure based on this master. It can then be edited and tailored in the Departure.
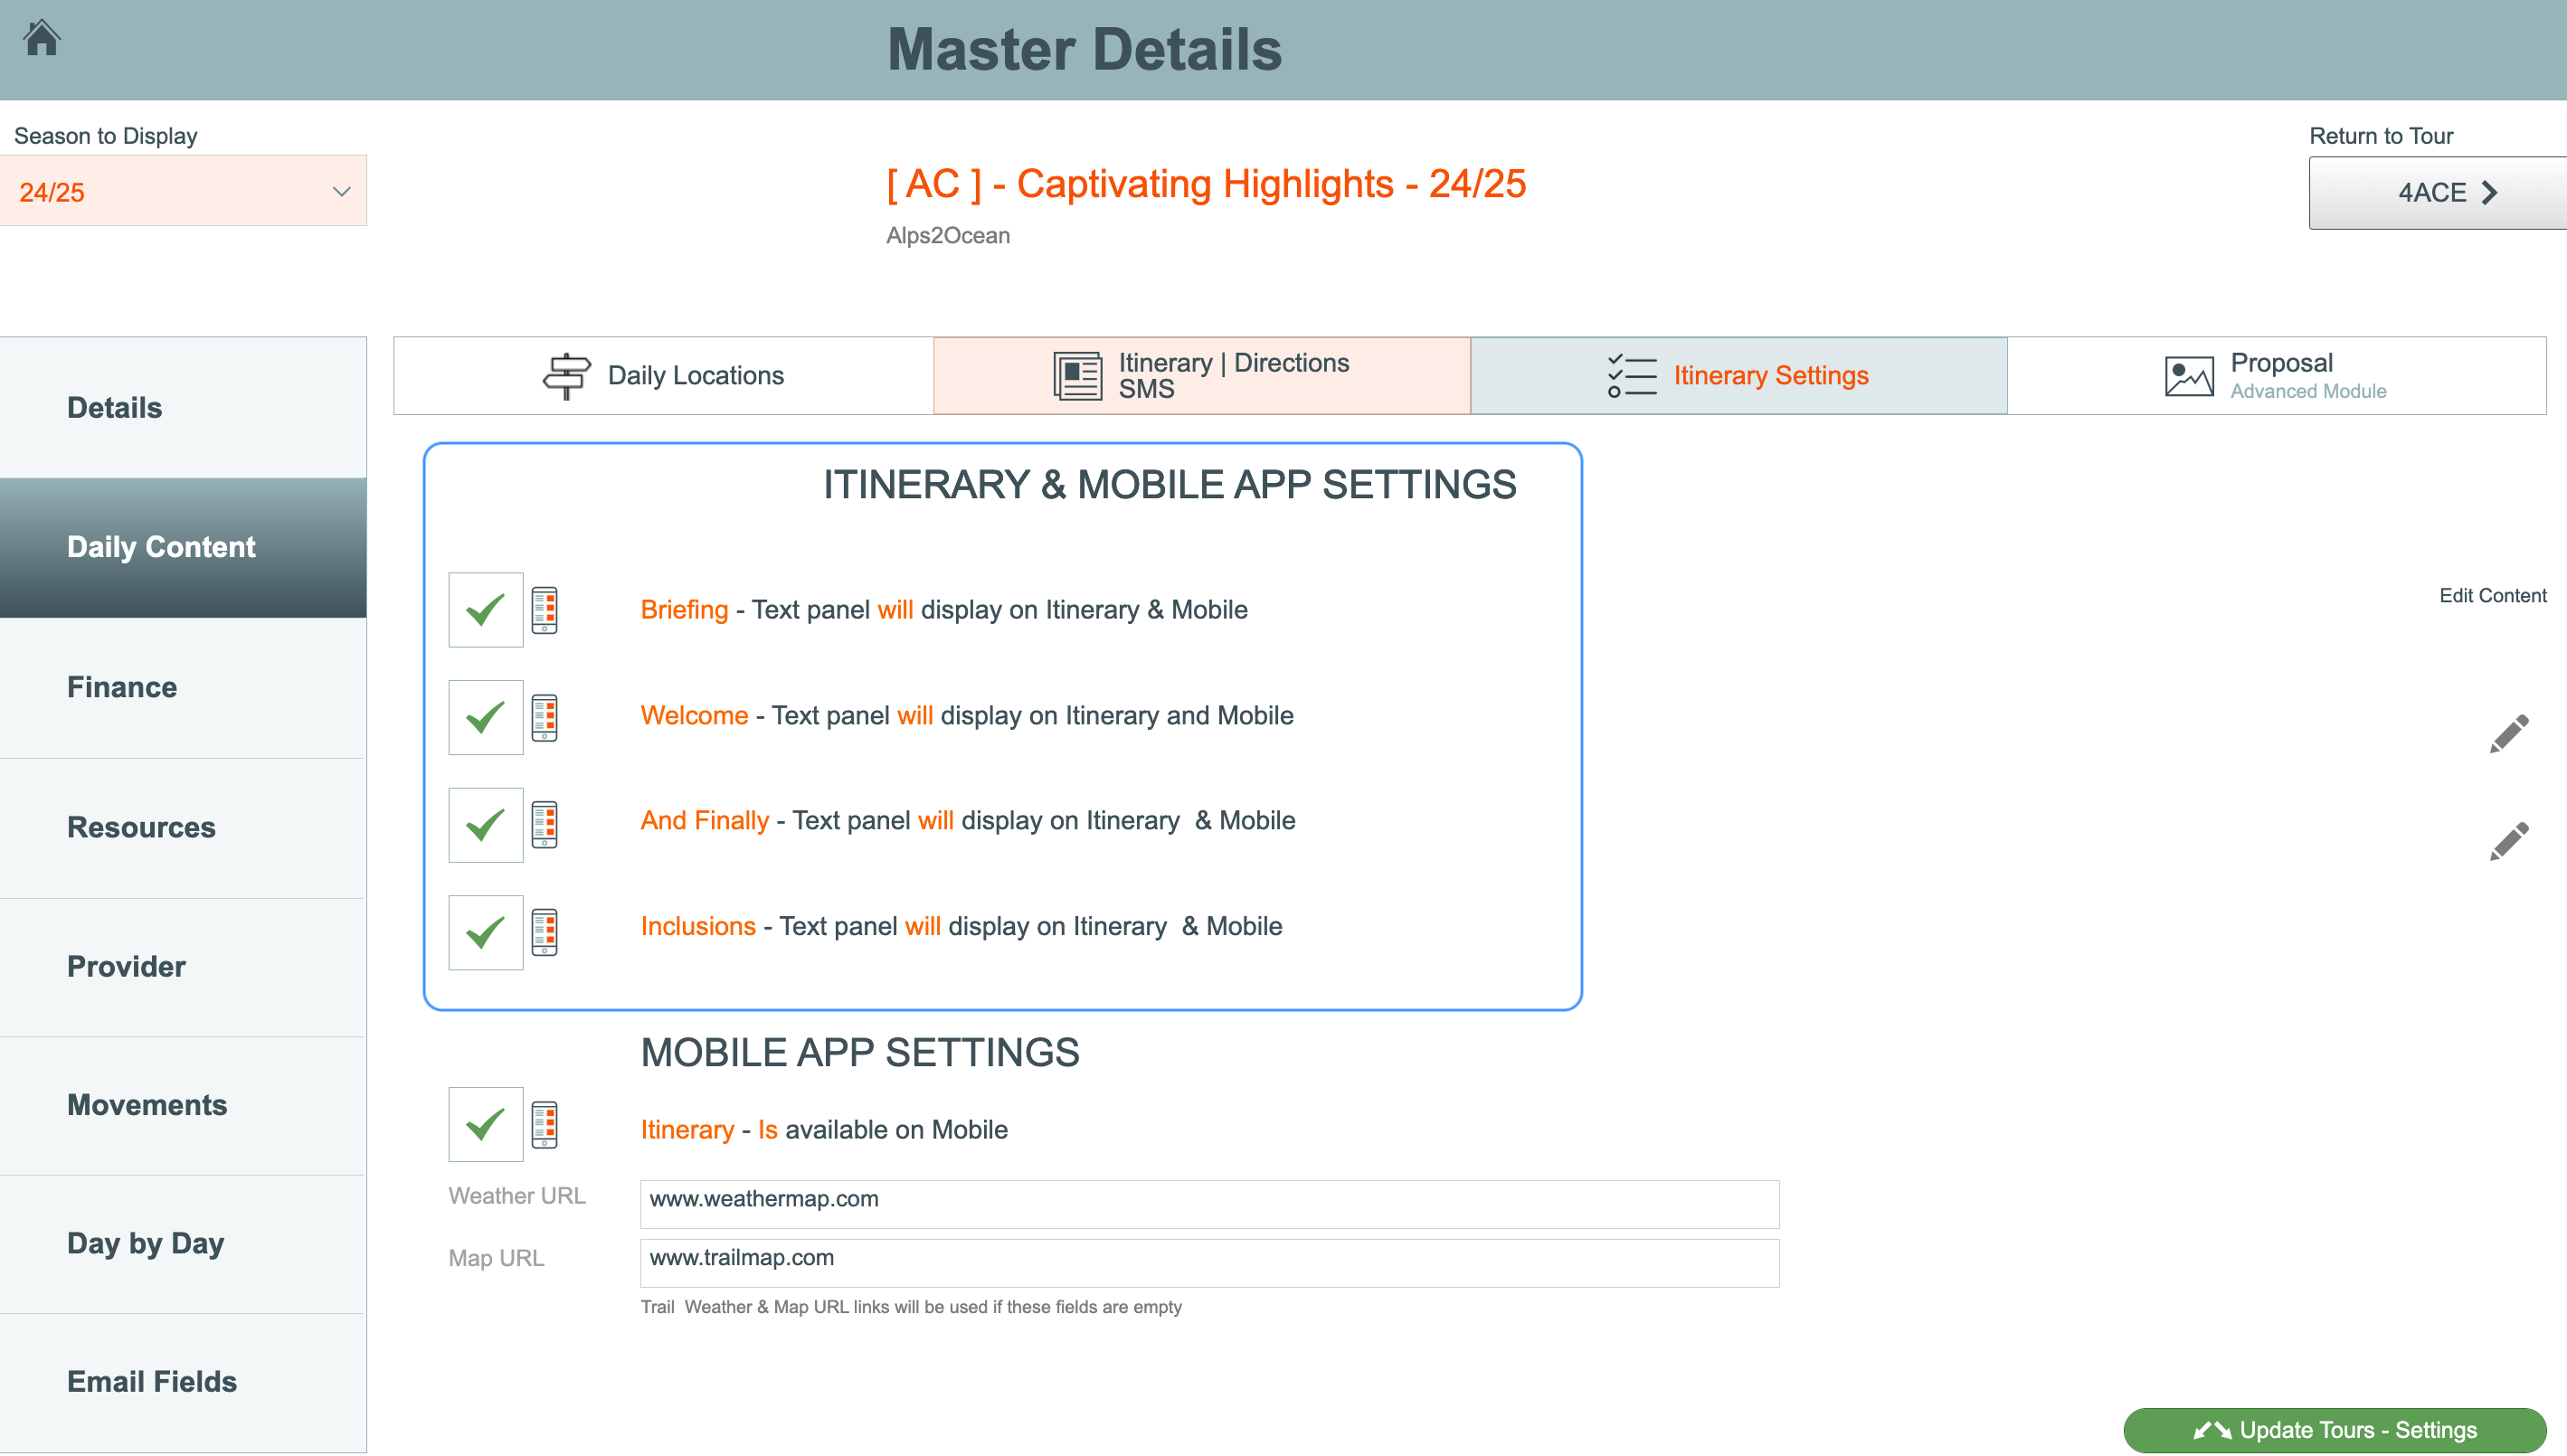
Itinerary Settings
Briefing
- tick the tick box if the briefing text panel will display on the Itinerary or on Mobile
- the briefing time is entered on the Master | Details Details tab
- text content is entered
Welcome
- tick the tick box if the Welcome text panel will display on the Itinerary or on Mobile
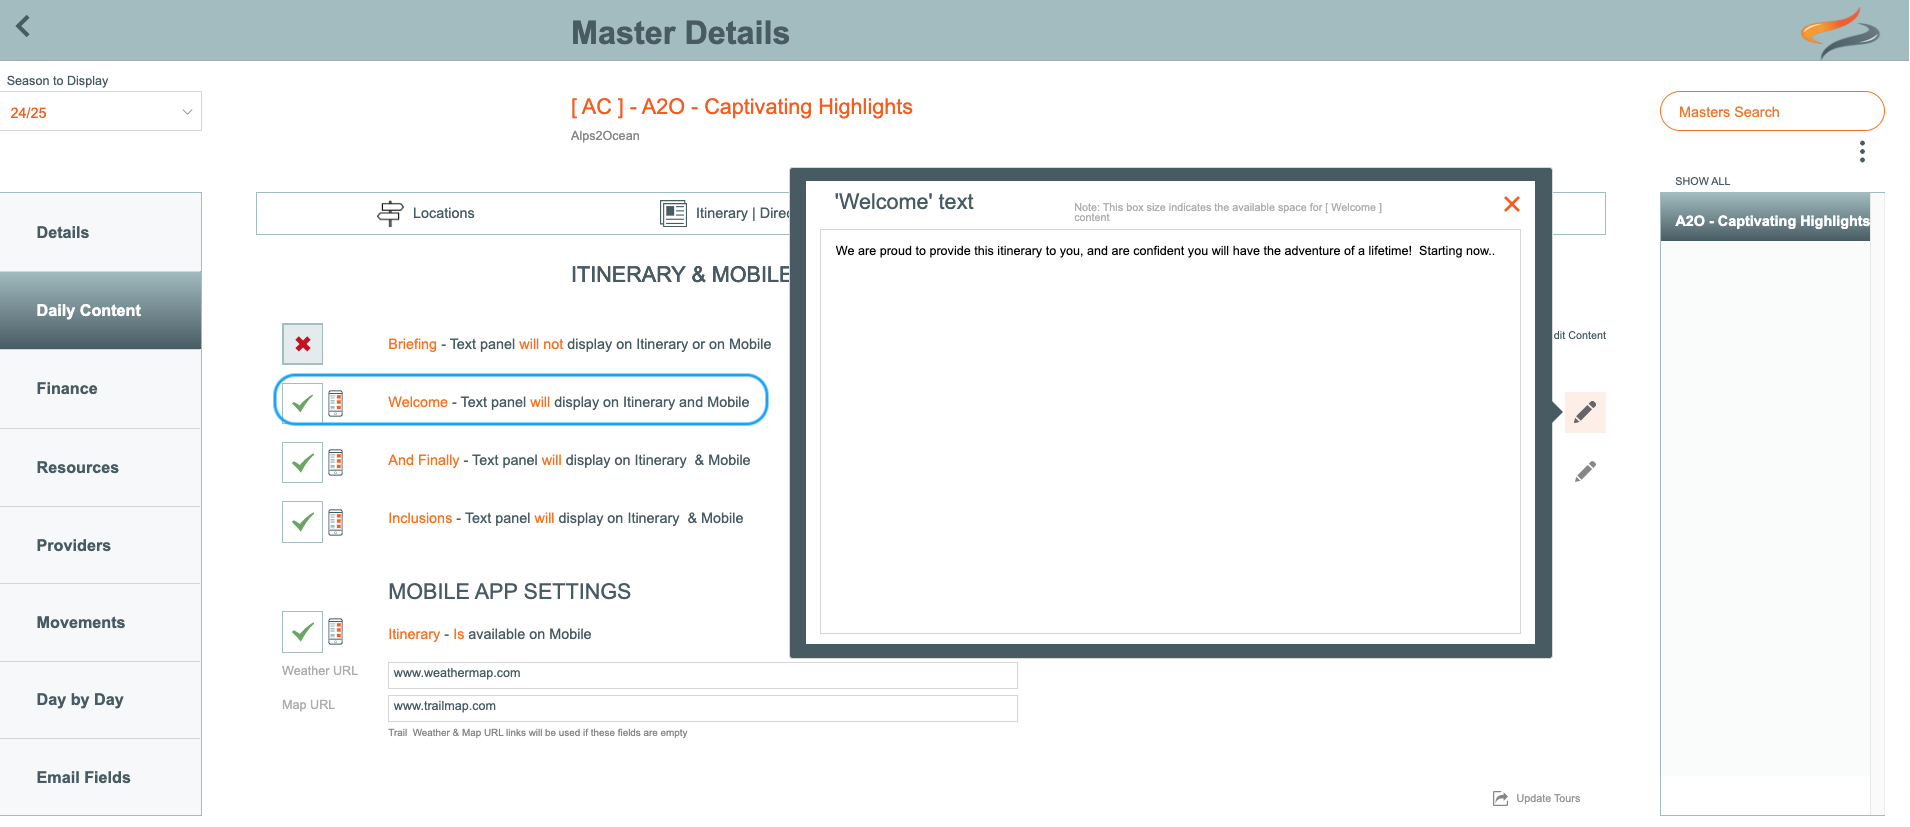
- click the pencil to edit the welcome content
-
Master | Daily Content | Itinerary Settings | Welcome / Finally / Inclusions text; Inside the Edit Content popup box there is now a button to Refresh from Master, for just the details currently in Focus... eg: Welcome Text, Inclusions or Finally text boxes.
And Finally
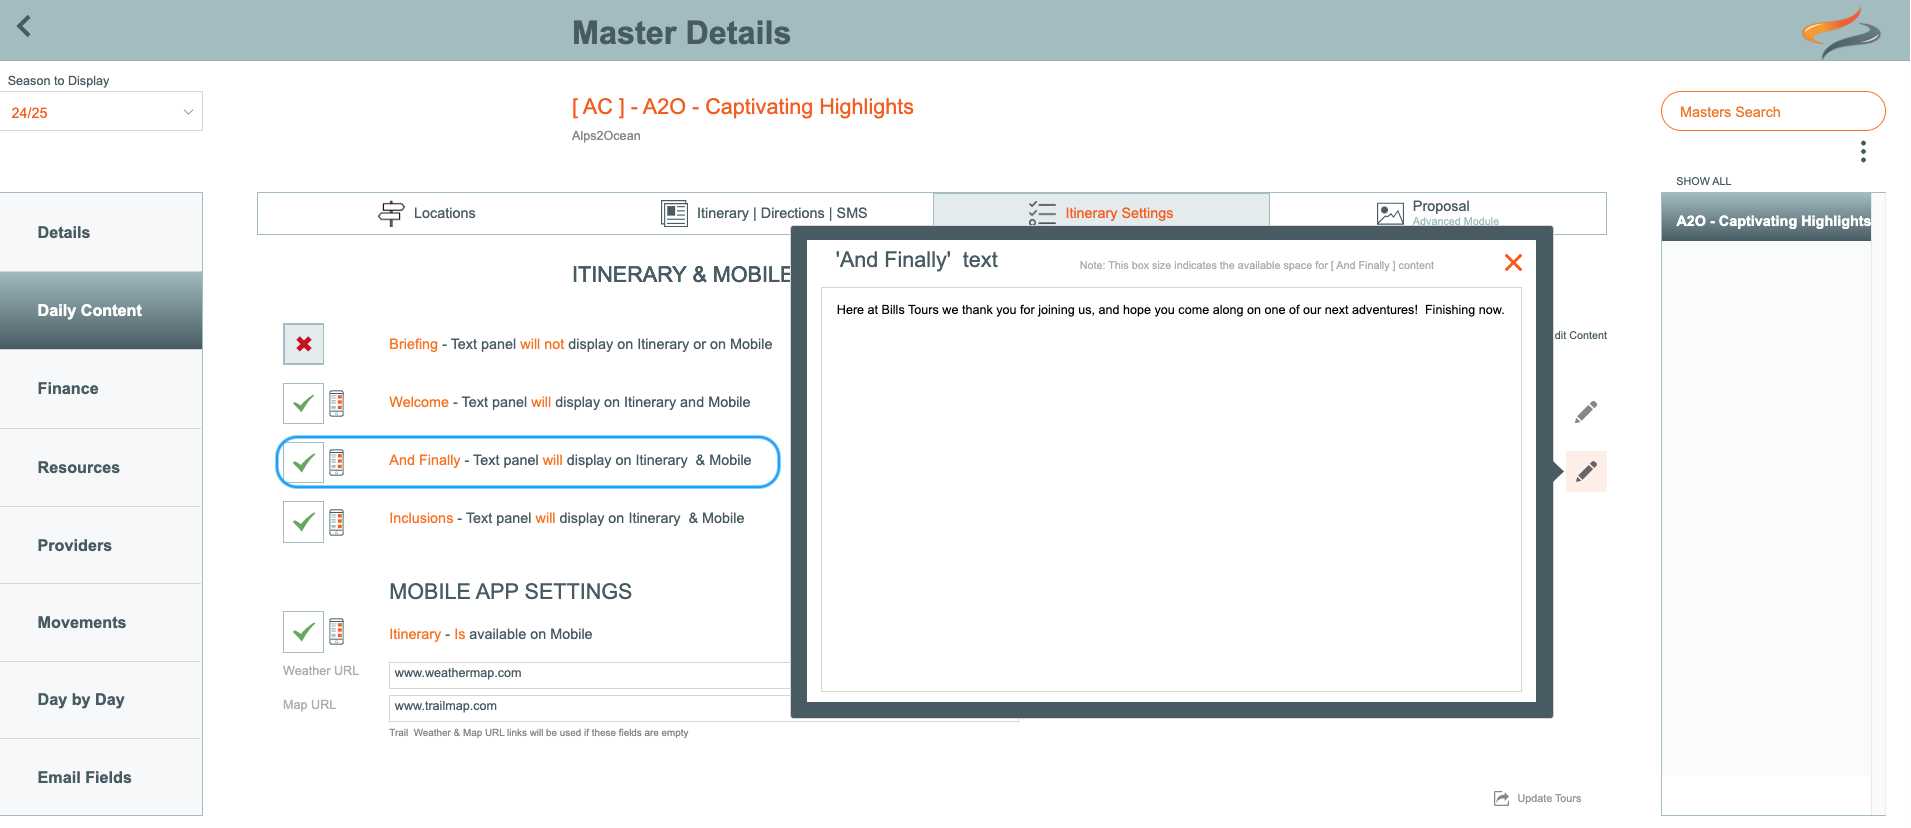
- tick the tick box if the Welcome text panel will display on the Itinerary or on Mobile
- click the pencil to edit the welcome content
Inclusions
- tick the tick box if the Inclusion text panel will display on the Itinerary or on Mobile
- The content is managed on the Master | Details | Inclusions tab
NOTE: These Itinerary settings above can all be edited at the Tour/Departure level.
Update to Tours
- Tick the Update to Tours - settings button if you wish these settings to be pushed to all Tours based off this Master
Mobile App Settings
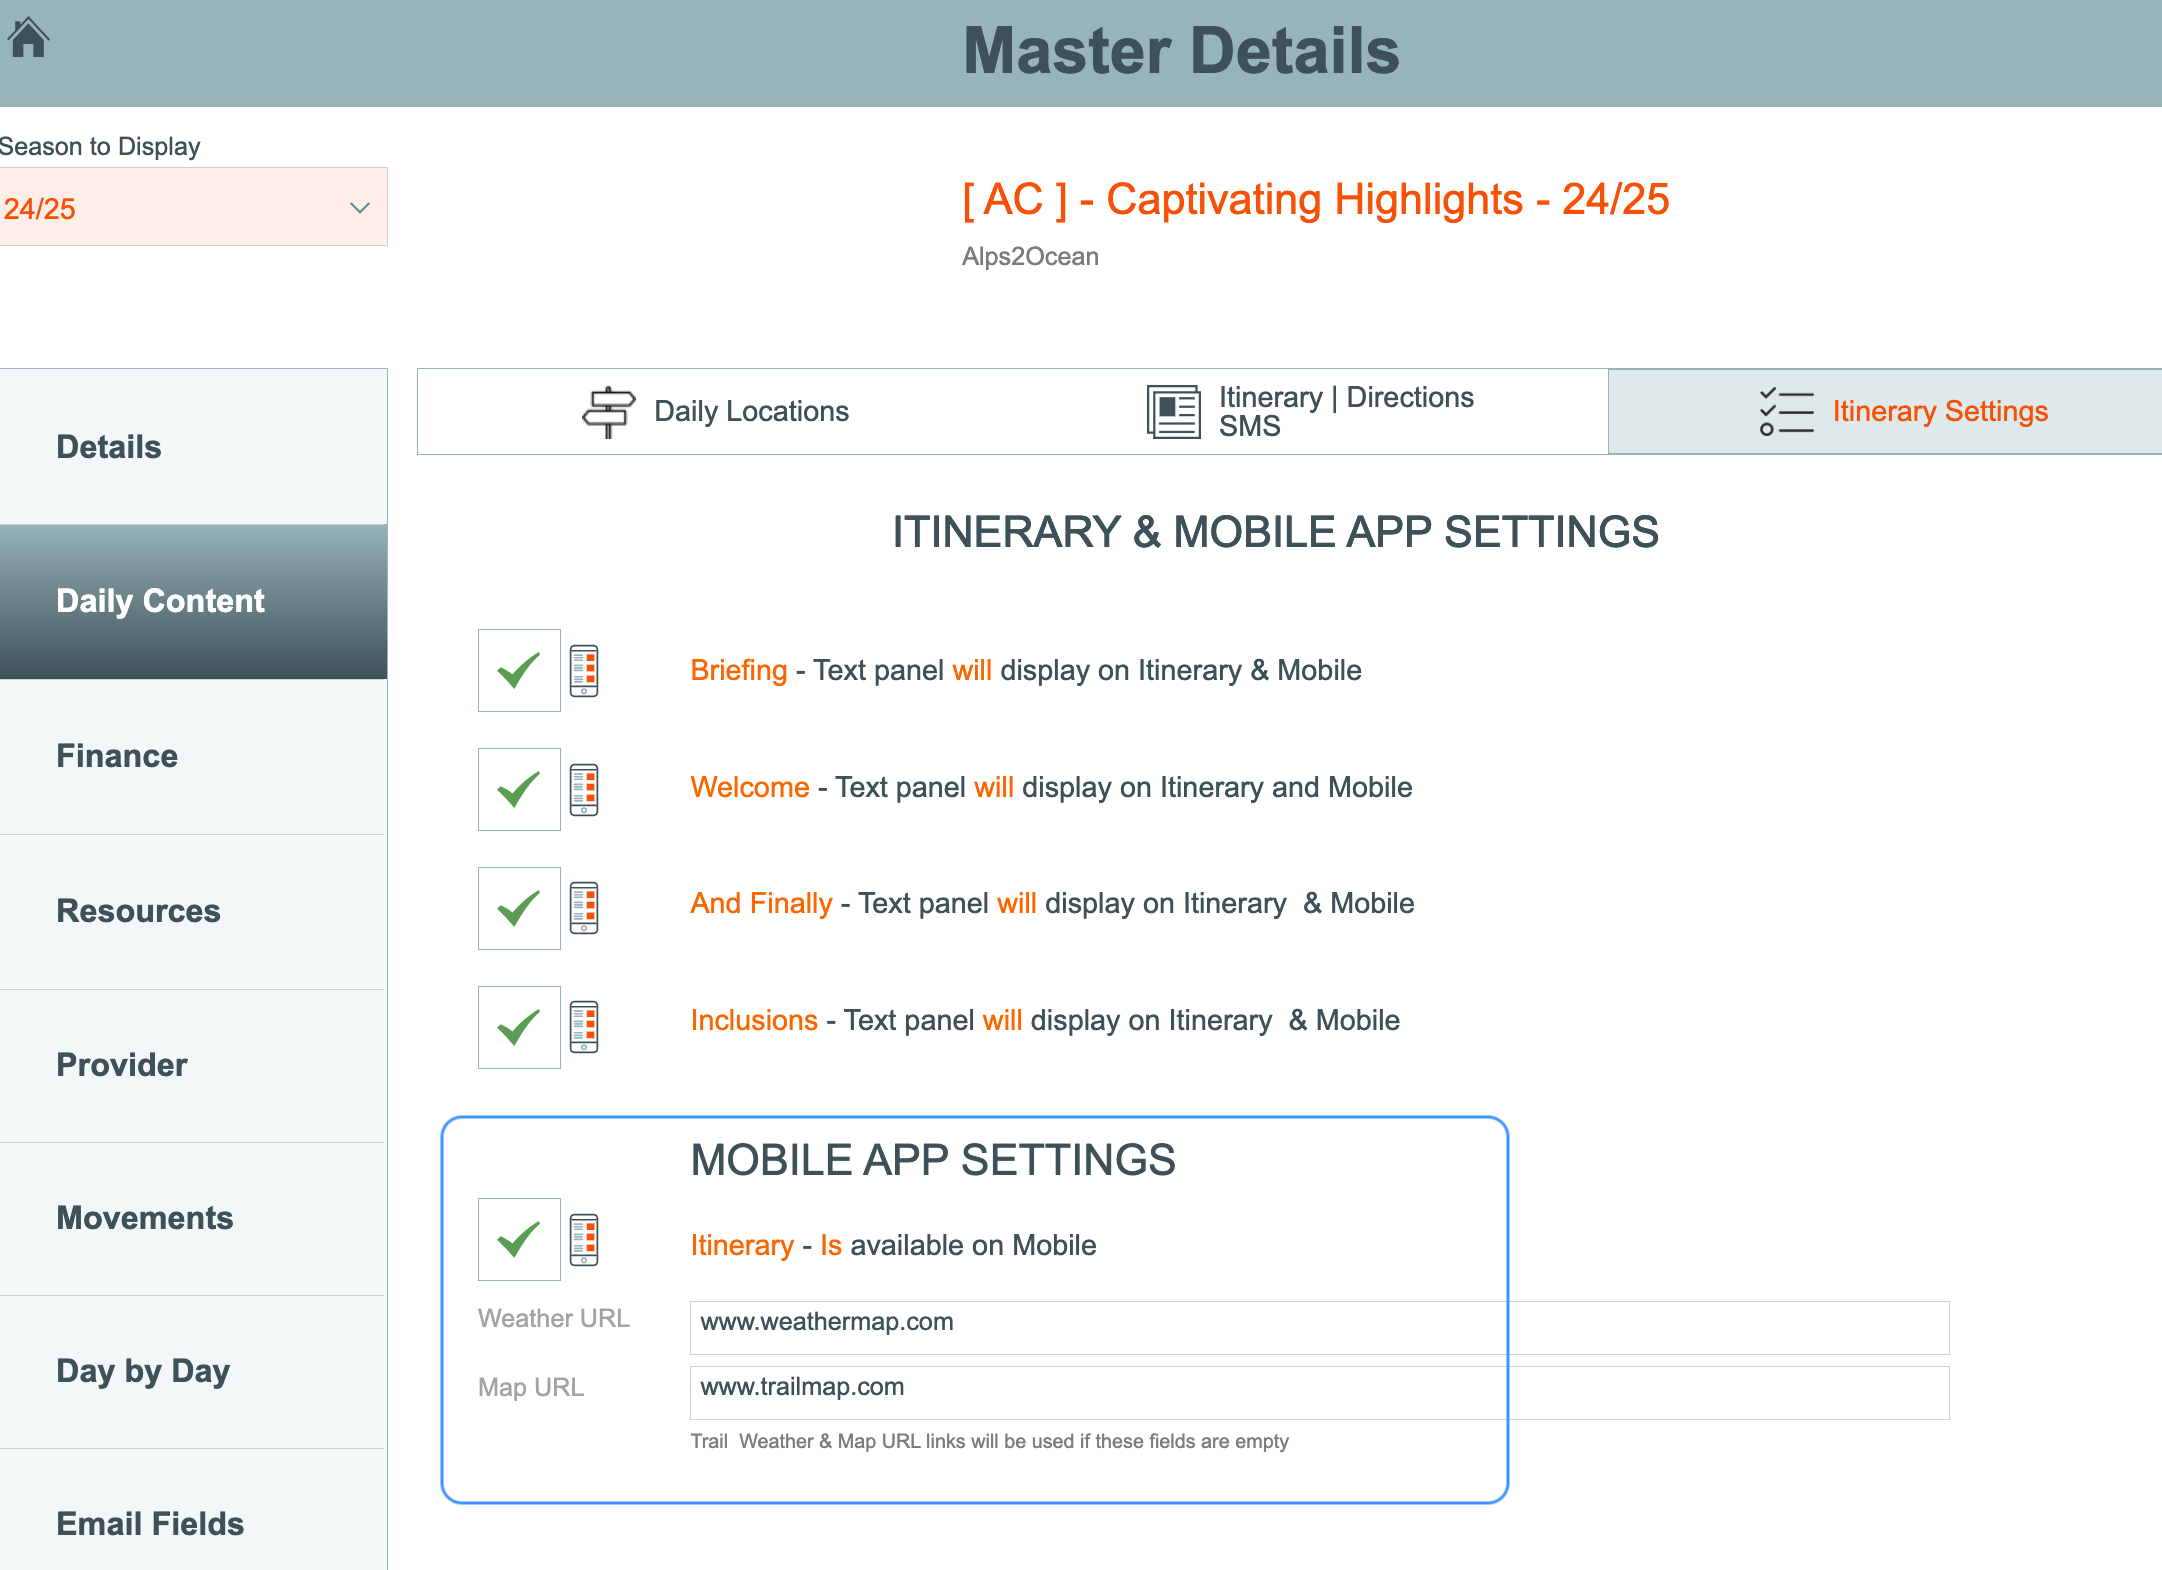
Available on Mobile App
- tick the tick box if the Itinerary is available on the Mobile app
- this because not all Masters may contain content that is relevant enough for use with the Mobile App; e.g. Walk-in Masters are possibly only single day, and a mobile itinerary is not required for these end customers.
Mobile App Weather URL
- To populate a unique weather map / weather URL for this Master, enter it on the correct season's Master | Daily Content | Itinerary Settings | Weather URL field. This will be displayed on the App's main page.
- If this field is left empty, the URL that is entered on the Main Menu | Settings | Company Settings | Trails/L1 | selected trail | Itinerary | Weather Button Trail Website field will be used instead.
- Note that each individual daily location on the app can use the weather map entered for that location. Manage location's weather URL's from the Main Menu | Settings | Company Settings | Location | selected location | Details | Geo Location | Weather url field
Mobile App Trail Map URL
- To populate a unique trail map / trail URL for this Master, enter it on the correct season's Master | Daily Content | Itinerary Settings | Map URL field. This will be displayed on the App's main page.
- If this field is left empty, the URL that is entered on the Main Menu | Settings | Company Settings | Trails/L1 | selected trail | Itinerary | Map Button Trail Website field will be used instead.
Viewing the Map and Weather buttons data on the Mobile App:
On the main App view, looking at all of the days in a list view, those Map + Weather buttons will look for their data in this order:
1) Master / L2
2 ) Trail / L1
On the App, if you're viewing an individual day for WEATHER
1) Admin Settings | Location | Weather URL ( For the 'End-of-Day' Location )
2) Master / L2
3 ) Trail / L1
On the App, if you're viewing an individual day for MAP
1) Daily Location Route - Map Icon/field thingie...
2) Master / L2
3 ) Trail / L1
Learn more about using our recommended weather URL here
Learn more about mapping here
Learn more about setting up the Directions Document Here