
Cognito Forms for beginners
Cognito Forms is an Advanced Module

Cognito forms is a 3rd party product, which uses an online form to gather information from clients and/or providers, and then push the data automatically into Odyssey. This allows you to send your clients or providers an email which contains a button link to one of your online forms, they complete the form online, submit it, and the data goes (via an intermediary step) to Odyssey.
Learn about how Cognito Forms are linked to MailJet Here
Creative Technology provides each Odyssey client who uses the "Advanced Cognito Forms module", a Cognito forms account with 3 draft form templates, which we have (hardcoded) linked to Odyssey for you. These forms are:
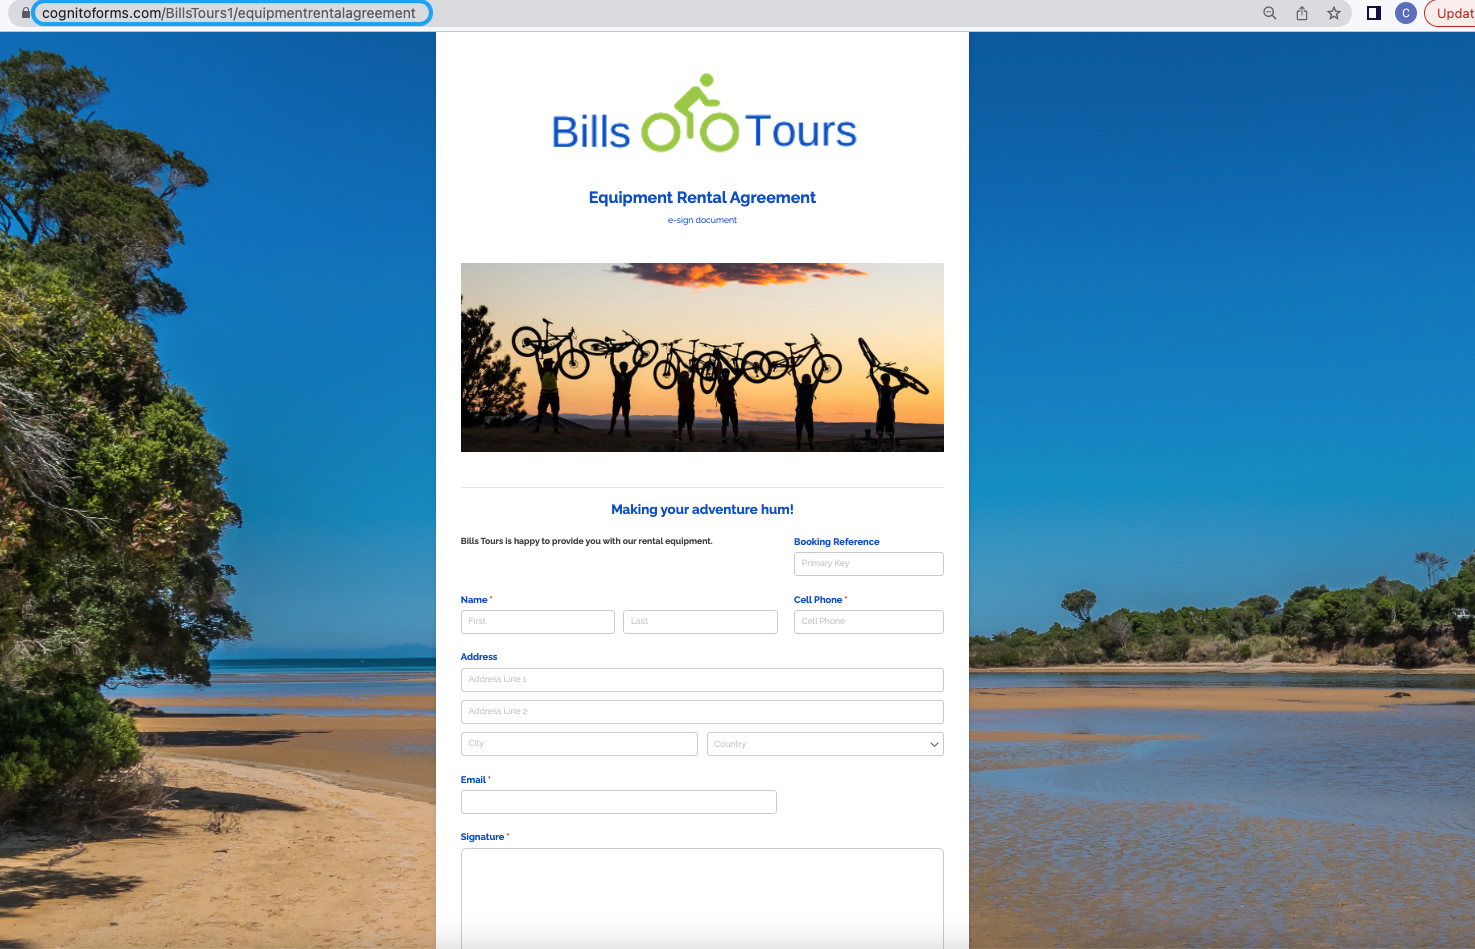
- Equipment Rental Agreement
- Provider Booking Request
- Client details form
The forms we have provided you can be reformatted (change of font, and some rearranging of field layouts etc), but we strongly urge you to treat the forms with great caution. For example, although fields can technically be deleted, there are some fields on the forms which are critical to the operation of the form and these should never be deleted, or else the form will not work.
Sample forms:
Below are links to sample forms used by our Demo Company, Bills Tours. Our clients have their own versions of these forms.
Https://Www.Cognitoforms.Com/BillsTours1/EquipmentRentalAgreement
Https://Www.Cognitoforms.Com/BillsTours1/ProviderBookingRequest
https://www.cognitoforms.com/billstours1/confirmingclientdetails/publish
TIP: Don't change these form names, the names must remain the same as when we provided them to you, or else the links to them don't work
How to use Cognito forms:
Log in to Cognito Forms, using the login we have provided you
Your view will look something like this, listing the forms provided to you:
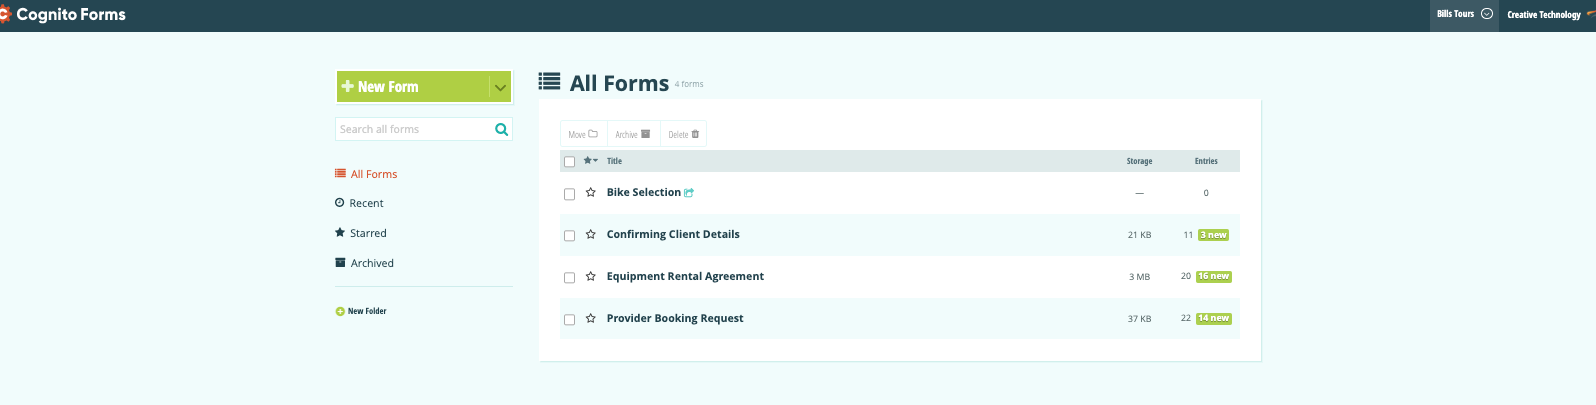
Hovering your mouse over one of the forms, will provide you with options to Build, Publish, view Entries, Users, Copy, Form Link.
At the right hand end of the window, you can also view the total number of entries used by this form (11), and the number of recent submissions (3)

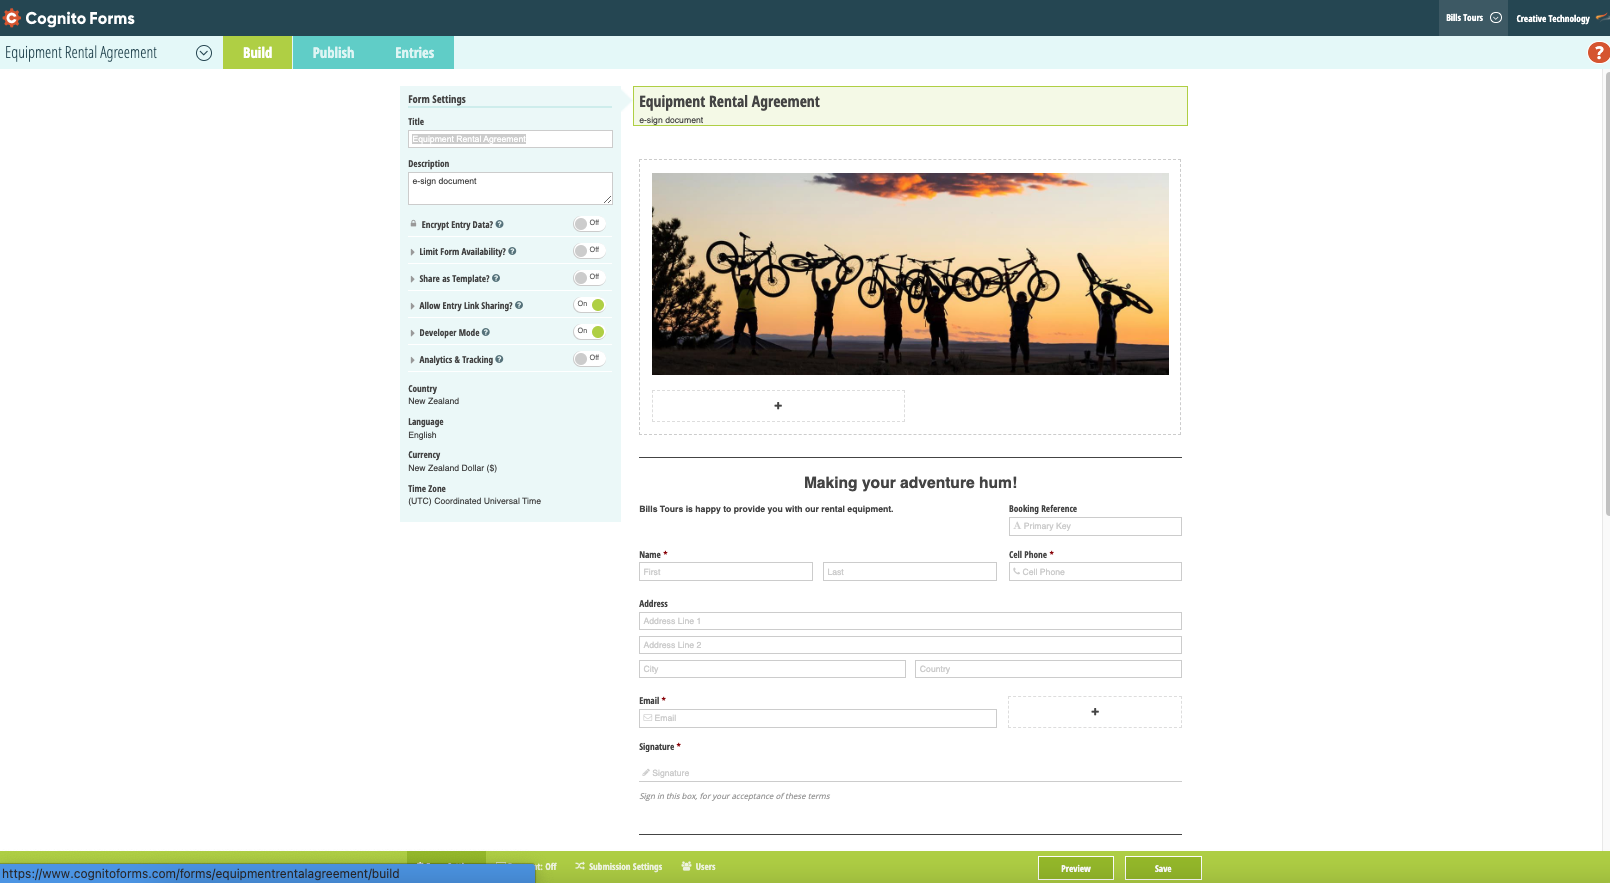
Build
This is the area where you can build or edit your form. Once again, we urge you to treat the editing of your forms with caution.
Learn all about form building techniques from Cognito Here
Adding new fields
Find a full list of the field names you can insert into your form Here
Add new fields to your form by clicking on the + button

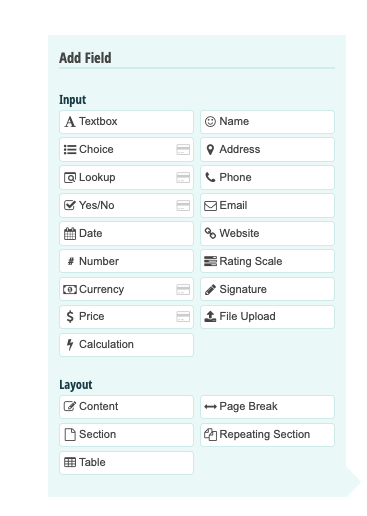
Although a range of field types can be selected at this point, we recommend you restrict your new fields to simple fields such as the Textbox field, as in this first round of development, we do not automatically support the inclusion of any additional fields in Odyssey.
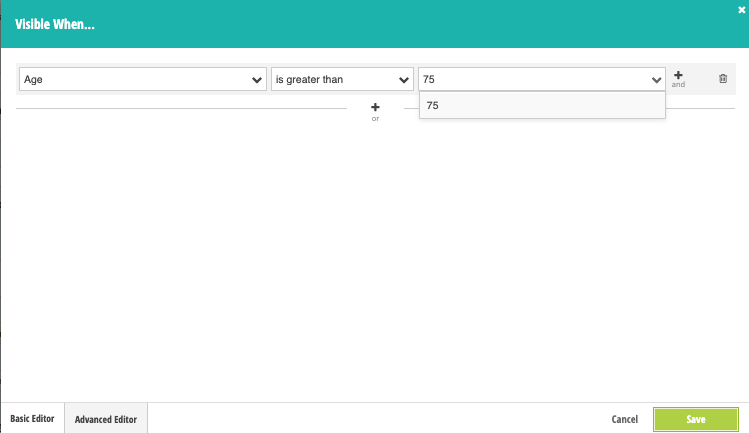
Fields can be set to be visible, required, or read-only, when certain conditions are met.
For example, we have set some fields in your form to be read only when they have been populated (and they are automatically populated by pulling the data from Odyssey), so that your clients can't change the content of fields which are critical to the synchronisation of data back to Odyssey, such as L3 Booking Description, L3 Booking Reference, and Start Date. Sections can also be set to only show when certain conditions are met. Learn more about conditional logic here
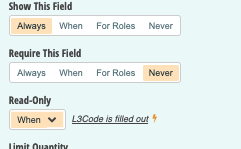
Rules can then be set, as in the example below, to determine when that field is visible, required, or read-only
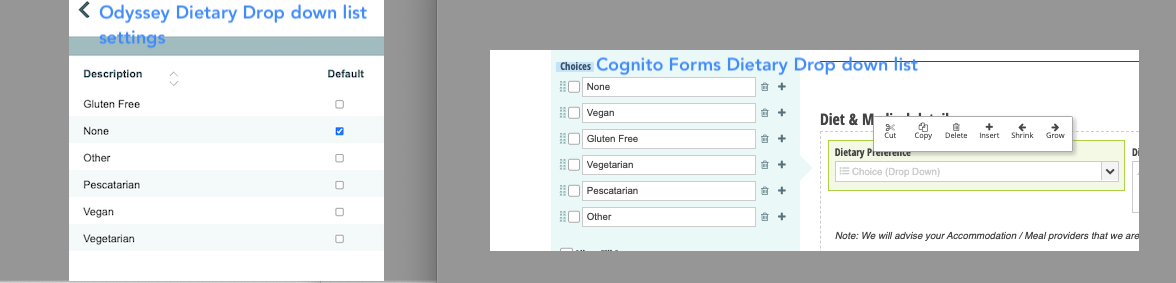
If your Cognito Form has a drop down list for your clients to select from, it must match perfectly the equivalent drop down list in Odyssey. Enter the the content of that drop down list manually into your form.
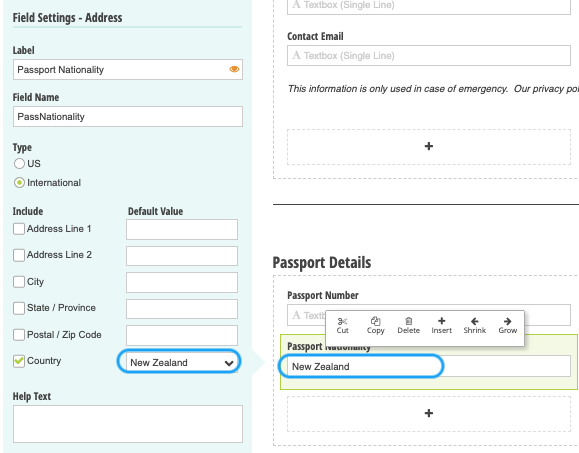
Default values can be entered into any fields, to speed up data entry for your clients. This can be particularly useful for say a country of passport issuing,
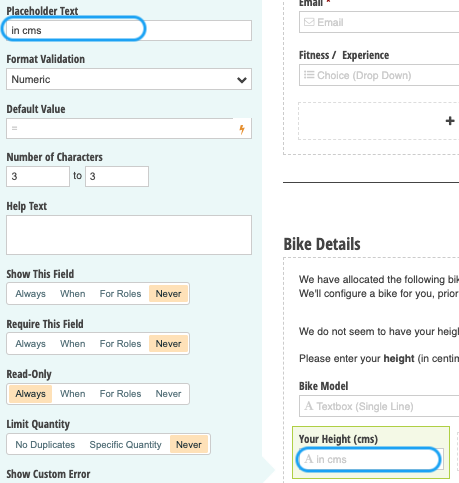
Placeholder text can be inserted on fields to give your clients some support as to the type of data you want them to supply, e.g. enter "in cms" as Placeholder text in the Height field, or "Any medications we should be aware of?" in the Medications field.
Some words of caution:
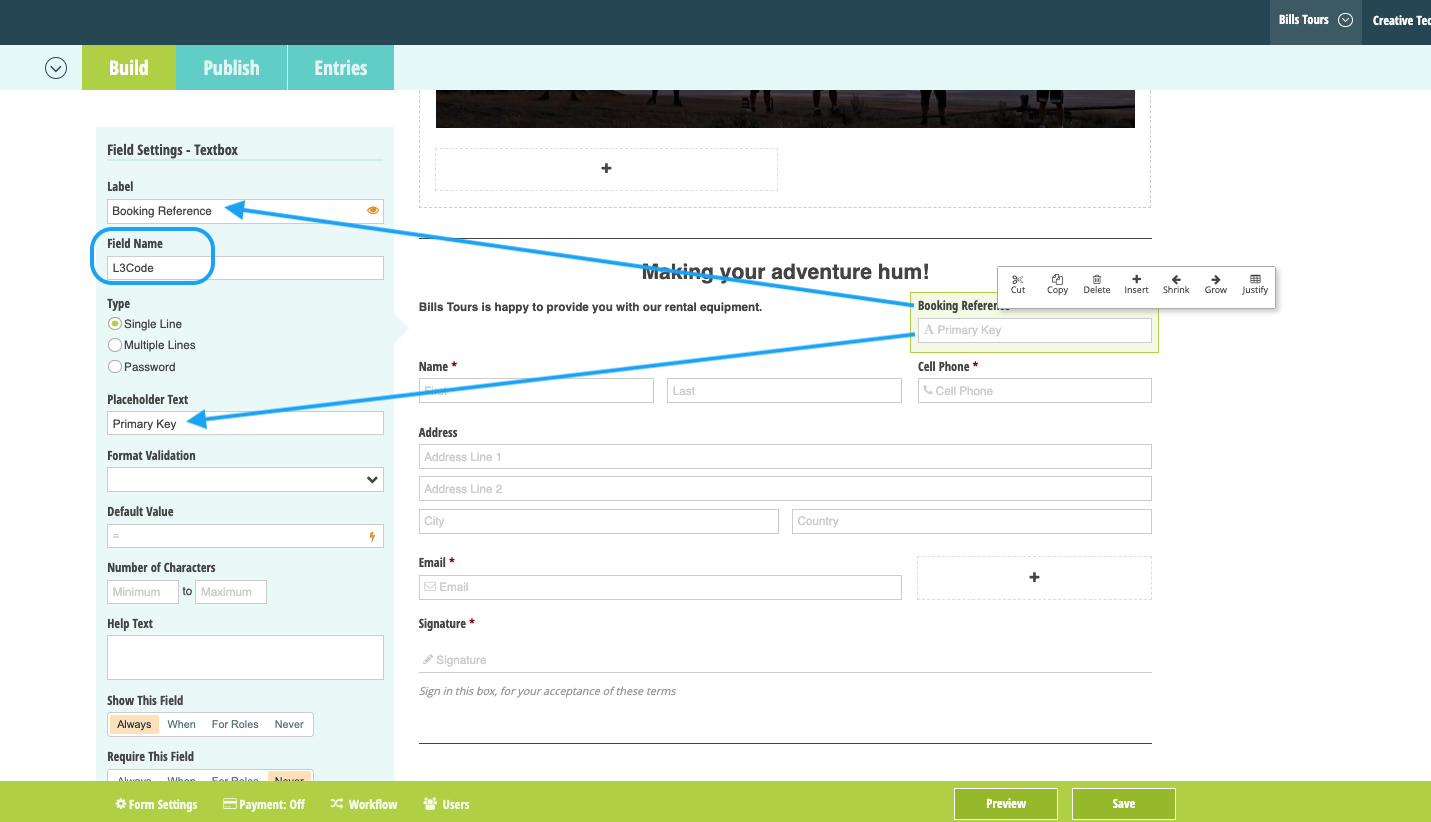
1. When editing your form, It's OK to change a field label, and the placeholder text, as marked out in the screen shot below. But NEVER change the field name, as this is what links this field in your form to Odyssey.
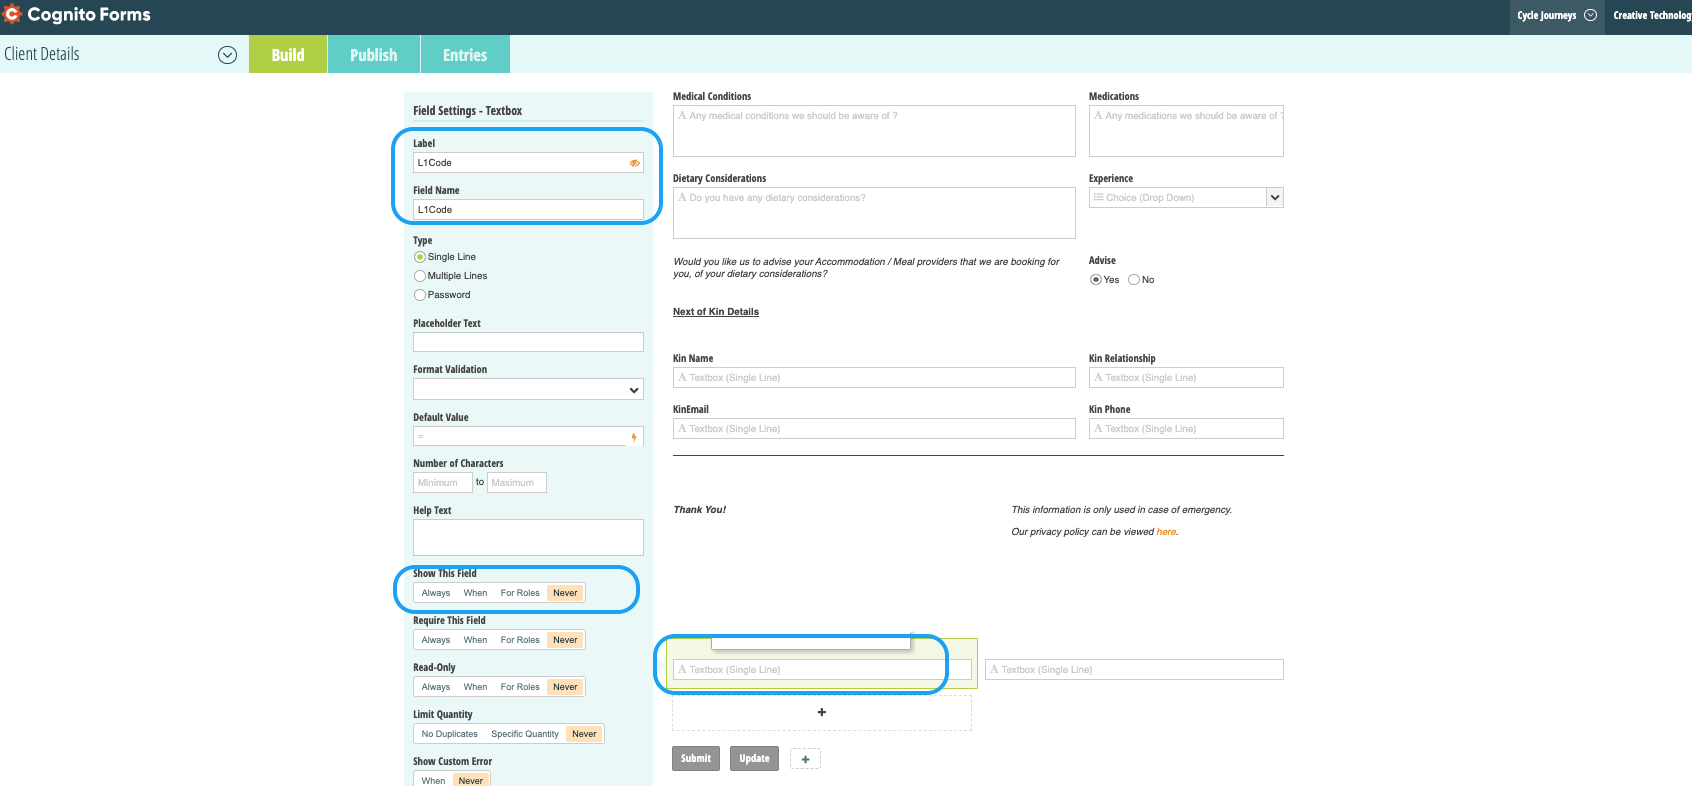
2 Some fields are designed to be hidden. We have designed these forms for you, and at the time of providing them to you, they work successfully. If you edit the form, please keep in mind that some of the fields on the form may not even be visible to your clients, but are critical to the successful operation of the form, in the case of the green text box field in the picture below. As you will see, this field label is "L1 Code", which is the top of your data pyramid in Odyssey (i.e. the Trail, Country or Category) , and this information is crucial to the successful operation of gathering and population of the data in Odyssey.
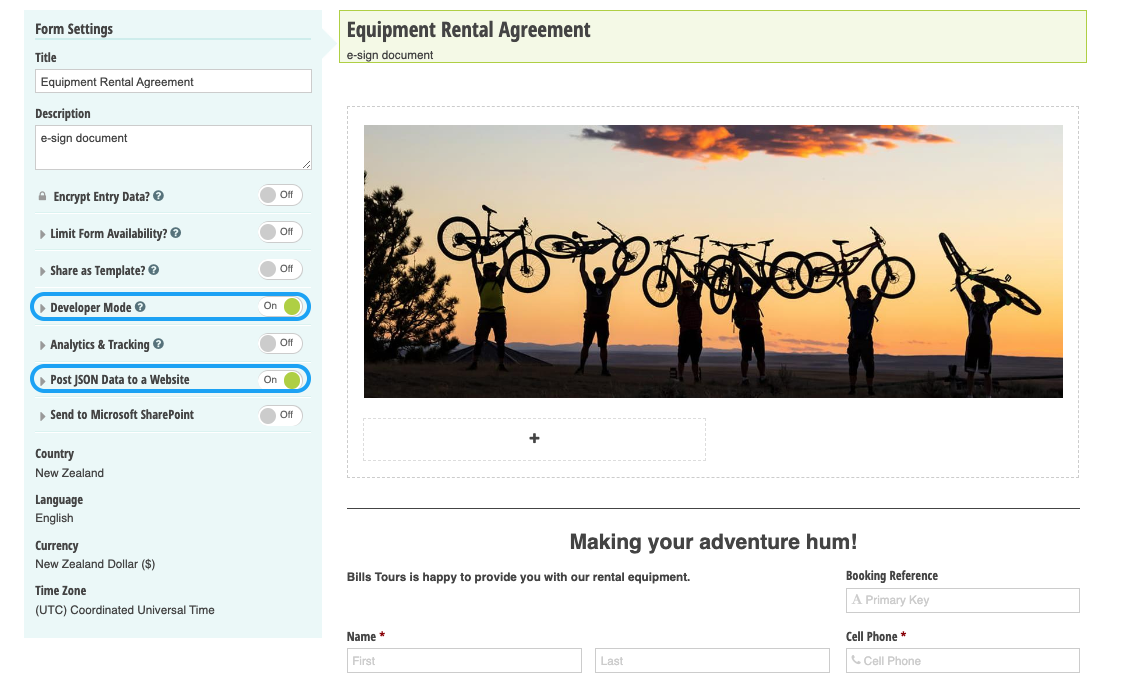
3. Form Settings: Ensure that the Developer mode, and Post JSON Data to a Website buttons both remain turned ON
Form name
Do not change the name of the Cognito Forms document!
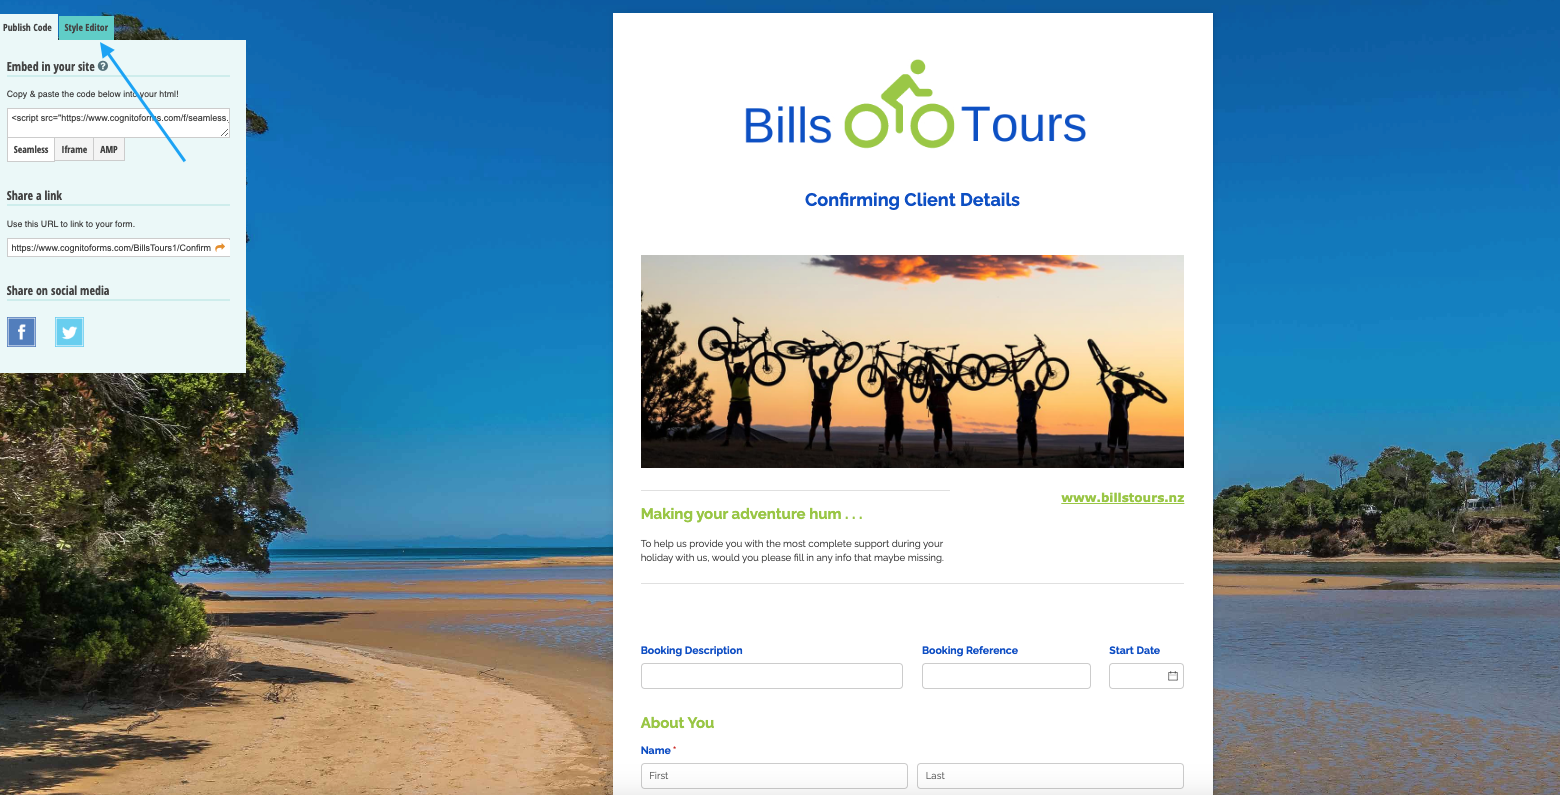
On the Header Styles tab:
- In the logo field, Add a banner graphic to the top of the page, which combines their logo and the name of the form
- On the Layout button, select Logo only

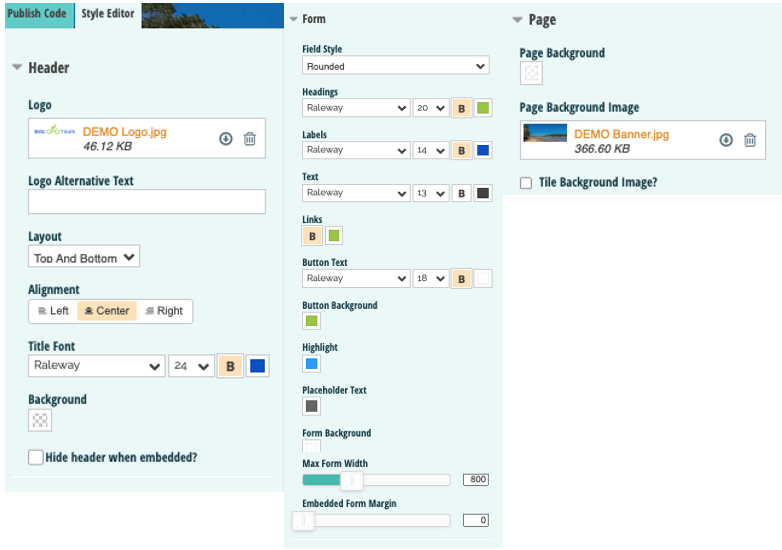
Publish
Once your form is complete, Publish it
Use the style editor tab to edit a range of settings, such as the page background, your branding/logo, and the field styles, fonts styles and colours, link colours, paragraph alignments, etc, used in this form.
Link the Form to a MailJet template
In MailJet, create the email template that you wish to send, and Include a button which links to a mergetag for the appropriate form - then start sending emails that contain that button link to your form!
Learn how to add a link to this form on a MailJet button here
Learn more about mergetags here
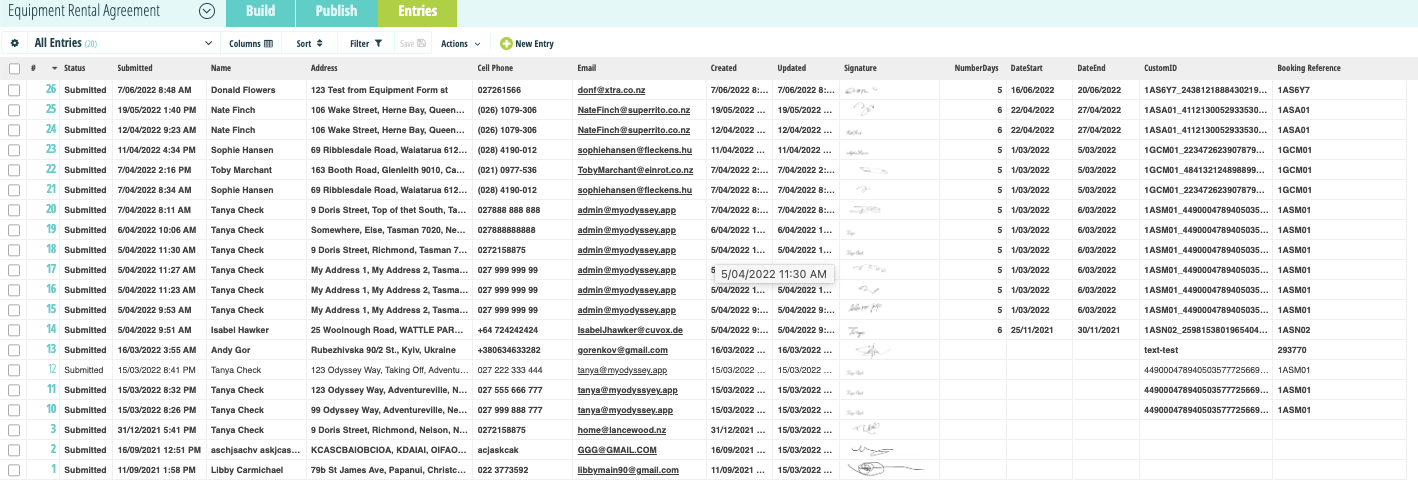
Entries
Each time a recipient receives an email with a link to your online form, they click on the link and complete the form. When they submit the form, Cognito Forms receives the data they have submitted. Each entry, each form submission, can be viewed here.
How do users know what data has been submitted?
Each time a client or provider completes an online form, and submits it to you, the user who sent the email containing the link to the Cognito form will be automatically sent an email detailing the data that was gathered in the submitted form.
And in the case of the Rental Agreement form, there are two places in Odyssey where the form itself can be viewed. On the Booking | Details | Details page, and on the Departure | Bookings page
Users
The Cognito Forms licence provided to you by Creative Technology allows for one user. Clicking on the Users button is likely to show you this message:
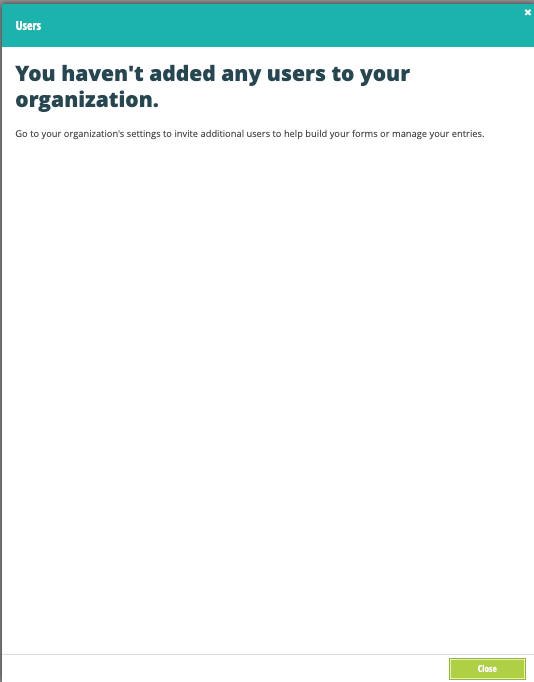
Please contact us at support@myodyssey.app if you require multiple users
Copy
If you have a form you love, and want to create a similar version of it:
- From your Cognito Forms Main Menu/Home page, select the Form you wish to copy, and use the Copy function
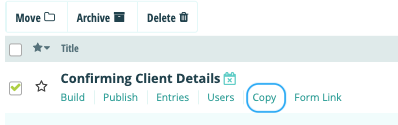
- Give the duplicate form a new Title
- You also have the option of copying to the new form, all entries which have been submitted online via the original form
- Make your selections, and click Copy

Form Link
If you need to find the URL of this published form, click the Form Link button
A new tab will be created in your browser, and the form will be published. You are then able to select the URL (webaddress) at the top of the page, copy it , and paste it into a MailJet url field (on a button, for example)
Learn more about MailJet Here