
Email templates in MailJet
The ability to create company branded consistent email communication is achieved with the integration of Odyssey data and a 3rd party email provider - MailJet.com
- This functionality allows you to create and edit your own graphical email templates, all linked to live Odyssey data eg money owed, bike size required, departure dates.
- Email templates can be time based & monitorable to ensure emails are sent when required eg 30 days out from departure
- Visual tracking display of emails
Below are examples and steps involved to construct all the email templates you may require to communicate with your external Providers & Clients.
MailJet's own template builder user guide can be accessed Here for more complete details, if required.
Creating a NEW email template
- Log in to MailJet Www.Mailjet.Com
- From the menu bar go to Transactional | My Transactional Templates.

My Transactional Templates – this is where all your mail templates are stored and accessed for set-up or modification.
- Click Create a NEW template
- Choose either
using a template from gallery (mail jet gallery)
Or
Using one of my templates (we have set up some templates for you to start with)
- Select the template and choose a name
- Your new template will now be open with content and setting tools
Modifying your new template
Learn some great tips on using MailJet's editing tools Here
Content – adding new
- Here you can add new columns, and ‘drag and drop’ content into the template eg images, text, videos and action buttons, and add features to improve the layout and design of your email template eg dividers, spacers etc.
- A full list and description of content tools can be found Here
Links:
To insert a link to an URL:
- select and copy the text which is to become the link
-
go to the formatting toolbar and select the link icon

- type (or paste) the url into the box that appears, and click Apply


Variables:
Variables are the pieces of data (from Odyssey) which vary with each individual email that you send. For example it could be the customer name, the provider name, a $amount, or a trip name.
When you are writing the email text for the transactional template, (eg Provider email - 30 Days Prior), either leave spaces, key words or symbols for the variables, or write the text (e.g. "We are excited to inform you that the ****** tour, departing on trip date has been confirmed.") and enter the variables as you go.
Merge Tags are the names of the fields available in Odyssey to be included as variable data in your email template.
- View MergeTags available to use
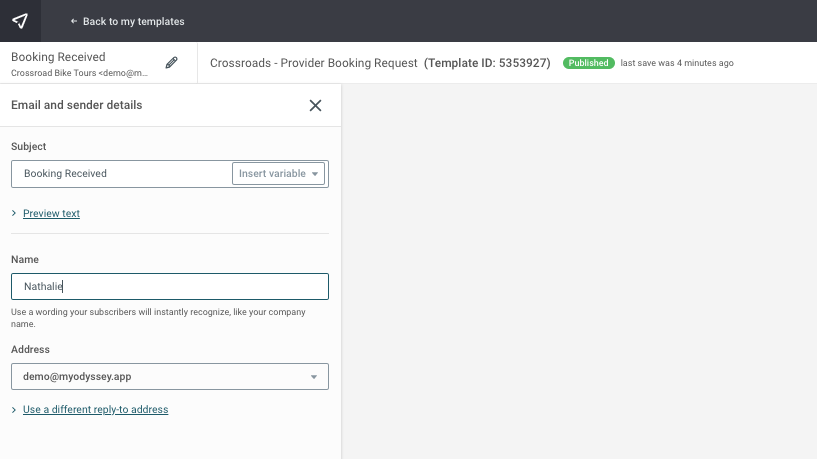
In Mail Jet (image below)
- Put cursor in the area of text you want the variable to appear.

- Paste the variable (from Odyssey) and click Insert

- Don’t forget to click Save and Publish

To Set up Conditional Sections
What are conditional sections?
Conditional sections are optional blocks of texts, or buttons, which can be pulled in to your email when certain conditions are met.
The advantages of using condition sections is that you can create one email template, which can include different blocks of text, or graphics, buttons, signature blocks, depending on the trail or other specific conditions. Therefore there are less email templates for you to create and maintain, and your staff only need to consider sending one email template, and MailJet and Odyssey control what content is used depending on the conditional sections.
Some usage examples are:
- create one single email template for a 30 day reminder to clients, but include different conditional sections to include different blocks of text for each trail you operate on. This could mean you have different header graphics for each trail, different signature blocks for each trail, different buttons taking you to different links for each trail.
- create one single pre trip email template, but include quite different content for each of the trails being used
- create one single email template, but include a block of text advising that you have received the client's height details and confirming their bike size selection, and alternatively, asking for the client height details so that you can make the correct bike selection, but only if the client hasn't already supplied that information to you
Following this third example, there are two sections of text (red and green) (see image below) that we wish to include in our single email template
- Red = yes we have your bike details etc
- Green = we haven’t received these yet – please email asap etc

Conditional sections, where MailJet will show one section of text if the client height has been entered into Odyssey,
and another section of text if the client height has not been entered into Odyssey
How to complete a Conditional section
1. Decide on the text required for each field… (see examples below)

2. Create your MailJet template as normal, and Drag and Drop a new column into your template for EACH of the different text sections

3. Then drag and drop a content block eg text into each of the new columns

4. Enter (or copy/paste) the text for each section
5. At the top left of each column (when highlighted purple) click Add condition

6. Enter the criteria for when this section should be displayed eg

- click ‘Only if’
- Add the relevant variable name eg ClientHeight (use our page on MailJet merge tags Here to help you identify what the variable name is)
- Select equals, is less than, is more than… etc
- Enter the value eg .1m
- Repeat for each section of text – changing the conditional display details as required
To setup conditional formatting for banner headings, for example
If you would like to use one Mail Jet template for all 30 day reminder emails, but include a different banner header graphic depending on the trail being used.
In this situation, create new sections for each trail's banner headings, and use the following conditional formatting:
- if L1 Code (Trail) = GTT (then include this section containing graphic a)
- if L1 Code (Trail) = WCW (then include this section containing graphic b)
- if L1 Code (Trail) = PAP (then include this section containing graphic c)
- if L1 Code (Trail) = A2O (then include this section containing graphic d)

Subject Headings
The subject heading field in MailJet does NOT get used. (Nor does the reply email address) Everything comes from Odyssey.
The subject heading is comprised of three parts:

The first component, the trip code is automatically included in the Subject heading by Odyssey, based on the trip in question
The second component comes from Odyssey's Main Menu | Admin | Email Settings | email template Subject field

and the third component comes from the company name, stored in the client's Odyssey file, in the Main Menu | Admin | Settings | Company Address details | Name field
When sending test emails from MailJet, the sender name and subject comes from the

Saved sections
Useful for headers (images 600 pixels x 200 pixels approx), footers, or even marketing text that you would like to repeatedly use or include on a range of templates, it is possible to save "sections" or blocks, and drop them into your templates. And then when you edit the saved sections, any templates which use those saved sections will automatically be updated. This makes your marketing and branding so much easier to manage!
- Hint – add your logo, social media links, and contact details as a ‘saved’ footer
To view and create new saved sections
From the Templates menu, choose Saved sections

then create saved sections. Save and publish the sections you create

To use saved sections
- While editing the template, select the Saved button from the left hand panel

- Choose a saved section from the list that appears, and drag it into the desired space in the template

If, at a later point, the saved section gets updated and saved, any templates that use this linked section will be automatically updated.
When editing a saved section, you may need to send an email request for permission to save the saved section. After sending the email request (perhaps to yourself, or to admin@creativetechnology.co.nz), you will then see a link in the top left'ish hand side of your screen, saying "Review Request", or something similar. Click on this link, and grant yourself permission!

Just activate the ‘Advanced mode’ at the bottom of the menu on the left-hand side of the Email Editor.
Linking this MailJet template to Odyssey
Once your email template has been completed, it needs to be linked to Odyssey. Log in to Odyssey and into MailJet.
- In MailJet, copy the template ID, from either the heading at the top of the window, or by choosing the drop down arrow beside Save and Publish | How to Use this template
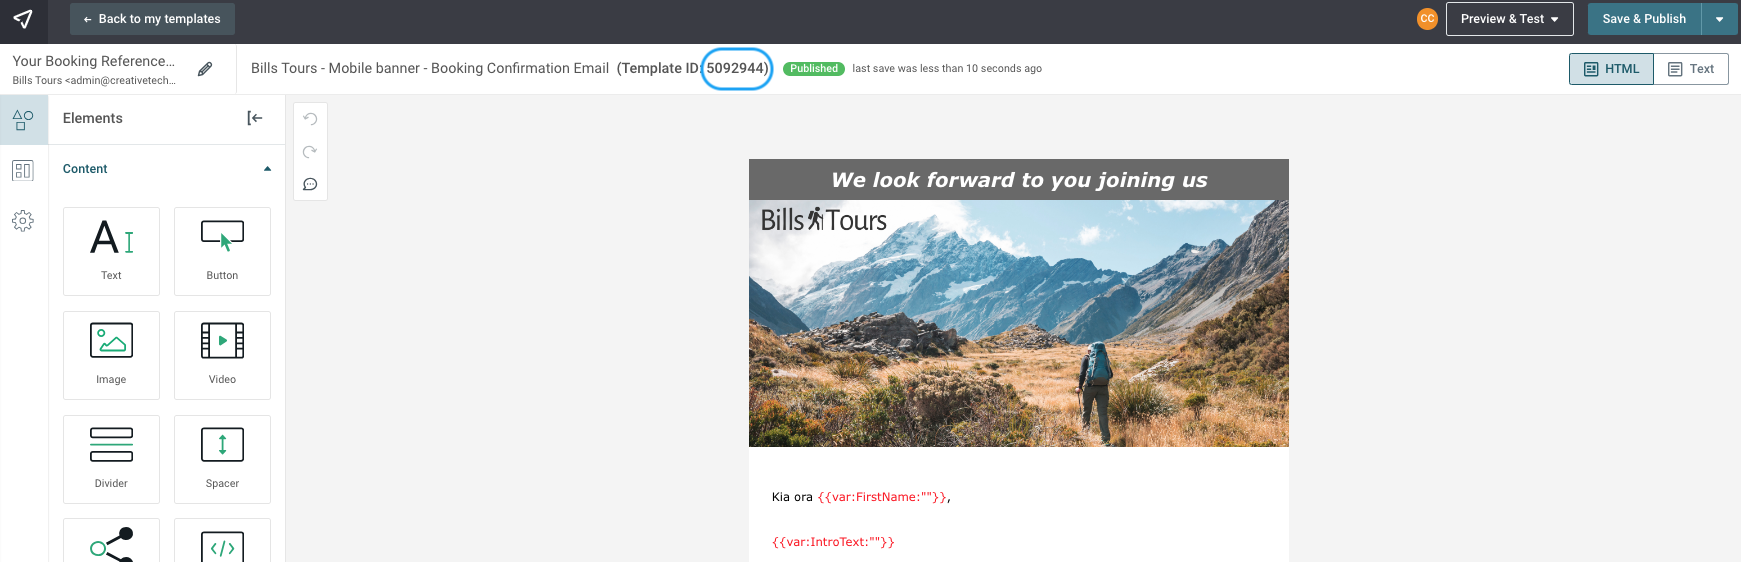

- and Paste this ID into the appropriate email template in Odyssey, like this:
In Odyssey, Go to Main Menu | Administrator | Email Settings | select a Customer Service | Finance | Operations or | Provider Template, then click to the left of one of the Template Descriptions to edit the template. Paste the MailJet template ID into the MailJet ID field.
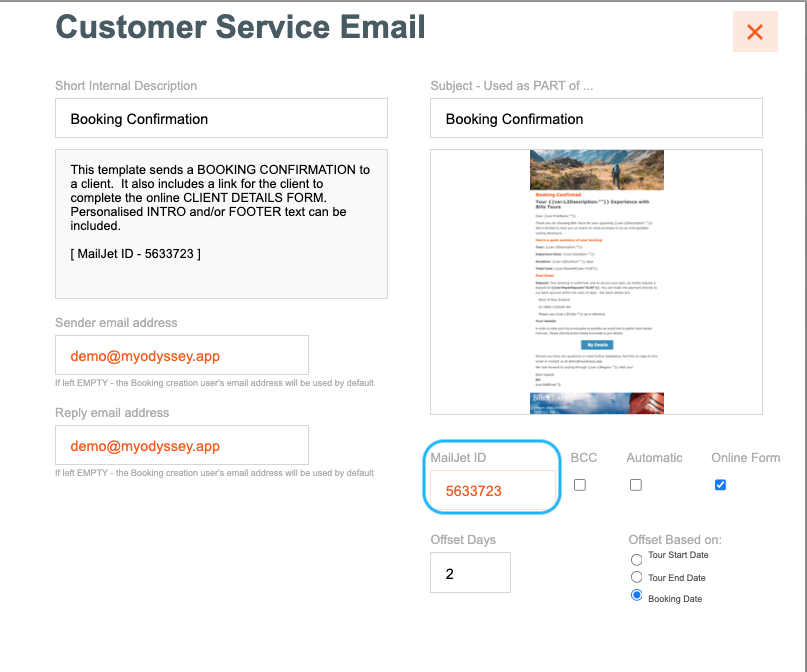
At the same time, complete the other fields.
Learn more about email template settings here:
https://support.myodyssey.app/article/303-naming-email-templates
For email communications to Providers - there are two main types. Combined, or not combined. "Combined" emails allow you to send individual providers emails regarding an entire season's advanced bookings, or to give them updates regarding an entire season's booking status (cancellations and additions etc). If the combined tick is not used, then the email is a regular, departure based email. To attach MailJet ID's for either type of email, please go to the Main Menu | Providers | Email | Provider Email templates, select a template, and enter the description and appropriate Mail Jet ID.


Learn how to include a link to a Cognito form Here