
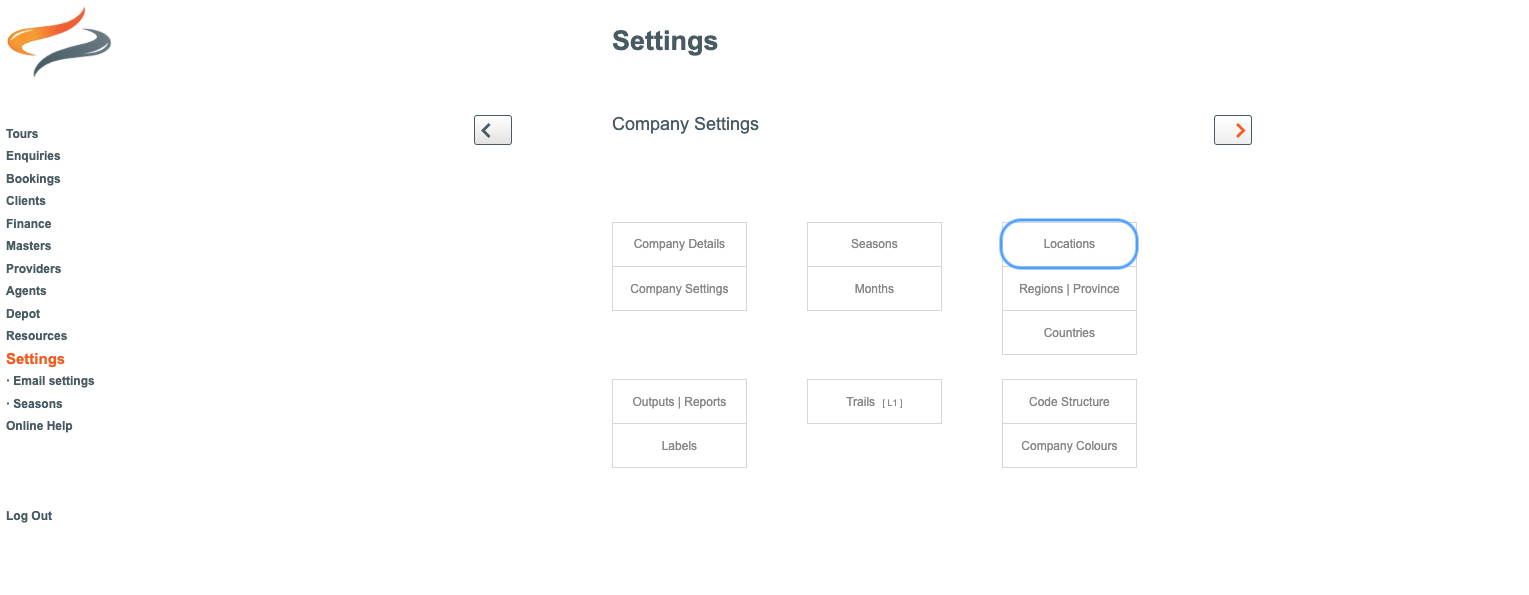
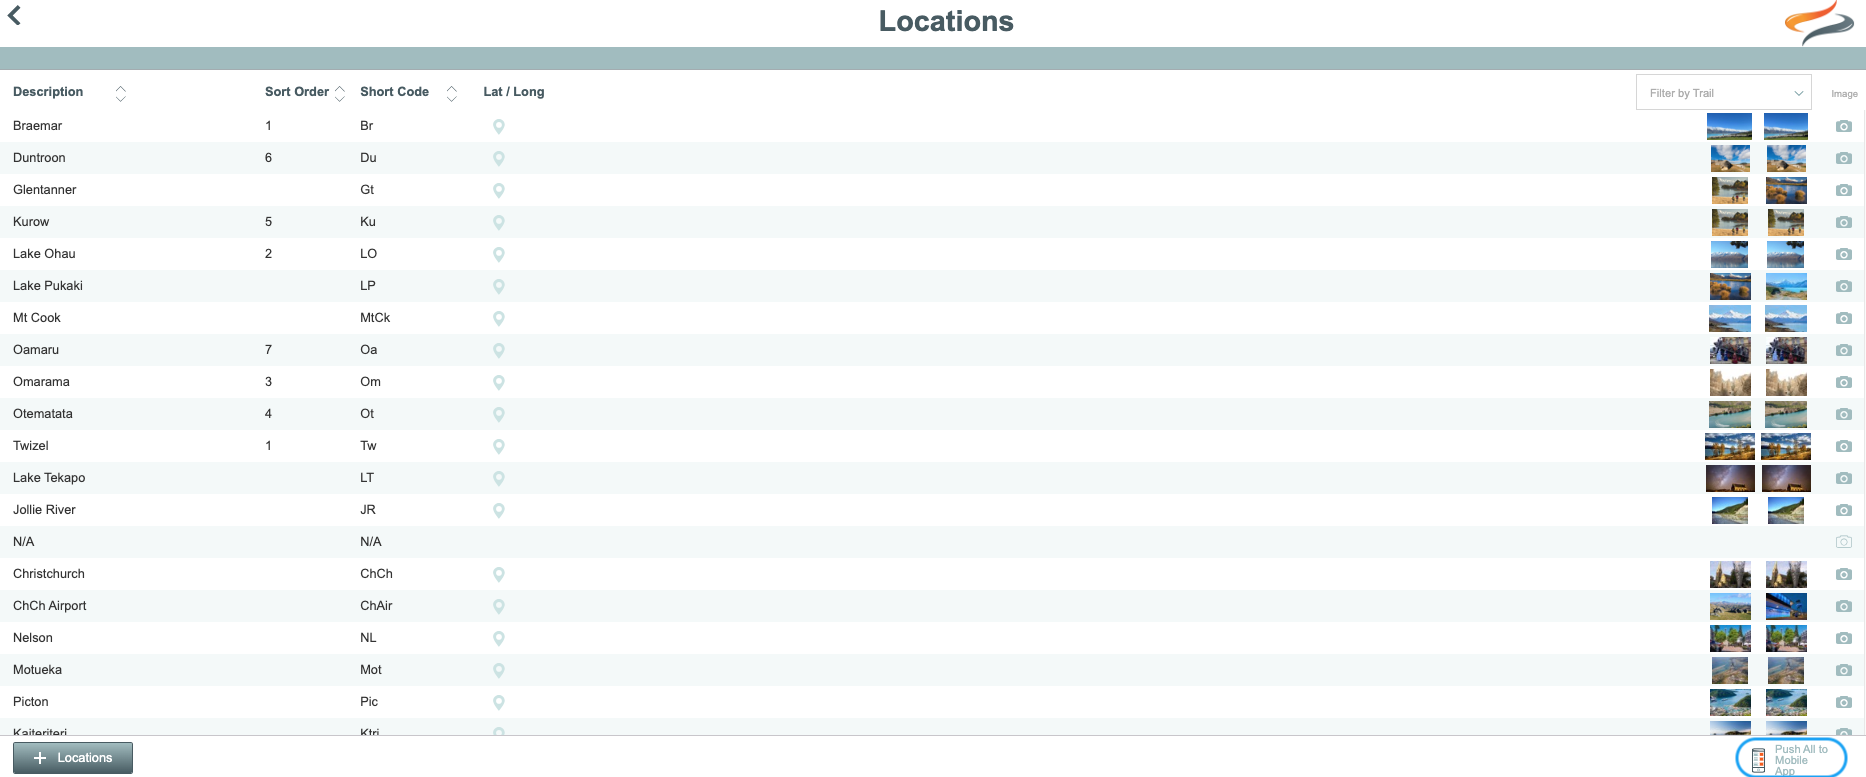
Company Settings - Locations
Location settings are managed from the Main Menu | Settings | Company Settings | Locations
Locations do not have to be offical Towns/Cities, but can in fact be any pin-point for a map. They are typically places where your clients stop along the trail for accommodation, meals, or activities, or where you provide accommodation for them, etc.
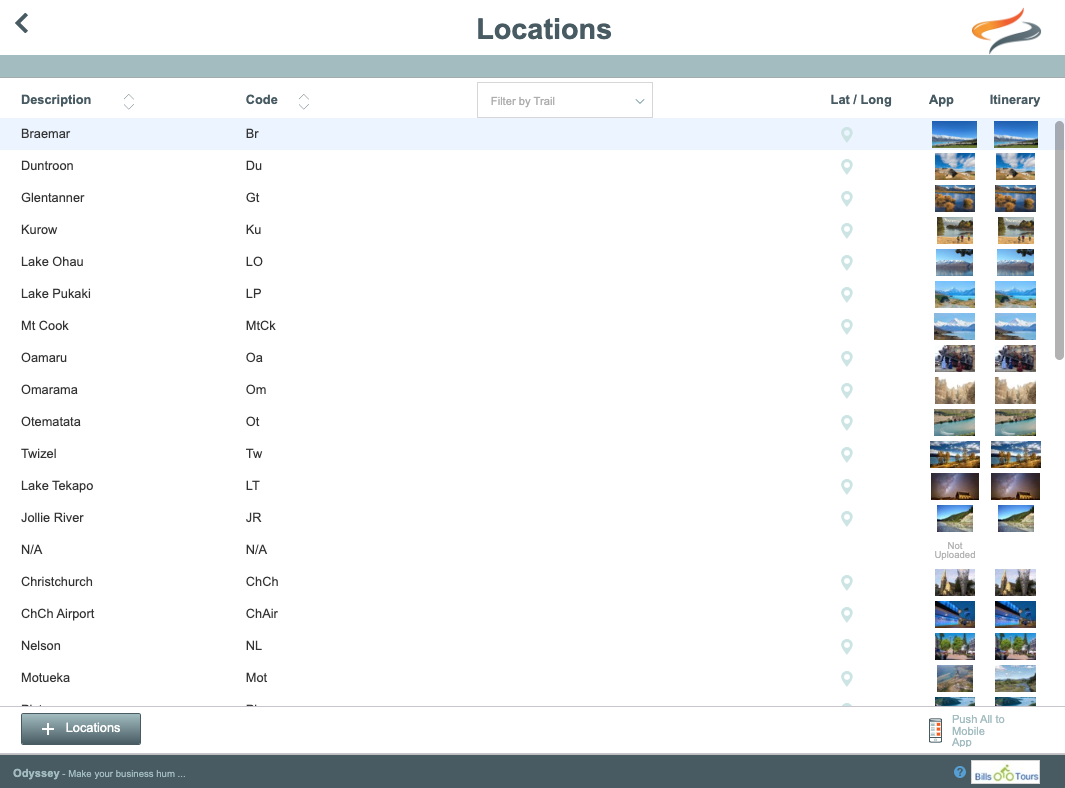

The Location list can be filtered by trail, and sorted by Description, the Sort order field, or Short code
Where are Location settings used?
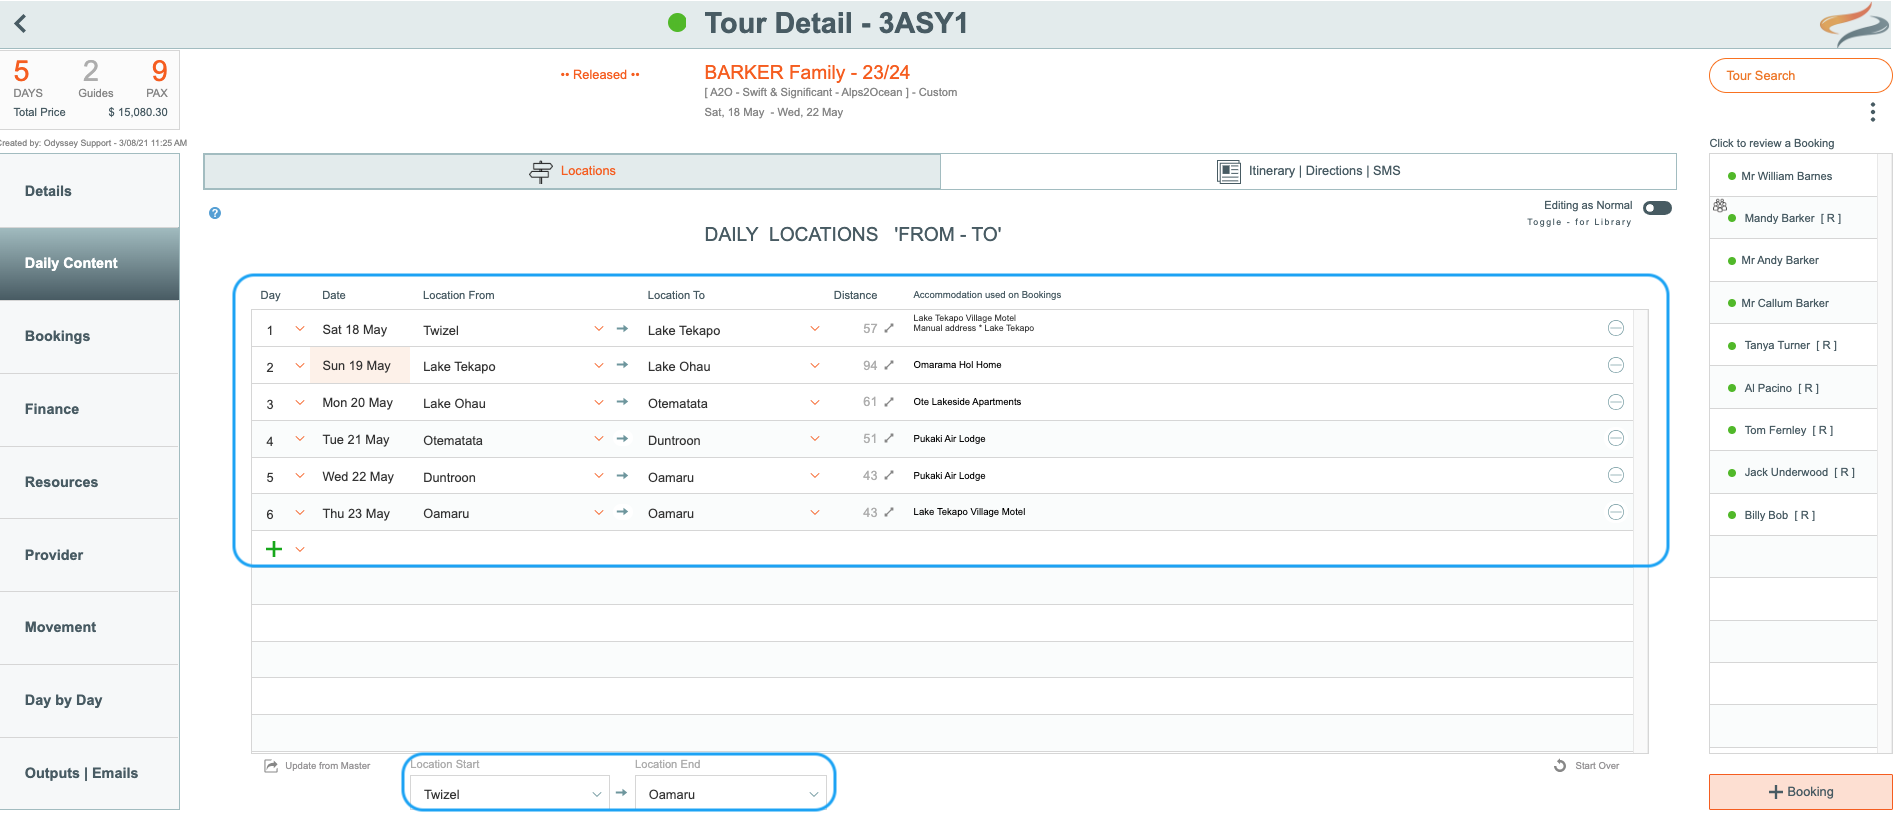
- Daily Locations are a key component of the structure of the Tour, as they define the starting and end point of each day of the client's tour, and these locations then help you select the appropriate providers, movements etc. Without a starting and end point of each day, the days would not be at all well "defined".
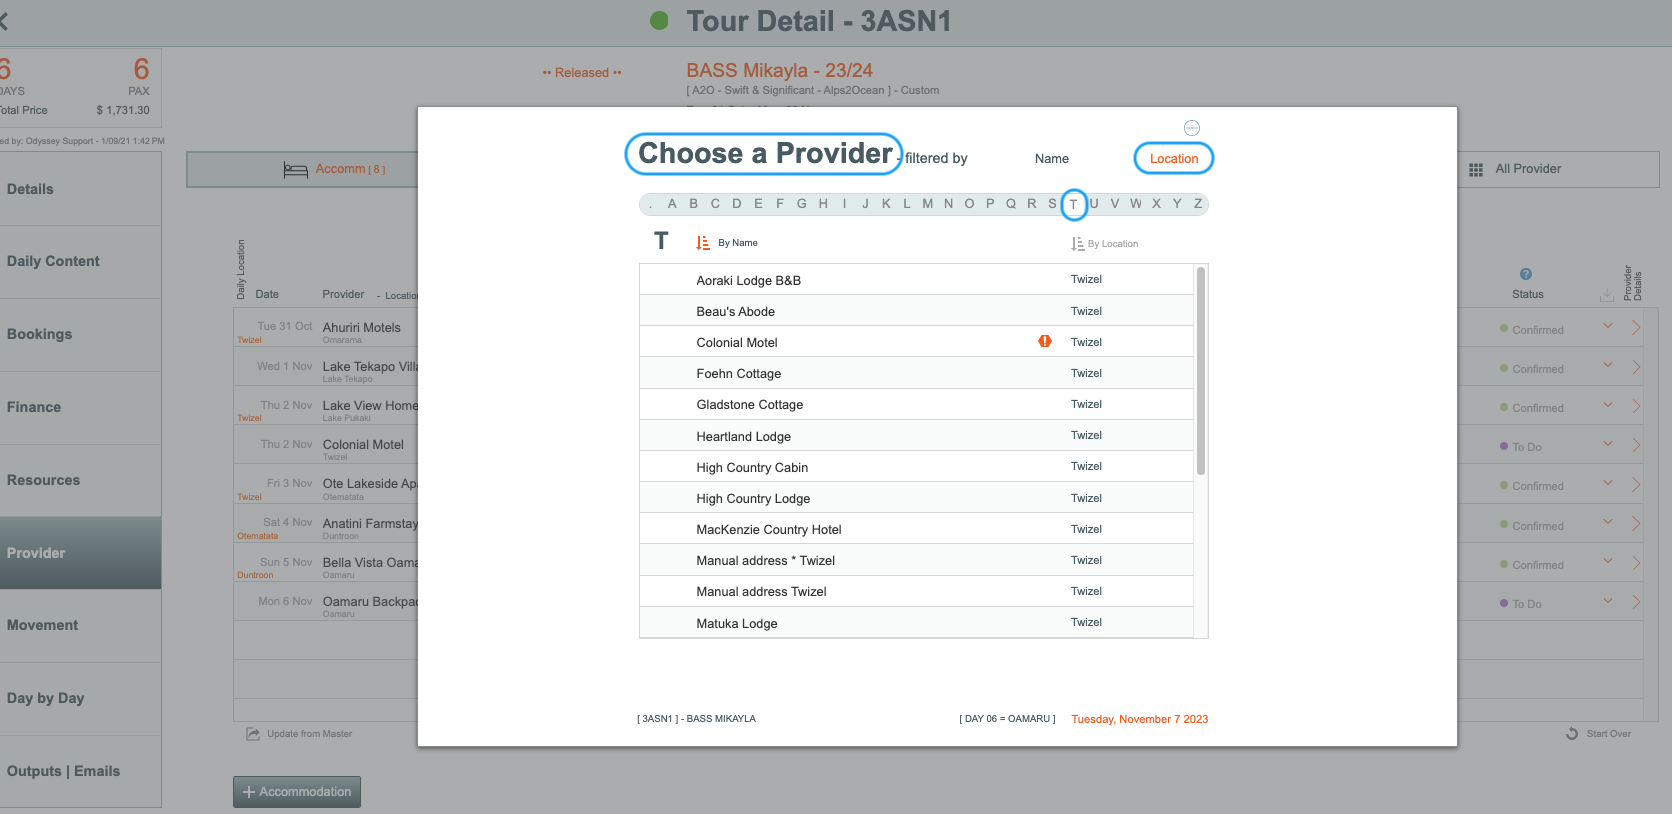
- Locations help make location based drop-down lists appropriate, and reduce wasted time scrolling around to find your required. For example, when you are adding a Provider to a tour, you can filter the provider list by location, so that the list doesn't contain all of your providers from A-Z - only those with a location that begins with L (for London), or whatever letter you choose.
- Locations are also used in Itinerary & Mobile App content, including end of day text, see below.

- Some Location fields can also be used in email communications with clients
Before you start!
Here's a great tip. If you have the L1/Trail selected at the top right hand side of the Locations list...
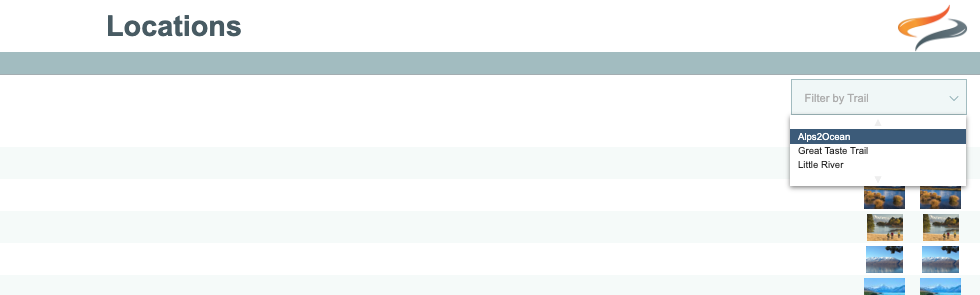
then when you have one Location open, use the < > arrows to navigate through your list of locations, for speedy data entry
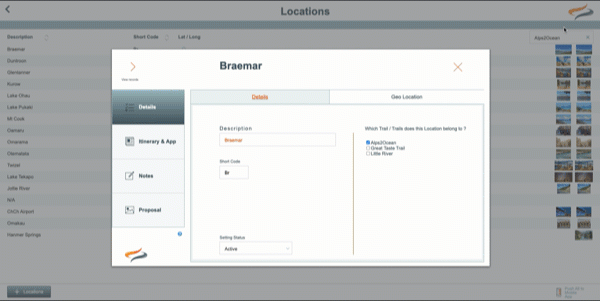
To Create a New Location
- Click the + Location button

Details
Details
- Enter a Description and a short code for the district. The short code is used in places where the full name is too long for the space available
- On the Trails field, check the trail/s that operate in this Location
- The setting status field can be switched to "Archived" if this is a Location that is no longer used on your trails
Geo Location
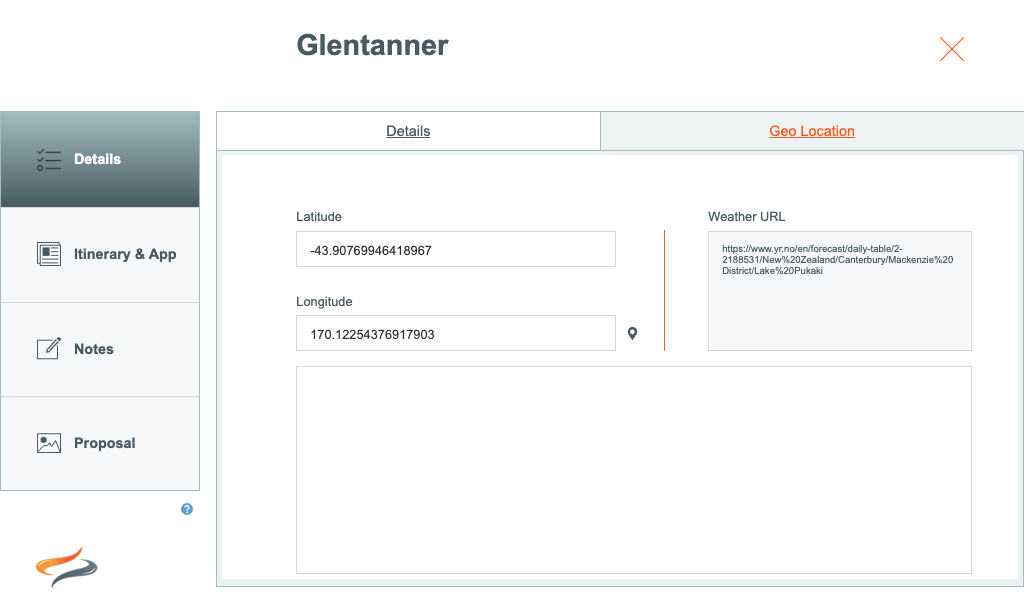
- Enter the Latitude and Longitude co-ordinates for this location
Steps
- The advised method to gather and store values for these fields is:
- go to that location in Google Maps
- 'RIGHT CLICK' on the Map location you want, and the Google pop-up window displays the values as Odyssey requires them.
- Use the copy button Google provide
- Go to Odyssey's Main Menu | Settings | Company Settings | Locations,
- open the Location required, and go to the Geo Locations tab
- Paste the value in one of the fields... noting that BOTH will be pasted
- Remove the one not required
- Repeat the paste & delete the non required one, in the second field

=
GEO locations form the start and finish of your shuttle/bag runs. Enter location latitude and longitude references into these fields if you wish.
Tip: For Locations that have one of your Depots based in them, it's a really good idea is to use the GEO location of your local depot as your Location. That way your runs will start and end at exactly the right places.
- Distances can also be calculated between two points, based on Locations
- Where a Location's address is not understood by the GoogleMaps distance calculator, the exact location can be enhanced by populating the Latitude & Longitude values for that Location.
Learn more about how to find Latitude and Longitude values Here
Learn more about creating runs Here
Learn more about run maps on the Depot's Daily Diary page Here
Weather
Odyssey has an inbuilt Weather function to support the Depot staff. Completing this field is optional.
Learn about the Weather function Here
The Weather function needs to know which Districts your staff might be looking for weather forecasts for.
To populate this drop down list:
- On your computer, visit to the Yr.No website (You may have to change the language to English, or your preferred language, from the Menu Option at the top right )
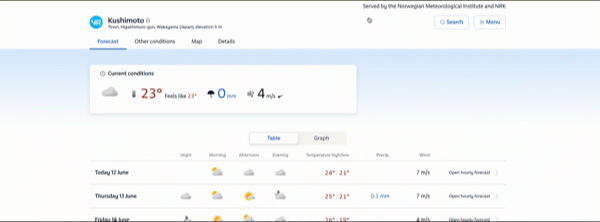
- Click the search function, and enter the name of the location you want to use, and press enter. A list of variations of that name might appear, click on the name you want.
- A page like the one below appears
- The "URL" of the page you are now looking at is circled in red
-

Copy this URL on the Yr.No website
- We want to copy that URL, so highlight all the text in the URL, and select copy (by right clicking)
- In Odyssey | Administrator | Settings | Company Settings - 2 | Location, click on the relevant district to open it up. In the example above, we would be opening the Twizel location
- Click on the Info tab.
- paste the URL into the Weather URL field
- Click Close
- Twizel is now a location available to be chosen from the Weather location drop down
Itinerary Content - App & PDF
Content
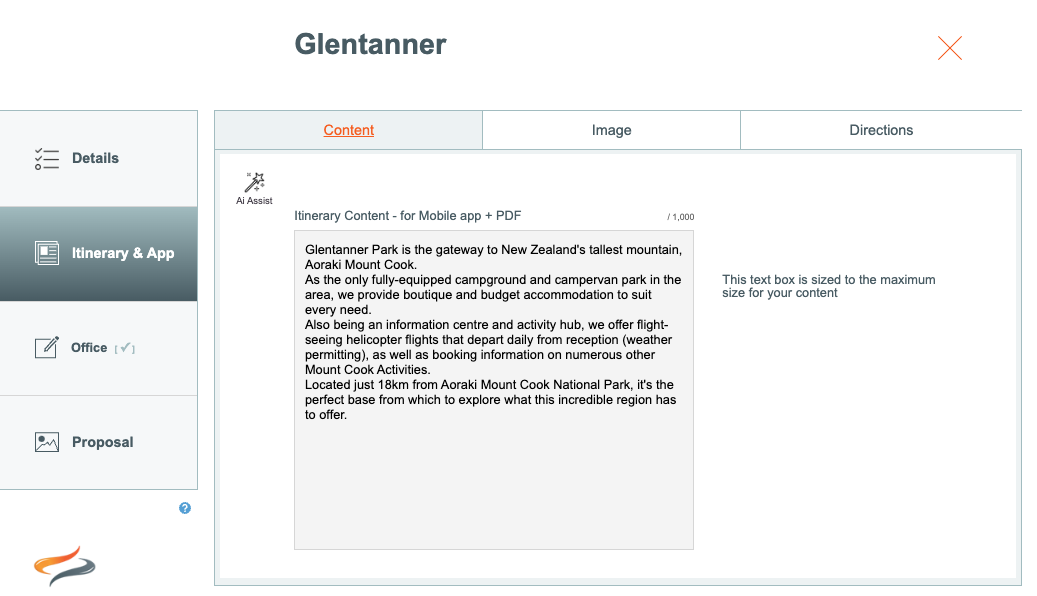
Itinerary content can be entered automatically, via AI assist, or manually
To enter Itinerary content for the location using AI assist:
- ensure there is an appropriate location name, and correct geo locations entered for this location, as both are used to help AI find the correct data
- click the AI assist tool
- content will automatically appear in the text box; review it for accuracy, and the correct "focus"
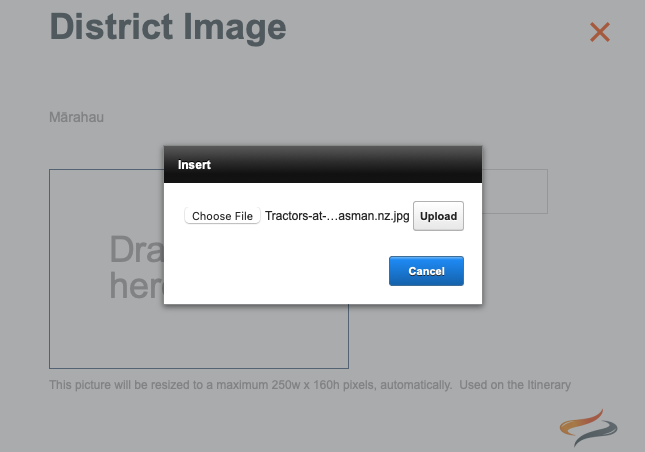
Image

From the Location | Itinerary & App | Image tab
- click the Suggest button under the image space
- a new window will appear in a separate tab, providing you with a selection of possible images using the geo location and location name, with a range of image options for you to select from
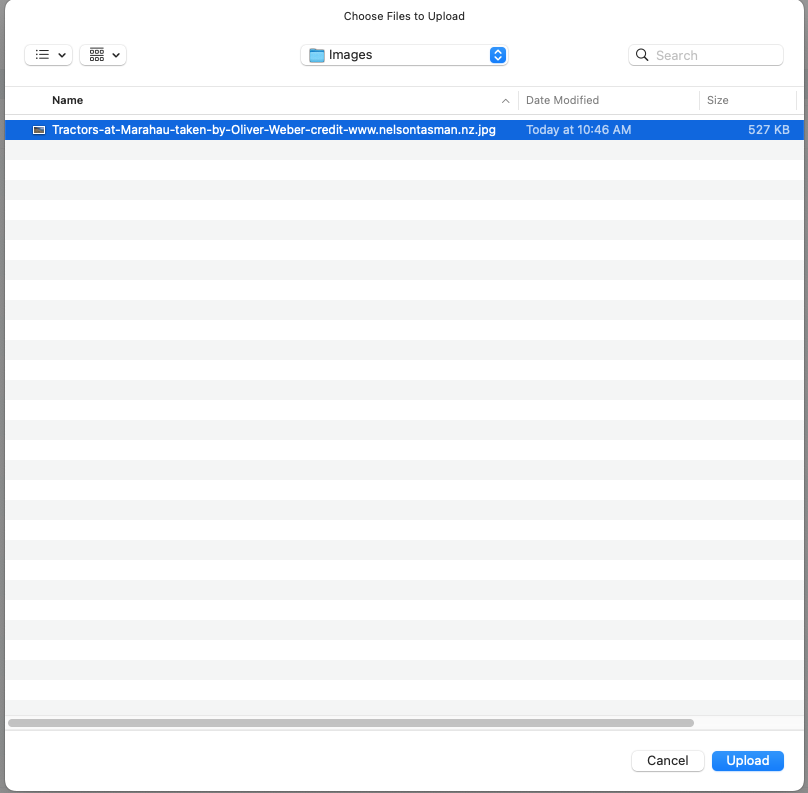
- Download a free image, and either
- drag it into position in the window, or
- click the Choose button, select it from your downloads location, and click Upload
- Either,
- a) drag an image from your desktop to the space where it says "Drag image here..." or
- b) Click the Choose button, locate the image in your filing system, click on it, then click the Upload button
Check that you have selected the correct file, and click the Upload button in the following window
Note: The image suggestion tool is an external site, and does not include Geo Locations as part of the search criteria (the way it works for the AI text tool. If an incorrect image location is being found using the AI suggestion tool, please use your standard google search tool to find a suitable image.
Pushing to the Mobile App
For Odyssey Clients who use the Advanced Mobile Apps module, any time you make a change to a Locations Itinerary Text or Photo, it is important to use the Push to App button to push that new information to the Mobile Hosting server.

On the Locations list, the Push to Mobile app Button will automatically push all Locations that have a photo to the Mobile App

For more information on setting up fields for the Itinerary, view Here
Directions
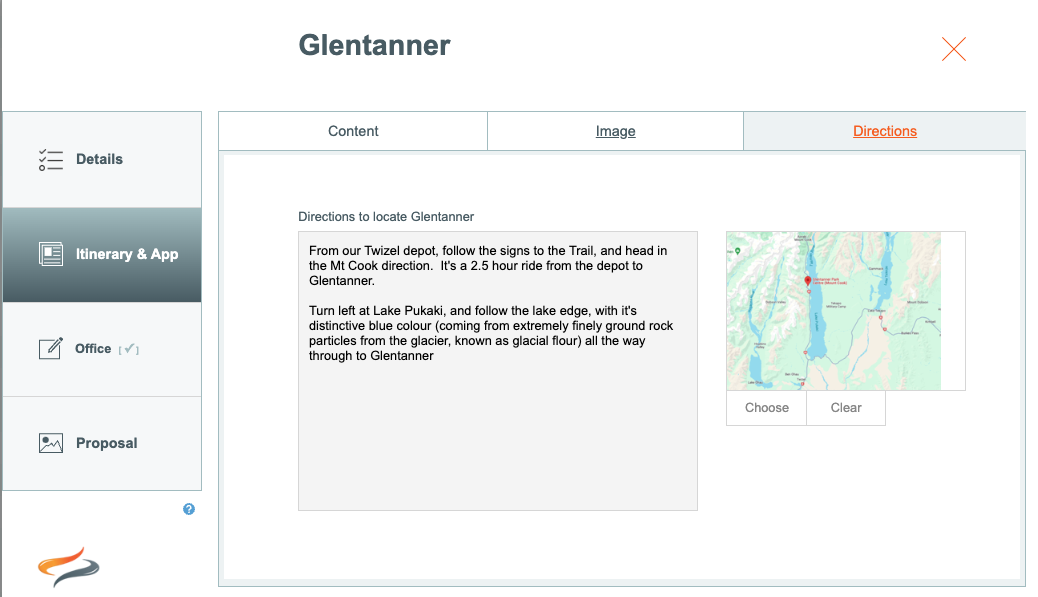
- Enter any Directions to help your riders onto or off the trail, for the Directions Document.
- Upload a map for the Directions Document
To learn more about the Directions Document, click here
Still need help? Contact Us
Office
Notes

- There is an Office Notes field for you to record any relevant notes relating to this Location, for internal use
Proposal
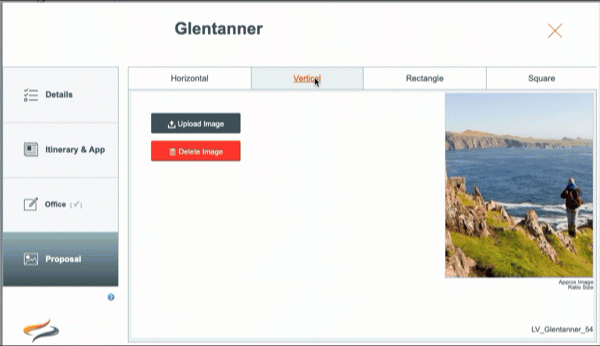
The Location | Proposal tab allows you to upload up to four different images (Horizontal, Vertical, Rectangle, Square) to allow you to use a range of enticing images in your online proposals.