
Booking - Finance
See Tour level finance here
This page is currently under construction
The Tour | Booking | Finance area is initially populated by the Finance | Defaults that were defined at the Departure level of this trip. i.e. if a Base Trip cost of $1200, and if "included in bookings" was ticked, then all bookings added to this tour will also reflect that those defaults, initially.

However, the costs for each booking can be changed at any time. Here's how:
Charges/Discounts
Either
- From the Tour | Finance | Charges/Discounts tab, select the base trip cost

- Click the Add to all button, if all clients should be assigned this Charge/Discount
- or click the Individual Quick Add + button, if you only wish to assign this cost to individual clients

OR
- This view can also be found by going to the Tour | Booking | (select a booking record) | Finance tab

- and clicking on Charges/Discounts

Note:
- Costs for Resources, Providers and Movements do not show in the Finance view. Check each of the appropriate tabs for those costs.
To edit a charge/discount for a booking:
- From the Tour | Finance | Charges/Discount screen, Click on the Charge/discount line you wish to edit, e.g. Base Trip costs,
- then from the Bookings tab, click on the name of the client whose finance charges you wish to change

From here you are able to:
- Tick to indicate if this item should be charged
- View the tax inclusive retail and wholesale price
- Tick the tickbox if this figure should be included in the deposit required calculation
- Tick the tickbox if this figure should be included in the agent commission calculation
- Office notes for Finance will also be shown, if they have been entered
- the ability to delete a record from here, by clicking the minus button
- or delete all, if none of these clients should have this particular charge
To make further changes to the booking level finances:

- Click once on the name of the client/booking:
- From the Details tab:
- make this client self paid, (not paid by another client on this tour)
- the booking price, and the RRP can be overridden by clicking the override button, entering the new values, and clicking apply
- if an Agent has been assigned to this client, and the agent fee % should be different to that assigned to the agent, enter the override value here

Notes/Office tab

- enter any office notes
Edit multiple selected
If you wish to make the same changes to a number of bookings on this tour,
- from the Tour | Finance | Bookings tab
- click in the tickbox on the left hand side for each of the selected clients
- or click the Select all tickbox at the top
- click Edit x selected

Add selections
All the changes you make here will be applied to all of the selected clients:
- Office Notes
- Charge for this item
- Include in Deposit calculation
- Include in Agent commission calculation
- Retail Price Override
- Wholesale price Override
Click Apply Selections when done

Remove selections
All the changes you make here will be applied to all of the selected clients. Tick the tickboxes for those items you wish to REMOVE.
- Office Notes
- Charge for this item
- Include in Deposit calculation
- Include in Agent commission calculation
- Price Override
Click Remove Selections only
or
- Click Delete Booking Assignments, if you wish to fully delete this Charge/Discount item from the selected Booking records.

Xero Integration
- IF the Accounting ( Xero API ) Advanced Module has been activated by Creative Technology for your Odyssey set-up, there will also be a + Push Costs button to push the costs through to Xero.

- The last time costs were pushed through to Xero will be displayed to the left of the button
To add other costs or discounts
Click the + Costs/Discounts button


- Select a cost description from the drop down list
- Enter the cost (incl GST) in the cost field (Note that the ex GST price is displayed underneath the cost)
- Enter a Note, if required (e.g. this discount is applied because the client is a returning client)
- Tick the charge box if the client is going to be charged for this item
Note: the Departure code for this trip is recorded above the cost description field, for your reference
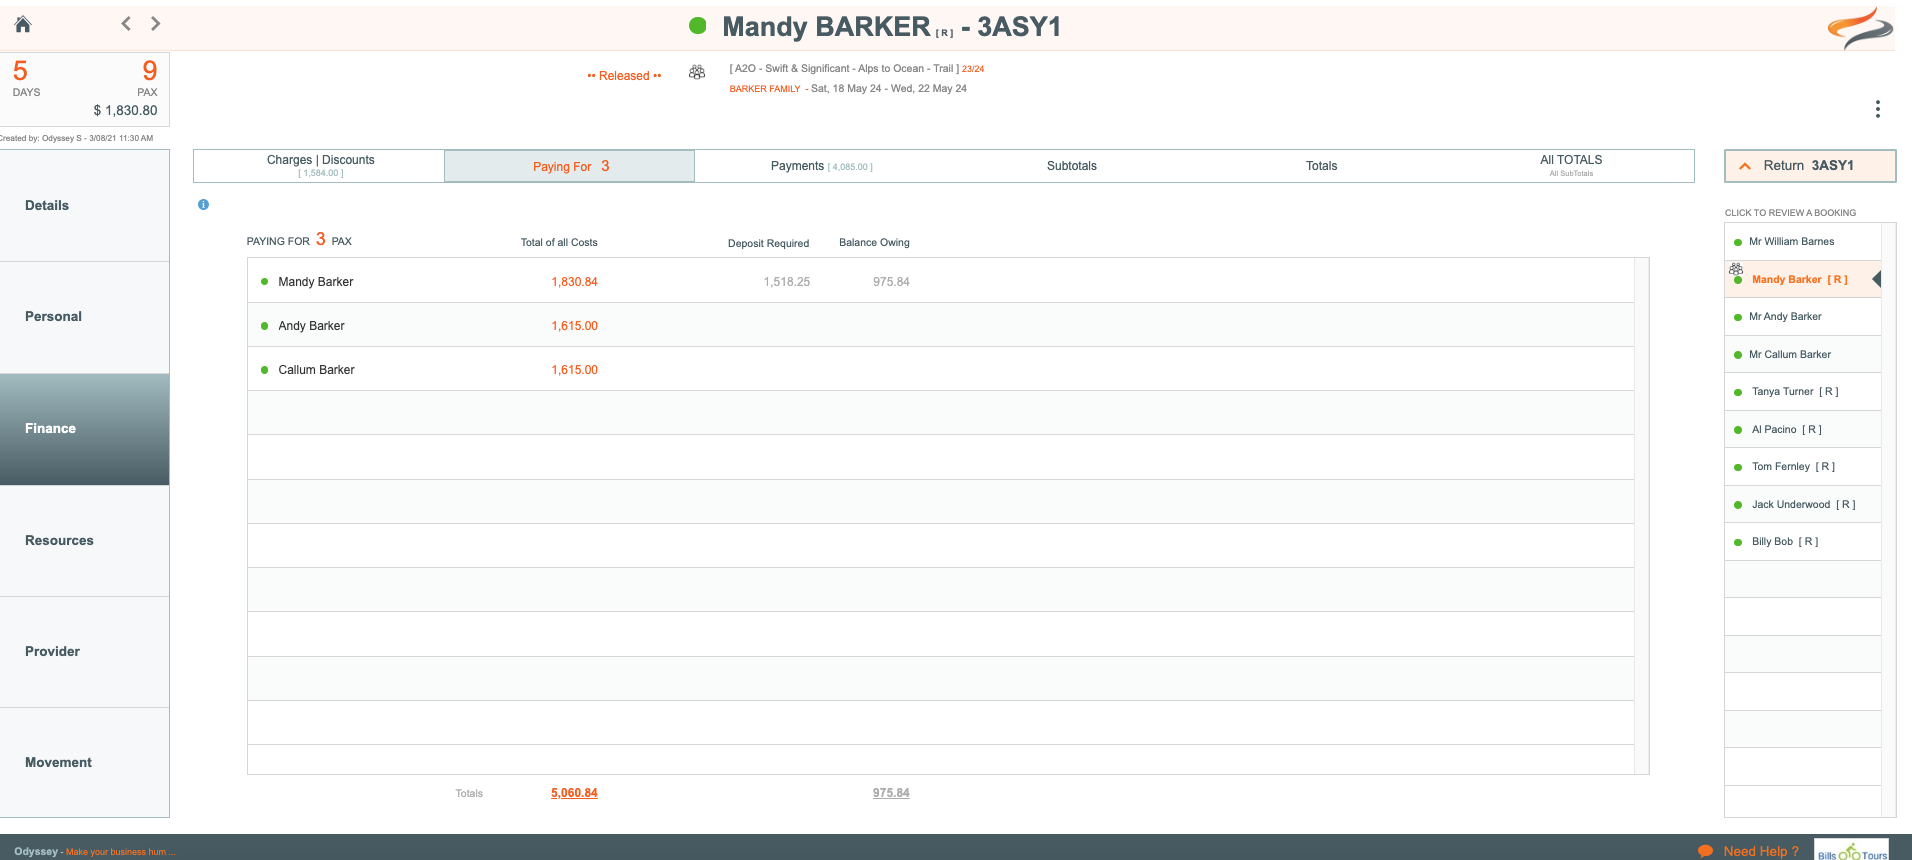
Paying for
A client can pay for their own booking or pay for others.
If a client is has nominated that someone else will pay for their booking
From the Booking | Finance tab
click the + Paid By button

- and select a payer from the list of bookings on this Departure.

Note: The "'Paying for x Pax' field on the Payer record will be adjusted appropriately.
Note: changing the Payer causes a huge amount of recalculations to happen (because you may have assigned a different person to PAY for all their items), so wait a second or two after clicking the close button for it to complete the process.
Note: a Payer can be a non-participant of the Departure/Trip, but listed on the Departure/Trip. This is managed by the Booking Status field, learn more Here. The number of Pax correctly excludes this non-participant.
Once another person has been nominated as a payer, the + Paid by button changes to - Self Pay. To switch this booking back to being a self paid option, click the - Self Pay button
Payments

A payment can be a deposit, an initial payment, part payment, or payment in full, entered directly into Odyssey, or pulled from Xero for those clients who use the Advanced Xero module. There are a variety of payment types which are defined in your settings Here
Each time a client makes a payment, it gets recorded on the Booking | Finance | Payments screen
To record a new payment
- Click the + Payment button


- Select a payment type from the drop down list
- Enter a payment date, and tick the box if this is a first payment. (Some Odyssey users take it that if a client makes a first payment, this is an indication that the trip is going ahead. By double clicking a departure on the Departure Dashboard, you can get a summary which shows if and when a first payment has been made) Learn more about the first payment feature Here
- Enter the amount of the transaction, and if payment is by credit card, enter the credit card fee
- Record any notes in the Notes screen
When the payment has been recorded, Odyssey will automatically record the name of the staff member who entered this payment, and enter it in grey text under the transaction.
Subtotals

The Booking | Finance | Subtotals screen provides you with a breakdown of the entire range of costs for this Booking. Charges/Discounts, Bike hire, extras, provider costs, movement costs etc.
The first row of costs shows what the client will pay for themselves, the second row shows the combined costs this client has elected to pay for.
Costs can be displayed inclusive or exclusive of GST by clicking the appropriate radio button.
Totals
The Booking | Finance | Totals screen lists total costs for the individual payer, and combined payer. Total costs are displayed, along with the total amount paid, and the outstanding balance, if any. Credit card fees are also shown.

Xero
IF the Accounting ( Xero API ) Advanced Module has been activated by Creative Technology for your Odyssey set-up, there will also be two buttons:
- Pull payments - will enable you to pull payment transactions FROM Xero TO Odyssey
- Push Costs - will enable you to push cost amounts FROM Odyssey TO Xero
Note: the date the transactions were last pushed or pulled to Xero will be recorded above the buttons
All Totals
The All Totals tab on the Booking | Finance screen takes you to the Finance Summary for the entire tour.
Learn more about this view here
