
How to send bulk Provider emails for combined departures
The email sending process from the Providers record is described as 'Bulk' emails because although the email is sent to an individual Provider, it contains an attachment which includes details of multiple departures.
Odyssey will gather all the details set up in the Tours for the selected season, and put these details into one of two attachments.
There are two varieties of these "bulk" email attachments that can be sent to Providers.
The two email attachments are:
- Provider Initial Bookings
- Provider Booking Status
Before you begin, you will need:
- Email templates set up in MailJet to support these two types of attachments
- Connect those MailJet templates to Odyssey's Provider email settings
Learn more about these two topics Here
This means with ONE EMAIL you can
a) Email a .pdf to any selected provider at the beginning of a season with all of your anticipated bookings with them for the upcoming season.
These are known as BULK emails and are sent from the PROVIDER record
and also
b) Keep each provider updated of your bookings status with them - showing any cancellations or modifications as the season progresses, by sending them an email with a .pdf attachment.
These are sent from the individual Trip/Departure.
and... there are two versions of this email, depending on your business model.
- Generic accommodation ( Data from Departure level )
- Selected accommodation ( Data from Booking selections )Tip: If you don't see these options, turn them on in your Paperwork settings, learn more Here
To send the Provider Initial Bookings email
1. Create and store the attachment which will be included with your email
- From the Main Menu, Go to the Provider | Email | Send tab
- Select the correct season from the right hand corner of the window

- Click on the Initial Bookings - Multiple Departures record
Tip: You may see an icon under "Last stored" showing you when you last stored this document prior to emailing. If you haven't used this before, there maybe no previous history to see
- You will be taken to a view of the Pre-season Bookings document, which will be automatically attached to your email. For a preview of what the Provider will see, click on the Preview button.
- Click the orange Downward arrow button to store the attachment.

- And now, your email can be sent (But first, if you would like to include some personalised text to your provider, follow Step 2 below)

2. Include Personalised text
- If you would like to include some personalised text to your provider, perhaps confirming a conversation you have had with them, click the icon of a person with a pencil beside it.
- From the drop down list, select the email template that this text will be included with
- Type any intro text, and any footer text
- Close the window

3. Send
- Click the Send button

- In the next screen,
- select the name of the email template you wish to select
- ensure the correct attachment will be included
- if you wish to receive a Blind Carbon Copy of this email, click the tickbox
- and click Send

Provider Booking Status email
To send the Provider Booking Status email
1. Create and store the attachment which will be included with your email

- From the Main Menu, Go to the Provider | Email | Send tab
- Select the correct season from the right hand corner of the window
- For the Provider Booking Stauts email only, select the Start Month, and the End month, if you wish to only report on a specific date range.
- Note that the month's seasonal numbers may appear - the numbers are based on the seasonal range your company has defined, so if your company season is from July to June, then July will be month 1, and December will be month 6.
- The clear button can be used if months have previously been selected, but you wish to report on an entire season
-
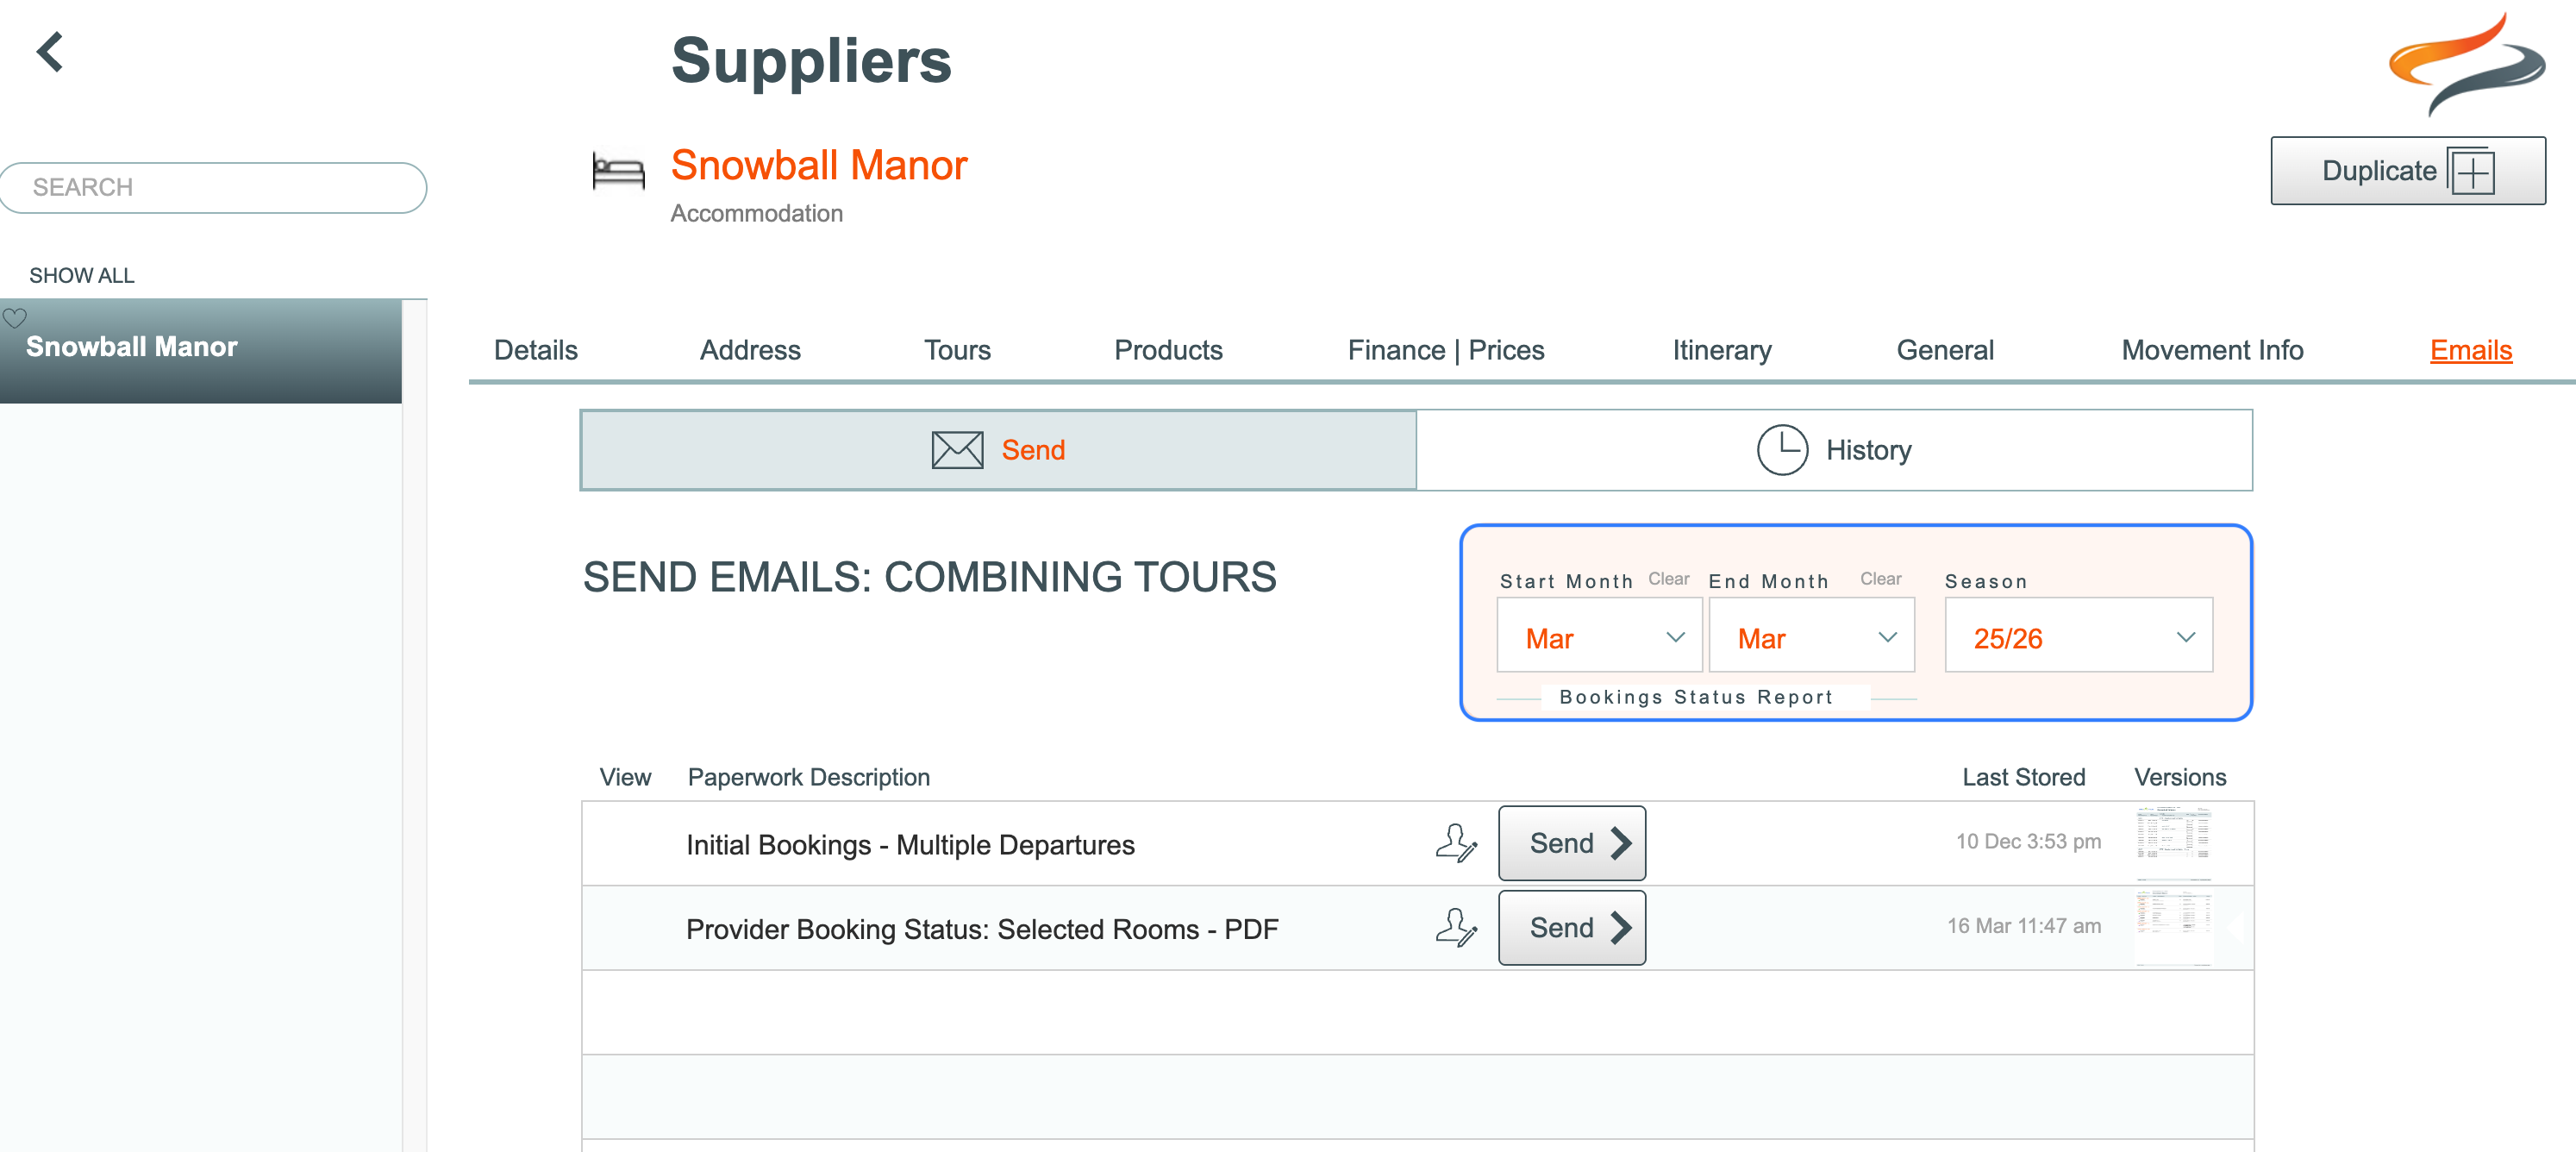
Making Month Start and Month End selections, as well as Season, for the Provider Booking Status email

- Click on the Provider Booking Status: Selected Rooms.pdf
- Tip: You may see an icon under "Last stored" showing you when you last stored this document prior to emailing. If you haven't used this before, there will be no previous history to see
- You will be taken to a pre-Preview of the Provider Booking Status document, which will be automatically attached to your email in the next step.

- For a preview of what the Provider will see, click on the Preview button
- Note that up to four different room types can be shown on the report, per trip. If you need to communicate that with your provider, we strongly suggest you add those details in the personalised text to the provider.
- Having the provider's wholesale price showing in this report is optional, depending on your company settings. Learn more about that setting here.

- Click the orange Downward arrow button to store the attachment.

- And now, your email can be sent (But first, if you would like to include some personalised text to your provider, follow the next step below)
- If you would like to include some personalised text to your provider, perhaps confirming a conversation you have had with them, click the icon of a person with a pencil beside it.
- From the drop down list, select the email template that this text will be included with
- Type any intro text, and any footer text
- Close the window

3. Send
- Click the Send button
- In the next screen
- select the name of the email template you wish to select
- ensure the correct attachment will be included
- if you wish to receive a Blind Carbon Copy of this email, click the tickbox
- and click Send

- Click the Send button