Master - Create New - Details
A Master is a template which is based on the products you sell and list on your website. A master contains all of the default settings/selections/costs that can be reused for subsequent Departures (or Tours/Trips, whatever your word for this is).
Learn more about Masters, and how they work here
Making a new 'Master' from scratch
( as opposed to duplicating an existing 'Master' ) ...
There are two ways of Creating a New MASTER
1. From the Main Menu, select Masters | + Master button

OR
2. From the Main Menu, select Masters | List and click the + Master button

The first screen that you see above, establishes some primary fields which are required, before moving onto the full 'Trip' Details screen where the remainder of the set-up occurs.

- Choose the name of the Trail or Location this Master is based on from the drop down list
- Give this Master a name in the Description field
- Assign a Shortcode, up to 3 digits
- From the drop down list, select the season this Master applies to. (Note, you can reapply a new season, and new rates, to this master in other steps at a later date)
- If a Package Master, enter the number of days that this Master is based on. This field must have a value, and there will be a "default" value of 1 day. The drop down list caters for 1-80 days. If a Custom Master, the number of days is not required
- Select the Pricing Model from the drop down list - is it priced on a Quoted basis, or a Costed basis. See the separate Help page on Quoted Vs Costed
- Click create
- You are taken to the Master Details tab
Master | Details | General

- Bundle Masters are currently under development
- Trail: This is the Trail, or L1/Level 1 (such as Category, Country, etc) that this tour is based on
- Code: The Code field is used to help build the Tour's Trip code, and is designed to show which Master was used to build the trip. e.g. 3ACY1 means the Trip is scheduled for the 3rd season, based off the A2O Captivating Highlights Master, in May, and this is the 1st iteration of this trip in May.
- Number of Days: Enter the number of days this trip runs for. Note that this does not create the daily records, it is a reporting value only.
- Enter a reporting sequence from the drop down list. This controls the position of this master in the Master | List view
- NOTE: We strongly recommend that you don't duplicate sort codes. We recommend a structure like the one below, where each TRAIL has a different sort sequence range, and each Master has a unique sort number within that range
- Trail: A20 (use a range of sort numbers from 1-9)
- Master: A20 Swift - sort sequence 1
- Master: A20 Hydro Lakes - sort sequence 2
- Trail: GTT (use a range of sort numbers from 10-19
- Master: GTT 1 day - sort sequence 10
- Master: GTT 3 day - sort sequence 11
The purpose of the sort order field is so that if you wanted the GTT 3 day master to appear in the Master List view above the GTT 1 day master, change the sort number of the GTT 3 day trip to 10, and the GTT 1 day trip to 11.
- Trip type: Select if this is a package master, or a custom master, from the drop down list
- Walk in Use: If this Master is designed for Walk in/Counter Sales customers only, tick this box. This type of tour is designed for Depot Sales, and simplified layout will be used for these tours at Reservations and Depot level, as they do not include accommodation, and are typically only 1-2 hire days, with some movements.
- Briefing Duration Minutes: Enter the default Briefing duration minutes. This helps with the logi
- Briefing time: The briefing time entered here on the Master (or amended at Tour level) will show on your client's Itinerary.
- Depot Use: Put a tick in this field, if the Master is intended to support Walkin Bookings (Counter Sales)
- Enter a minimum and maxim number of people required for this Master, if it's a tour with a set departure date and these requirements are important to your business. If not, you can leave these fields blank, or turn the view to the fields off using the view (eye) on/off buttons. Learn more about this feature Here
Note: For Users of of the Ody Shop Advanced Module. If you change the minimum or maximum number settings, remember to go to the Master | Details | Ody Shop tab, and push the Settings button to update the Ody Shop settings
- Click the Open Tours button to open either all Confirmed only, or tours with any status, based on this seasonal Master. You can then manually view and update these tours as required.

- Click the Update Tours - Details button to push the changes you have made to this Tour''s Details | General tab, to all tours based on this seasonal Master.

General
Learn more about general settings Here
Please follow the links at the bottom of the page to continue learning how to create your Master.
Settings

- Pricing Model: On this screen you can change the Master's Pricing Model from Quoted to Costed, or vice versa. See the separate document on Quoted vs Costed here.
- Select the correct currency from the Currency drop down list. (This updates the currency setting on the Booking Form, among other things)
- Check that the GST rate is correct from the tax drop down list, and if not, select a new rate
- Balance days prior override - whenever there is a selection in this field, that number of Days will be used in the Balance Owing calculation used in Client Comms etc. This is used where some providers require final confirmation deadlines, so therefore payment from the client might be due earlier than the "standard" setting in Settings | Finance | Default settings. This field is not editable at Departure level, this is a MASTER only setting, although the value is visible for reference purposes only, within the Departure.
- Select which Depot Details should be used on Itineries based on this Master - some Odyssey clients have more than one Depot to select. Depots are set up in Admin | Company Settings | L1
- Tick the Released box if you wish all Departures based on this Master to be automatically released. (Any departure can be released manually if this option is not selected) Learn more about released here.
- From the drop down list, select a colour you would like this Master to be represented by in Calendars
- Change the Status of this Master; if it is no longer in use, select Archive from the Drop down list
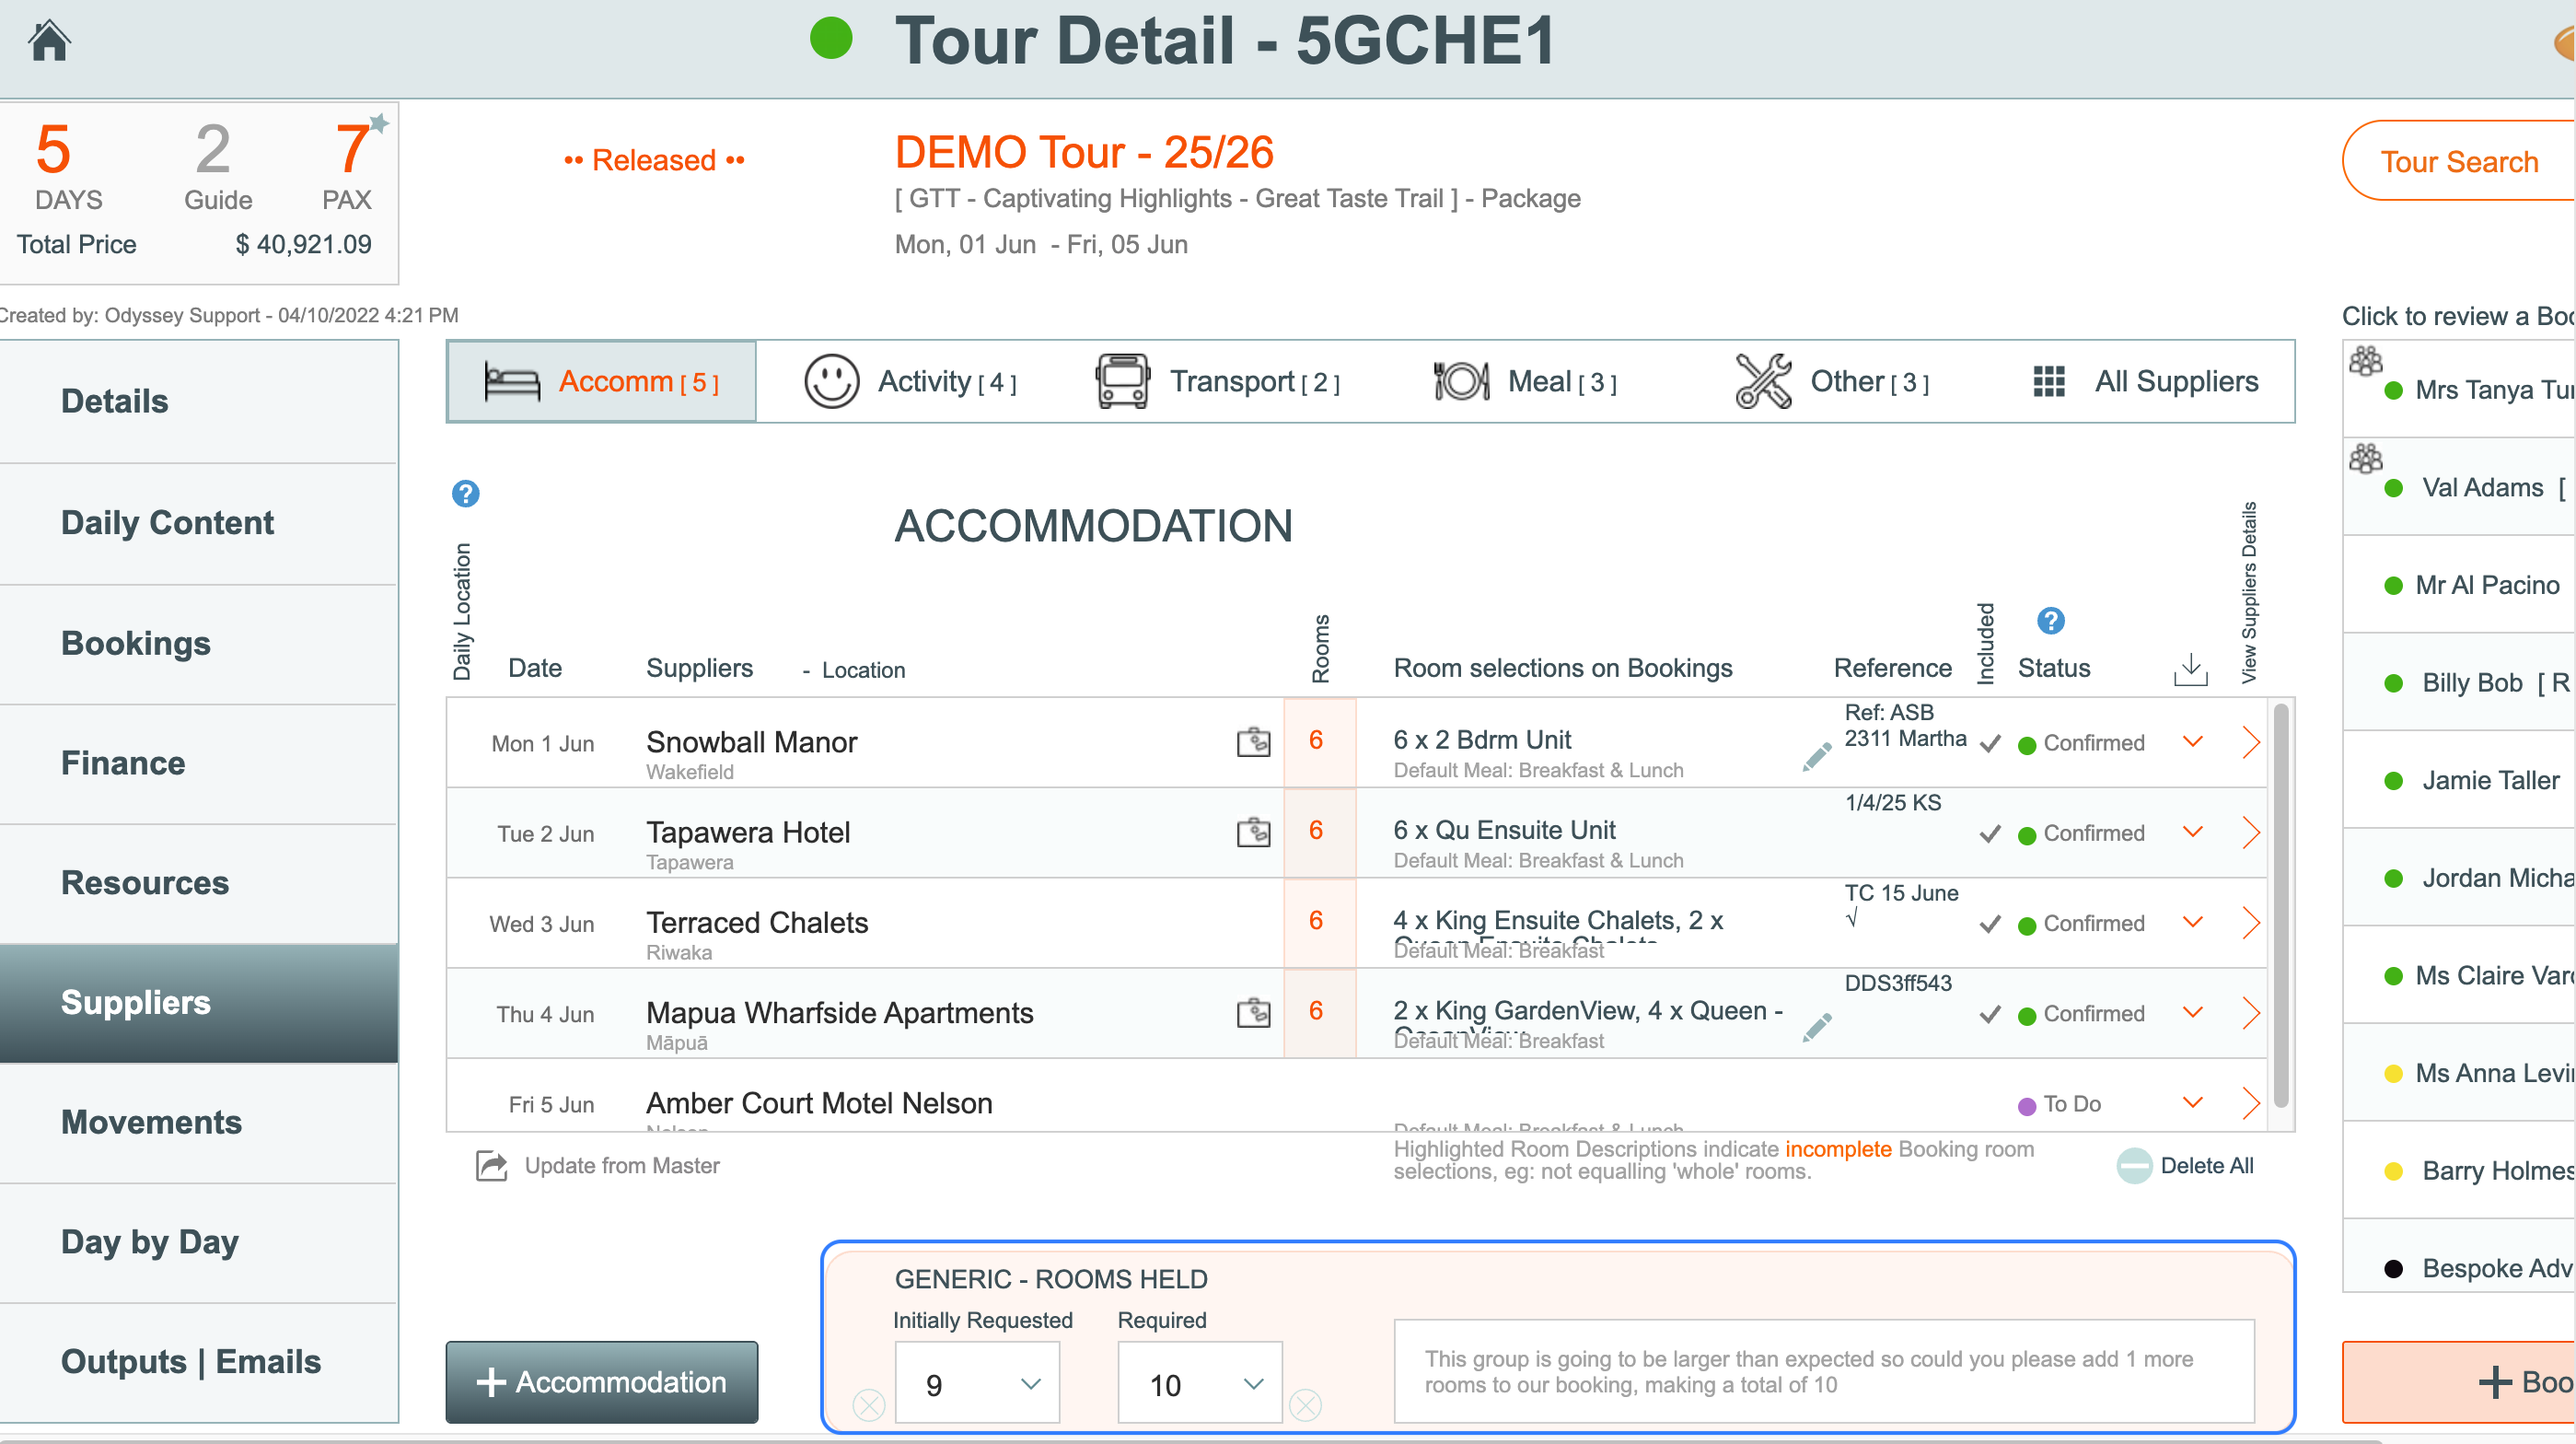
Initial Rooms and Room change message:
- Some business models - generally when they are scheduled departures of large groups - are based on an initial number of rooms being required from a Provider.
- Initial rooms applies to the number of rooms you initially request from all providers on this departure, when the departure is for advanced group bookingsIf this field is required, enter a number of rooms required here.
- The number of rooms applies to every Provider on the departure.
- If you have selected a number of initial rooms, a window will appear providing you the opportunity to enter a message for a provider, to use in email communications with them.
-
Room change message: This is where you enter a default message for all new Departures based on this Master, for IF and WHEN you wish to change the email message which is going to the providers to change the number of reserved rooms.
The text you enter here will only be effective in new Departures based off this master. For earlier Departures, you will need to manually amend the message prior to sending the email to the provider.
The default messages are:
When adding rooms:
This group is going to be larger than expected so could you please add 1 more rooms to our booking, making a total of 9
When reducing rooms:
This group is going to be smaller than expected, so please reduce our booking to 7 rooms and release any remaining rooms on hold.
When room numbers remain the same:
We are holding (X number) rooms with you for this group.
-
- These fields may not be required on Tours based on this master; if so, you can click the eyeball button to hide these fields.
- Update Tours - General Click this button if you wish the data on all of these fields to be automatically pushed to all tours based on this seasonal Master. This will happen automatically, without any prompts or questions.
- Click the Open Tours button to open either all Confirmed only, or tours with any status, based on this seasonal Master. You can then manually view and update these tours as required.
- Click the Update Tours - Details button to push the changes you have made to this Tour''s Details | General tab, to all tours based on this seasonal Master.
Inclusions
The inclusions tab holds explanatory text which provide details to the customers about what this trip offers. This is often the kind of content listed in your website about this trip, e.g. 4 night's accommodation, 3 shuttle movements, 3 bag movements.

The Inclusion text can be used on quotations/booking forms, and also (optionally) on the Itinerary. (See a sample Itinerary in the screen shot below, using that Inclusion text). If you wish it to appear on the itinerary, on Departures based on this master, click the "include in itinerary" tickbox. It can be turned off again on individual departures if you require.
In the Master's Inclusions field, type any explanatory text which will then be pushed through to all Departures based on this Master. It can be edited and customised on the Departure.


- Click the Open Tours button to open either all Confirmed only, or tours with any status, based on this seasonal Master. You can then manually view and update these tours as required.
- Click the Update Tours - Details button to push the changes you have made to this Tour''s Details | General tab, to all tours based on this seasonal Master.
Office
Office Notes are designed to advise your office staff some specific information they need to know about all trips based off this master. They could say eBikes are not available on this trail, Commission not payable on this trip, Set trails per day, DO NOT ALTER: Day 1=x, Day 2=y, Day 3=z, or Not well suited to over 75's

When a Departure has been created based off this master, the text in the Office notes field appears on the Departure's Details Tab
- Click the Open Tours button to open either all Confirmed only, or tours with any status, based on this seasonal Master. You can then manually view and update these tours as required.
- Click the Update Tours - Details button to push the changes you have made to this Tour''s Details | General tab, to all tours based on this seasonal Master.
Proposal
Proposal and Enquiries is an Advanced Module
Learn more about Proposals and Enquiries here
Views

The views tab allows you to control which Provider functions are available on this Master, and therefore on Tours based off this master.. This has the benefit of allowing you to manage Tours and Bookings more suitable to your business needs, e.g. if your business never offers Meals on trips based on this master, turn the view of that function off by setting the orange eyeball button beside the tab name to say Hide.
Create a provider - toggle the eyeball to ON if you want your team to be able to create a new provider whilst inside a Tour
Tour Rooms required - toggle the eyeball to ON if you wish to use the generic initial rooms required, rooms change message, and now required fields to show at Tour | Provider level. (These are generally used when bulk emailing providers prior to a new season, requesting them to hold a specific number of rooms for you for the upcoming season.)