
Tour / Departure Dashboard - by Month
The Departure Dashboard is a list of the currently selected season's Departures, listed by month. Reservations level users, and Depot level users, have slightly different versions of it.
Reservations level users:
Log in to Odyssey, and from the Main Menu on the left hand side, click once on Departure

Depot level users
Log in to Odyssey, and from the Main Menu on the left hand side, click once on Depot

- The Departure Dashboard lists all departures, per month, per trail (/country /category) but that view can be filtered to suit you, using the filters option
- Some departure codes are listed in bold, and some aren’t – that’s because the ones in bold have been “Released” to the Depot. Learn about Released Here
- Any departure leaving today is identified with an orange highlight
- The departure dashboard lists: (working from left to right)
- On the left hand side is the DAY of the month
- Then the Departure or Trip CODE
- The DESCRIPTION of the departure (perhaps using the name and date)
- The number of PEOPLE booked on this departure
- The MAXIMUM number of PEOPLE booked on this departure. Learn more about this feature Here
- The number of ROOMS required on this departure (Rooms required on hold with the Provider, number is stored on the Departure | Details | General tab, and is used in email coms with the Provider
- The amount of MONEY still owing
- A flag at the right hand end of the menu, indicates this is a NEW departure, and might need to be considered by other staff members for other tasks
- As well as the scroll bar to navigate through the list quickly, there will be automatically be up and down arrows to scroll to the bottom of your list more quickly, once there are over a screenful of records. (approx 14 records)
- At the bottom of the dashboard is a count of the number of pax/clients this month, and a count of the number of tours this month. This count is fully flexible, as it operates dynamically using the filters already available (e.g. you can have a count of just say Active Tours, on a particular Trail/Category)
TIP: If you aren't seeing the records you expect, try adjusting the "Filters" in the Options panel
Departure Dashboard Search
To find a specific departure, or groups of departures, use the search tool at the top of the departure dashboard:
- From the Departure Dashboard, click the search field, and type the word or words you are searching for.
- Press return or enter.
- If multiple results are found for that search criteria, they will all be listed.
- The results can be sorted by Month order, if desired. The resulting sort order will be: The oldest season at the top of the list, with the newest season at the bottom. Within each season the results will be listed by the first to last months of your company's season, e.g.Jul - June for the clients with that season sequence.
- Click on an item in the list to open that Departure - or click on the depot view button to the righthand side of it, to see the Depot's view of this departure

-
The results can be exported, and manipulated in Excel for example
or
- tick selected records, or all records, then choose open selected to work through all of those departures. In doing this, if you have clicked the Month button above, then the sort order will remain the same in this view.

Options panel
Filtering the dashboard list to make it shorter
Briefings
A briefings calendar is available from the Options Panel
Learn more about simple calendars Here

Walk-in
Counter sale bookings, or walk-ins, can be created from the Options Panel.

Learn more about Walk-ins Here
Export


4. You will find the file (called Odyssey Departure Details.tsv) in your downloads folder, or possibly in the bottom of your browser window
Learn more about .tsv files Here
Open selected
Odyssey can open multiple departures for you at one time, allowing you to work quickly and efficiently through a specific set of departures. This could allow you, for example, to open all of "your"
departures starting in three weeks time, to ensure all tasks are completed, review itineraries, or to send all of the required emails, etc.
1. Select the filters to meet your own requirements, click Apply
2. With those selected records now showing, click the select all button at the top of the Departure Dashboard list
3. Click the Open selected button
4. All the selected Departures have now opened, and you can then navigate to the tab required, e.g. to receipt payments, or send emails, or change itinerary information, and work through the selected set of departures by using either the SMALL < > arrows , or by clicking directly onto the next departure in the list on the left hand panel.

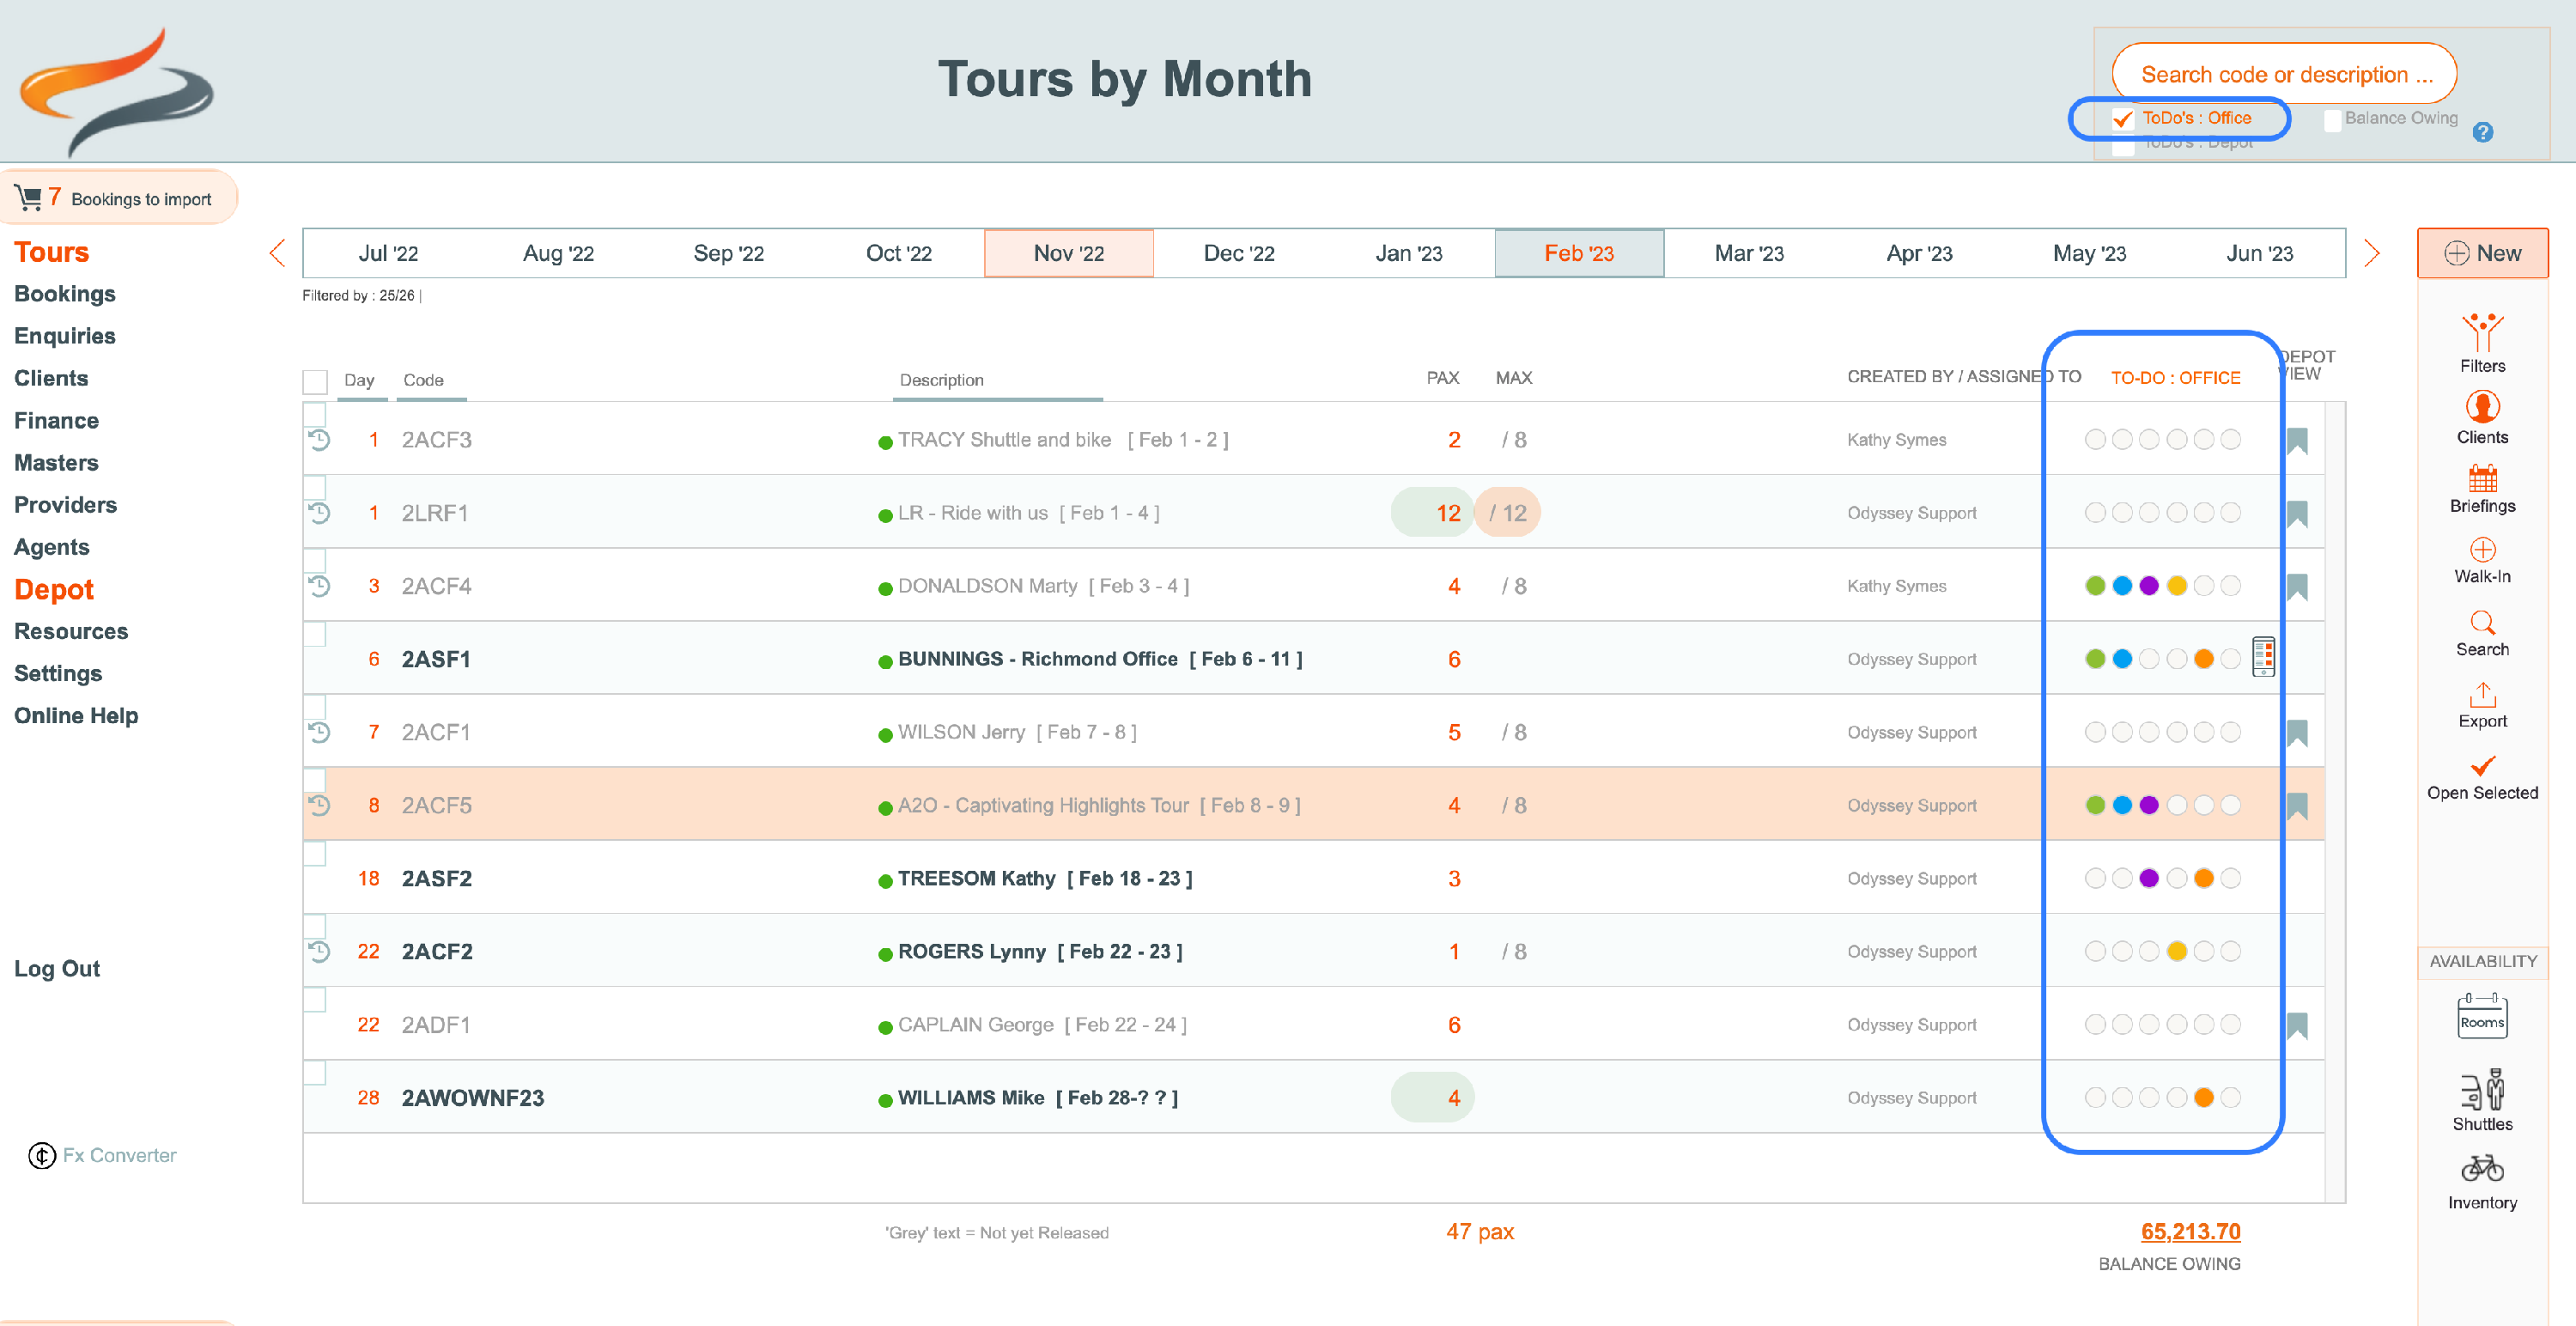
Viewing To Do Tasks or Tour Balances
In the Departure Dashboard, you can choose which additional information you would like to view, relating to each tour. You can choose to view:
- ToDo's for Office
- ToDo's for Depot
- Balance owing figures


Sorting the List

Viewing the Departure record
A single click on a record in the Dashboard list will open up the record for you to view all the details of the Departure, including the resources required, what providers are being used, and what movements are planned.
