Creating a New Departure or Tour
A Departure or Tour is a date specific instance of trip, and is the third level (L3) in the data structure of Odyssey.
While your business might call a Tour, other Odyssey clients might call them Trips, or Departures.
- Learn more about how other Odyssey clients might label their L3's here

When creating a new Departure or Tour, it is based on a 'Trip Master' which is a template of the package that you offer..
The 'Trip Master' contains all of the default settings/selections that can be re-used on Departures, and the details can be edited here at Departure level.
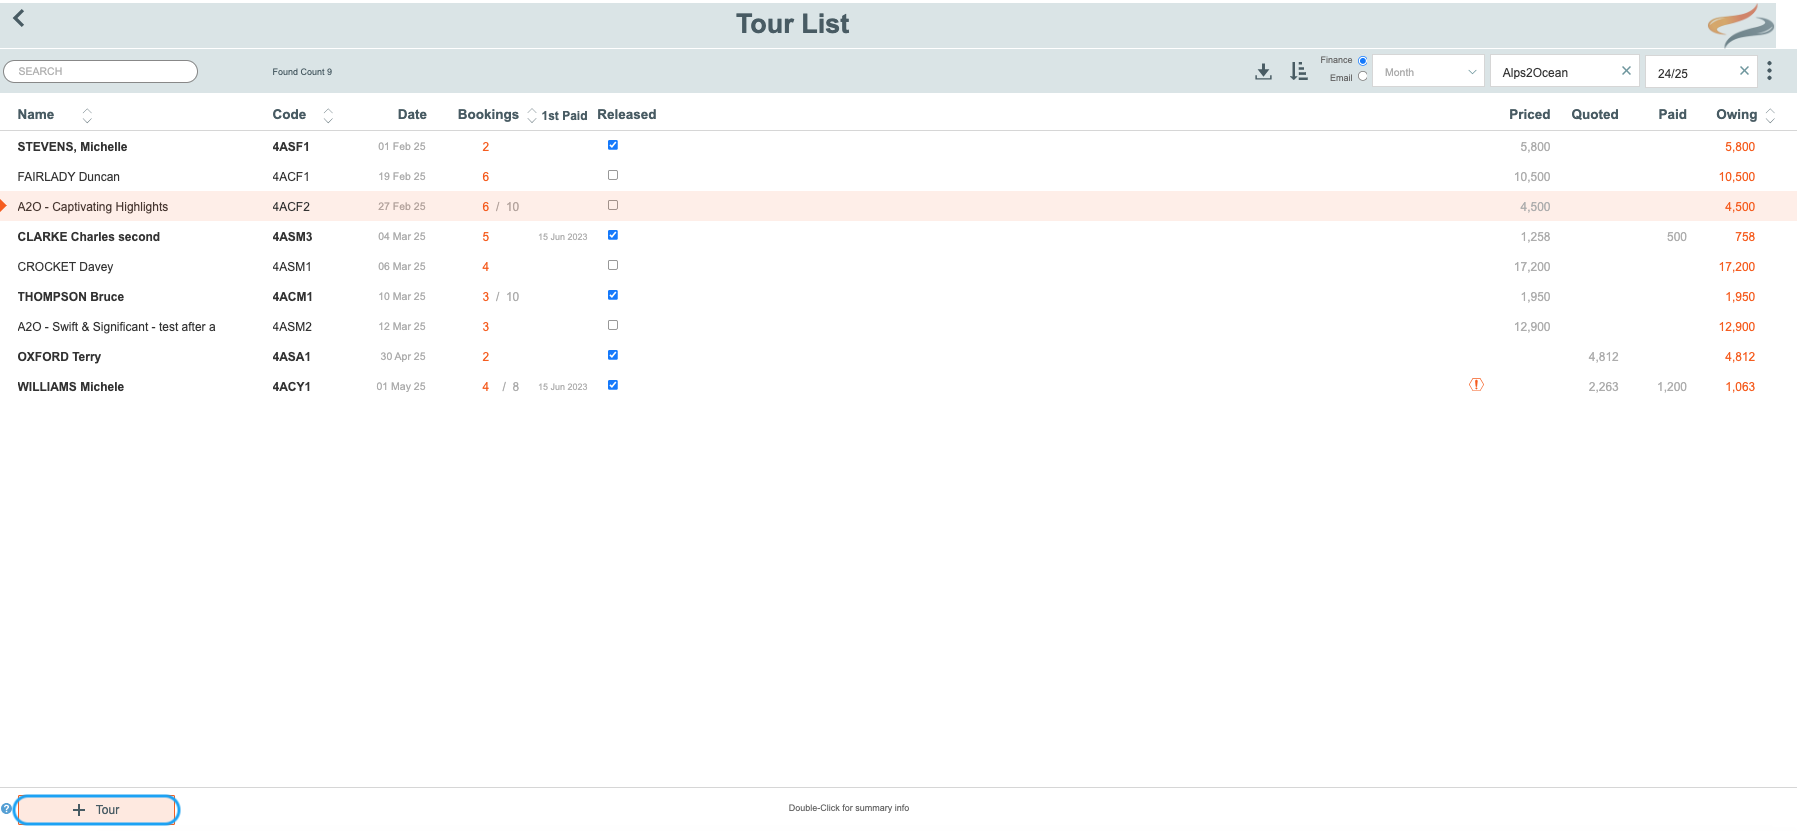
To create a new Departure/Trip
- From the Main Menu, Go to the Tours/Departures Menu and click the New button from the Options Panel
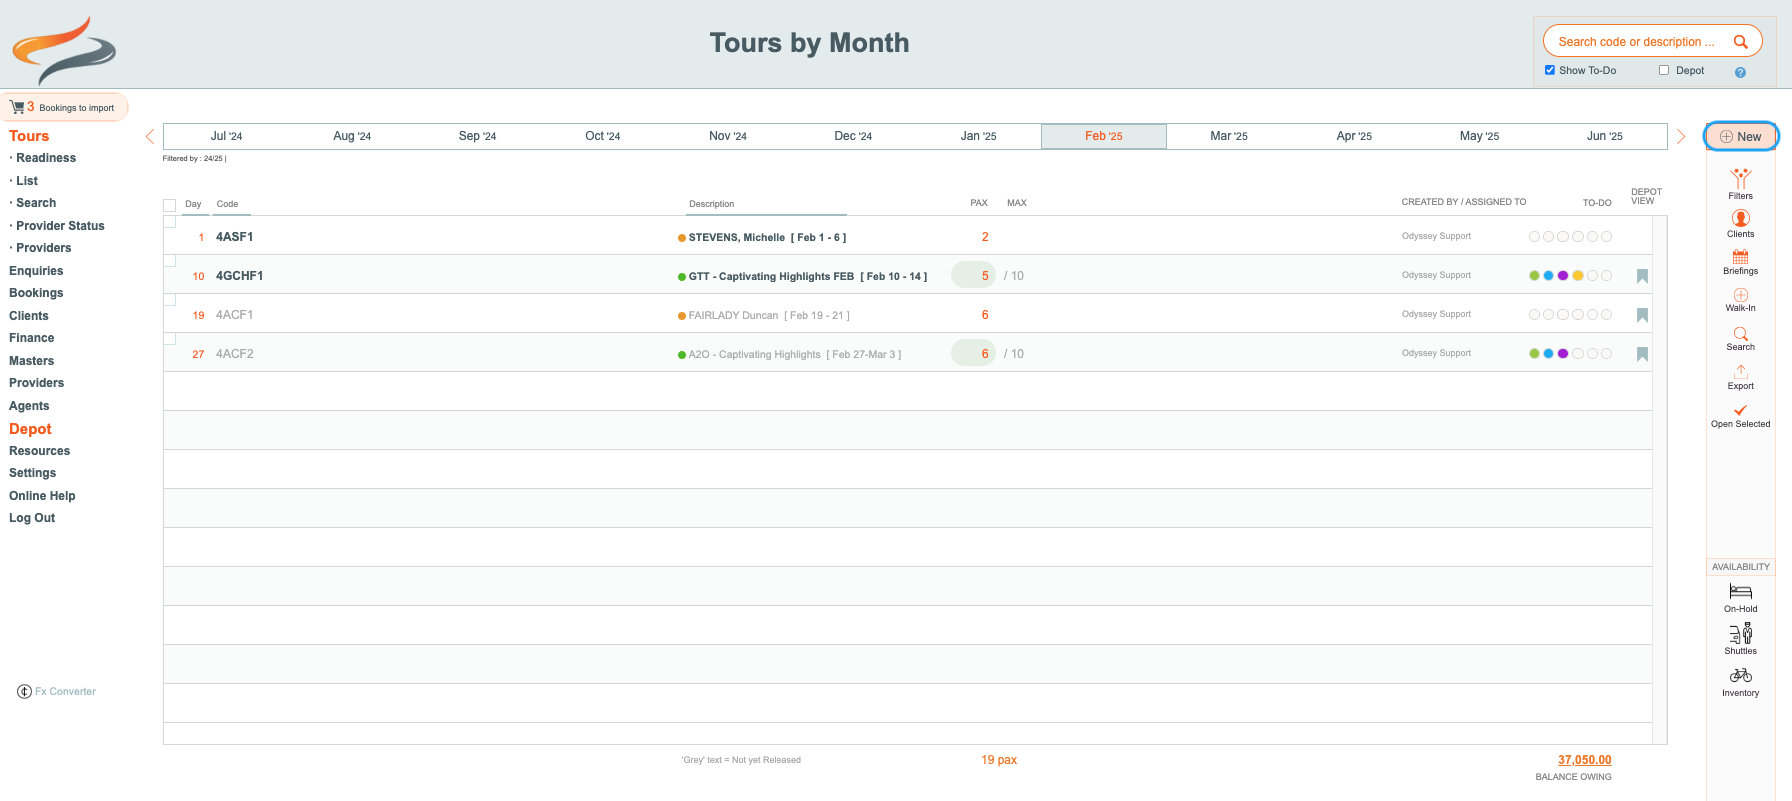
Alternatively, Click the + Departure/Tour button from the Main Menu | Departure | List
From the pop up window which appears, choose the required Trail from the dropdown list, and then choose the Master you wish to use
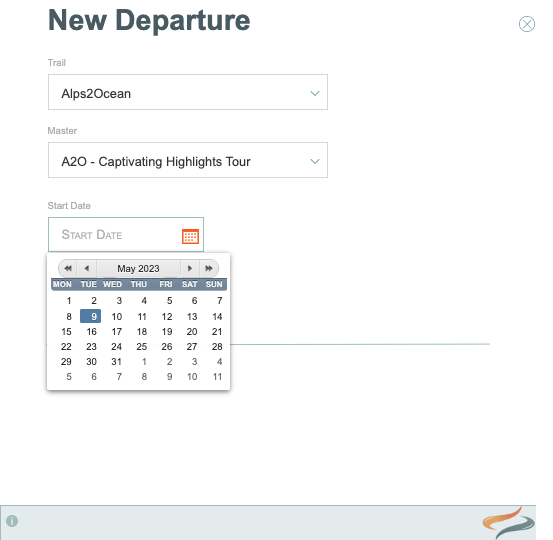
The start date fields will then appear
- Enter the start date from the drop down list
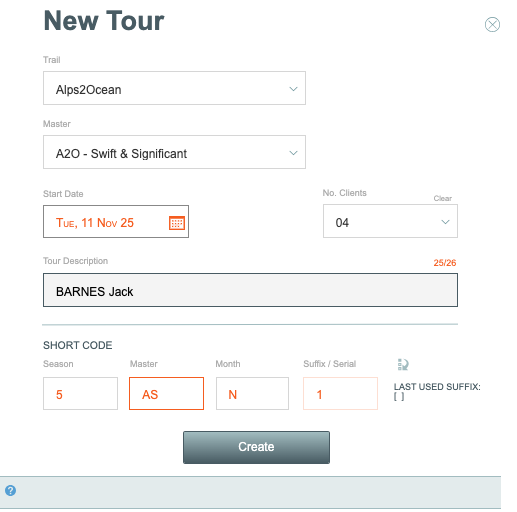
- enter the number of clients, if you want to add them now (the clients which are created will have system generated names, you can change those later, click Here to learn more).
- Enter the departure description. Most clients use a format of the organiser's SURNAME in capitals first, followed by the organiser's first name in lower case. This distinguishes it from the client's own booking record. e.g. BARKER, Mandy
- a unique Departure or Trip code will be automatically created for you, based on the selections you have made. You can learn more about trip code Here, or about changing trip codes Here
- click the Create button
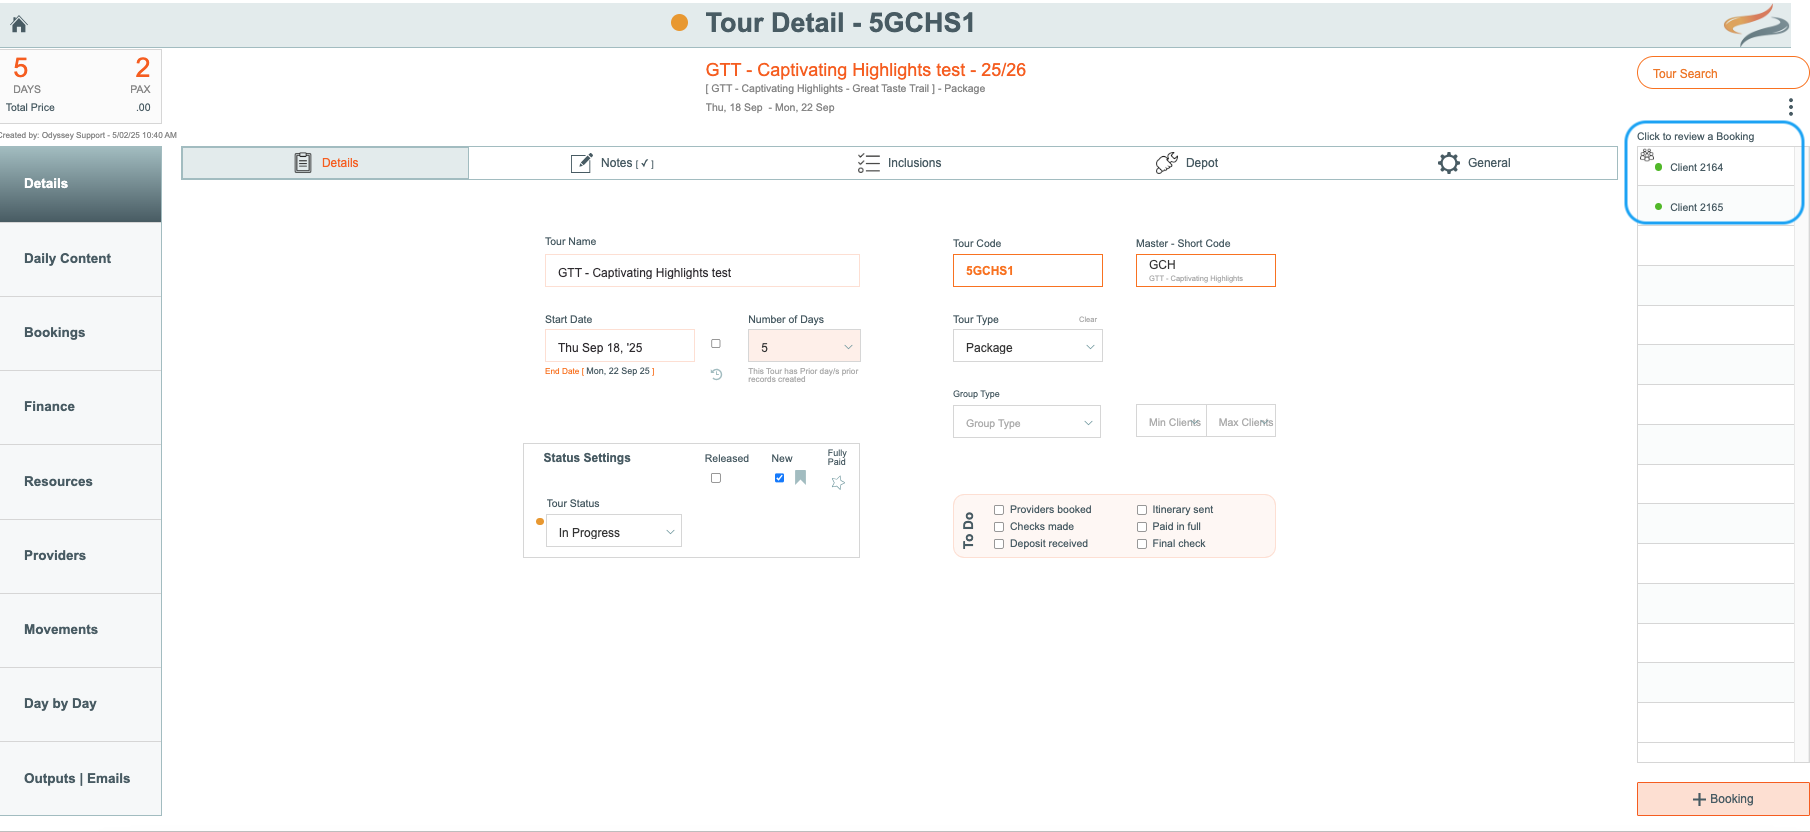
Details
General
You are delivered to the Tour's Details | General tab, which has been prepopulated for you, based on your selections, and also the Master the Tour is based on.

- At the top left of the screen is a count of the number of Days, the count of Guides (if applicable) (in grey) and the PAX count. A * beside the PAX count indicates that this trip has met it's Minimum PAX levels and is now "guaranteed". (emails going to client's can have different message text depending if the trip is "guaranteed' or not). Learn more about Minimum and Maximum numbers here

- The Departure's Balance Owing is shown at the top of the Details | General window along with the Date that the Balance is due. Alternatively, it will display FULLY PAID, if all clients have paid their trip in full.
- The name of the Tour/Departure is listed; this field is editable if you wish to change it.
- A list of To Do tasks for this tour is displayed, with a tick box beside each item so that the task can be ticked off when completed. Learn more about To Do items here
- The start date of the tour is entered, and an end date has been calculated. This is calculated based on the number of days added to DAY 1 of the trip (not -1 etc, a feature often used to provide guides or guests with a prior night's accommodation)
- If a -1 day has been included in the Daily Locations area, a new field will show on the Details | General tab, for "Include Day/s Prior". If this tickbox is ticked, then the Tour description will start on the -1 Day, not Day 1. When the box has been ticked, a note will apper saying "To clear this tickbox, click the Clear button."

- Number of days in the trip is listed here, and can be changed using the drop down menu. Changing the number of days does change the trip end date, but does not impact the days in the Tour | Daily | Locations tab. These need to be adjusted manually.
- Status settings Various different tour status settings can be selected using the drop down menu. Learn about changing the Tour Status here

- Released: learn more about released here
- The New Flag is designed to highlight to the Depot staff that a new Departure has come in from the Reservations team. (This could be a released, or unreleased Departure). Once the Depot staff have reviewed the booking, and taken it into account in their Depot planning, they can turn the "New" switch off on the Details view of the Departure. The purpose of the flag is so the Depot can identify any last minute bookings slipping in... And it's up to the Depot to turn the flag off, indicating they KNOW about it.
Settings

- The Trip Code is listed; it is also editable. To learn more about editing the trip code, click Here
- Tour/Departure type - this field is for reporting purposes only, select package or custom, cycling or hiking, etc, from the drop down list (defined in your system settings). It has no bearing on pricing or other features.
- The short code for the Master that this tour is based on is shown. To learn how to change this setting, click here.
- Select or change the Min and Max numbers of PAX required on this departure/trip, if that is your business model
- Choose the Group Type (family, couple, single person, etc), this is just for reporting purposes
- The Settings tab records when this Tour was created, and who the creator was
- it also indicates who the Tour is currently assigned to, and the assigned person can be changed by selecting a new team member from the drop down list
- Select from the Agent Itinerary Banner to use drop down list, if the Itinerary for this Tour should not use the default 'L1' banner, but one for this specific Agent.
Financial Details:
The Financial details field defines financial settings, such as
- currency
- deposit amount
- GST
- pricing model (e.g. how the Tour value is determined, Quoted or Costed)
- Learn more about the pricing modes of costed vs quoted Here. Use the drop down menus to change these if required.
- There is also a field for you to enter the number of Carbon kgs / Booking.
Provider Rooming Details:
Our clients have different business models. Some of our clients have Providers who will take bulk room reservation bookings ahead of time in order to secure a good rate.
For example, our Odyssey client may be an organised tour business who books an accommodation provider each month for a tour, and requests that the Provider hold ten rooms to accommodate the tour. Closer to the tour date, If the number of rooms required for the tour changes, Odyssey can automate the email process to the provider, requesting a revised number of rooms, up or down.
In the Tour | Detail | General tab you may have the following view:

Enter the number of Initial Rooms requested from the Provider (It may have already been populated from the "Room change message" field on the Master record. Find it on Master | General tab.)
When the room number requirements change, enter the new number in the Number of Rooms field. (Note, this room count is a manual process for your reservations team, Odyssey does not calculate it). This number is then applied to every Provider on this Departure. These fields are then used on email communications with Providers. Learn more about email Providers in bulk, here
Notes

- The Tour | Details | Notes | Office tab provides you with a space to record Office Notes - something about this Departure that could be of interest; For example, you may be explaining why a discount has been applied, or perhaps a group of them are arriving on a flight which has had its arrival time rescheduled, to explain the price brackets for this trip, what age or fitness level it is best suited to, or even to record all of your email conversations with the group. or anything you want to record for internal purposes only.
-
The Tour | Details | Notes | Guides/Staff tab provides you with a space to record any Guide/Staff Notes. The staff field may not be visible to you, as it is primarily used by businesses who use guides. The information stored here will print on any paperwork which has a Guides/Staff Notes field on it. Perhaps you could use it to let the guide know that it is a client's birthday when they are on the trip, or a client has a health condition they should be aware of, etc.
- The Suppliers Changes tab stores details of changes to suppliers. Whenever a Supplier is changed, a record is added to the sequential list of changes made within this Tour.
- It records the Prior & Post changed supplier's name.
- The name of the User who performed the change
-
And the Timestamp the change was made
This supports the sales/reservations team to keep track of changes they have made, when a Provider is unavailable on certain dates, and they are trying to find another.

- TIP: A tick √ will display on this tab if notes have been entered, as a visual indication that there is a note there to check
Inclusions
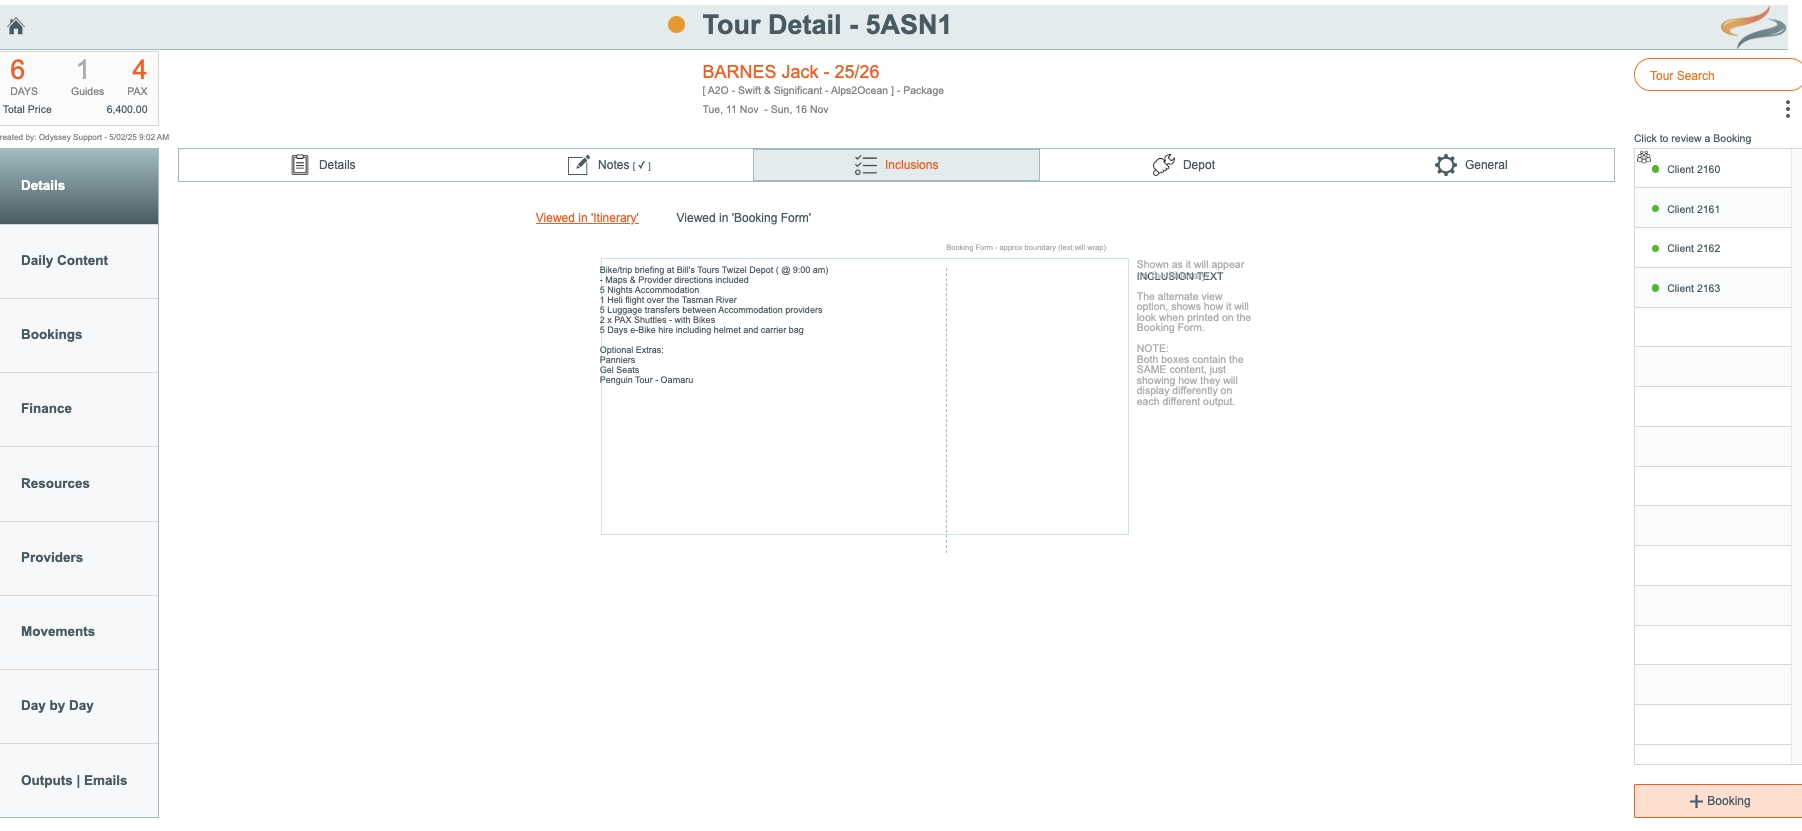
This area has been populated by text in the Master, detailing what is included in this Departure.
Text entered in the Inclusions space can be edited or amended to suit your tour/departure, and will show in the client's Quote / Booking Form under the heading "Trip Inclusions". Optionally, it can also be printed on the Itinerary. To learn more about these items of paperwork, click here
We provide two optional views of this data, as the text fits differently on each of the two documents it flows into, the Quote / Booking Form and the Itinerary.
The first view is the "Viewed in Itinerary" and we show this one first as the scale of this field allows you to read the text in a larger font than in the next view, the "View in Booking Form". There is a vertical line on the Itinerary view which provides a visual clue as to where the text will fit on the Booking Form.
Over on the View in Booking form tab, when bookings/passengers have been added to your departure, the View button will become visible. This will allow you to have a preview of the Booking form, to ensure the text you have entered will fit in the designated space.
Depot
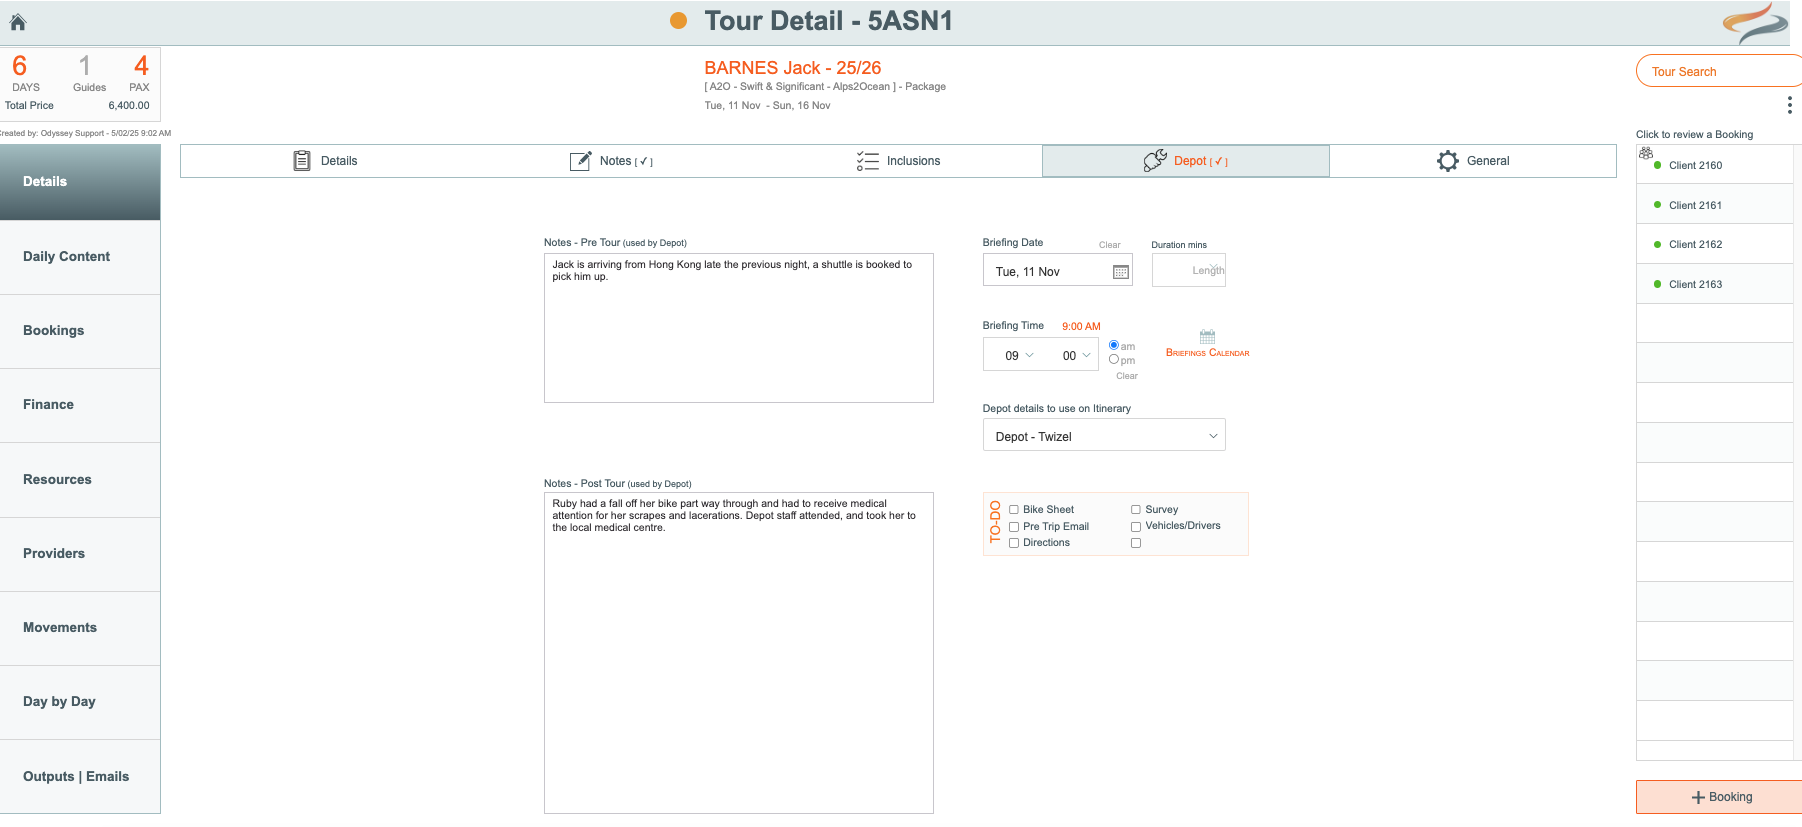
The Depot tab provides you with the opportunity to record notes which could be of interest to the Depot staff, pre or post departure.
- TIP: A tick √ will display on this tab if notes have been entered, as a visual indication that there is a note there to check
Pre Departure: This area allows you to enter free form text, for text you wish to be noted for pre-departure. For example, to leave flowers in a guest room, a client's last minute change of plans, or to add a buffet cost
Post Departure: This area allows you to enter free form text, for text you wish to be noted post-departure. e.g: Mike phoned and requires a replacement battery and charger, Barry the driver will drop to Otematata Bar and eatery.
Briefings:
On the Tour/Departure | Details | Depot tab
-
Select a briefing date using the calendar tool, and a briefing time using the hour and min drop down lists. Set am or pm. In order to ensure you don't have any scheduling conflicts for the briefing time, you can access the briefing calendar from here also.
Important Note: The briefing date and time are not shown on an Itinerary, or in many other locations, until the Departure status is Confirmed. This is because it's important for Depot logistics, planning and rostering, etc, that only Confirmed Departures are considered.
Learn more about the simple calendars, including the briefing calendar, Here
- Change the briefing duration if required
- Select a briefing location using the drop down list. Briefing locations are shown in Itinerary and other communications with the client, and are managed from the Trails settings. Learn more about trails and depot locations Here
- Depot staff can use a set of To Do tasks, which they can tick off as required. Learn more about "To Do" tasks here
Bookings
Bookings are the records which hold the Client records for this departure
Booking (Client) records can be clicked at any time, to review and update them as required
Learn more about Booking records here