
Tour / Departure - Output - creating, printing, uploading
Once a Departure has been created you can:
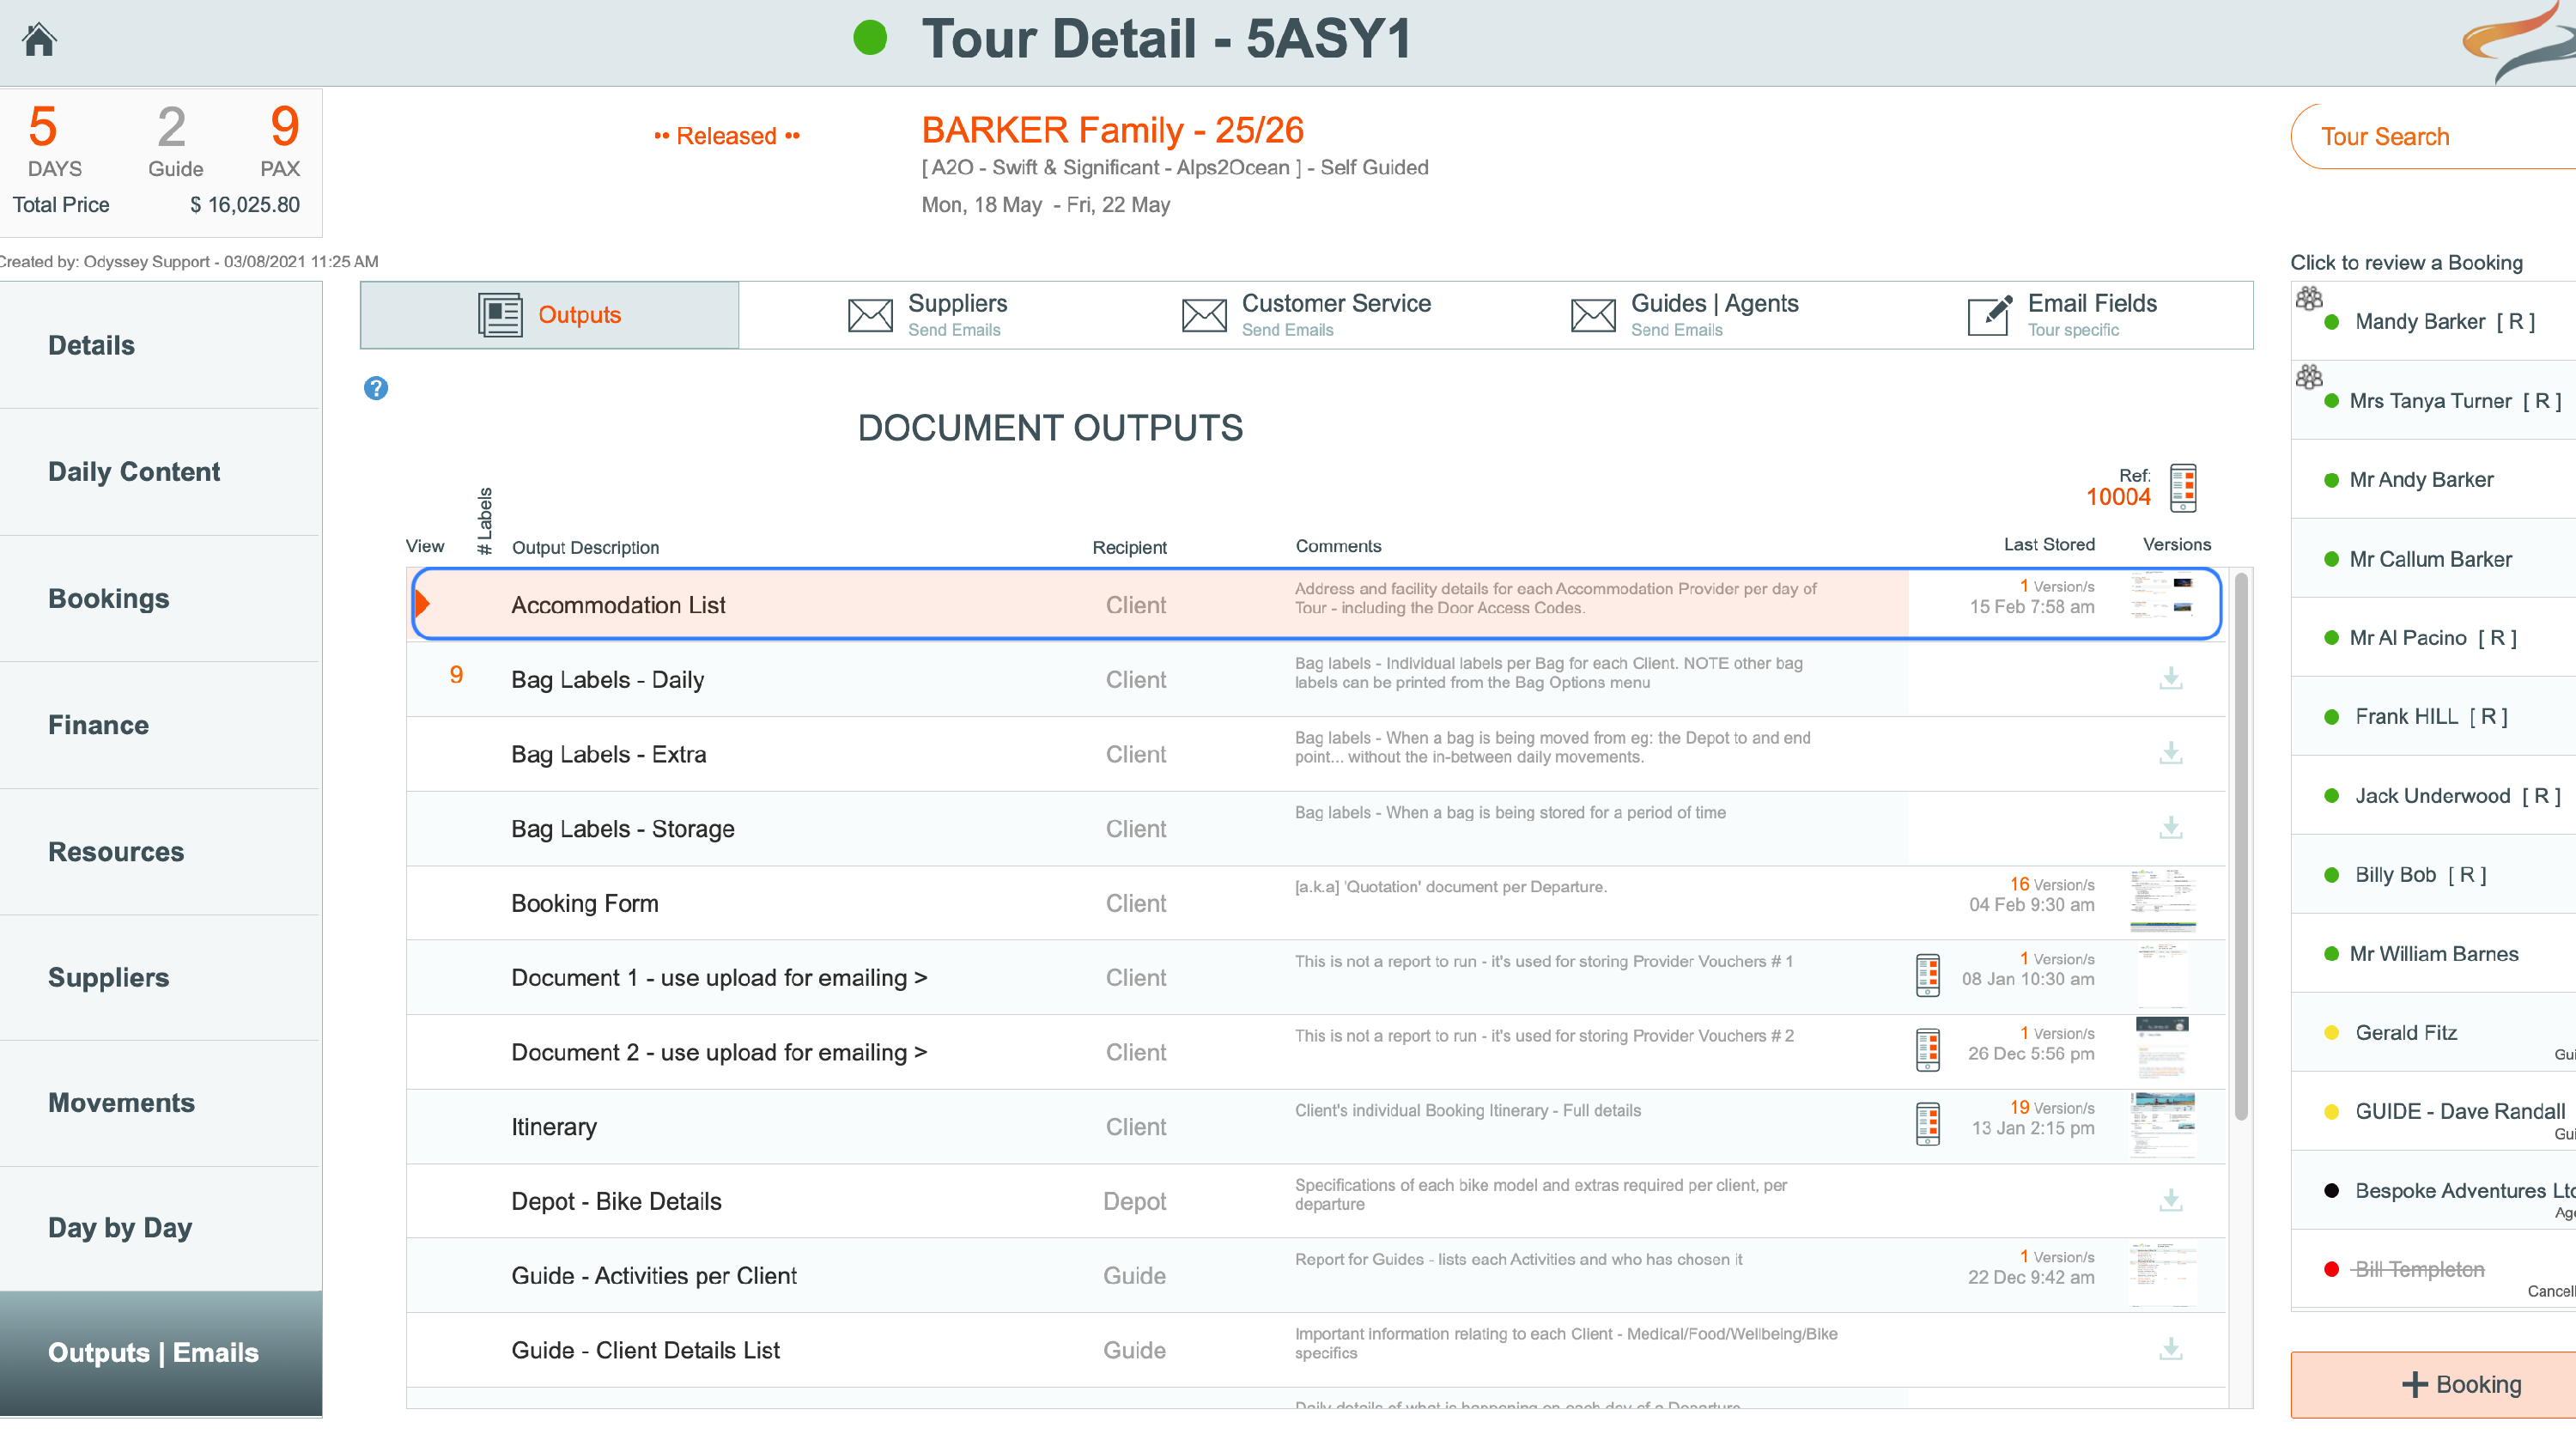
- view the paperwork output reports for the Departure. These include:
- The reports include:
- Accommodation List
- Bag Labels
- Booking Form (some call this "Quotation)
- Itinerary (some call this Trip plan, or Voucher)
- Document 1 and 2 (for you to upload your own documents)
- Bike Details, and Bike requirements next x days
- Review document
- Activity/Excursion Report for Guides
- Client Details List
- Client sheet (also known as Client booking sheet)
- Departure Summary (also known as Daily Run Sheet)
- Provider - Pre Season Bookings list / Initial Booking list
- Provider - Booking Status
- Rooming List
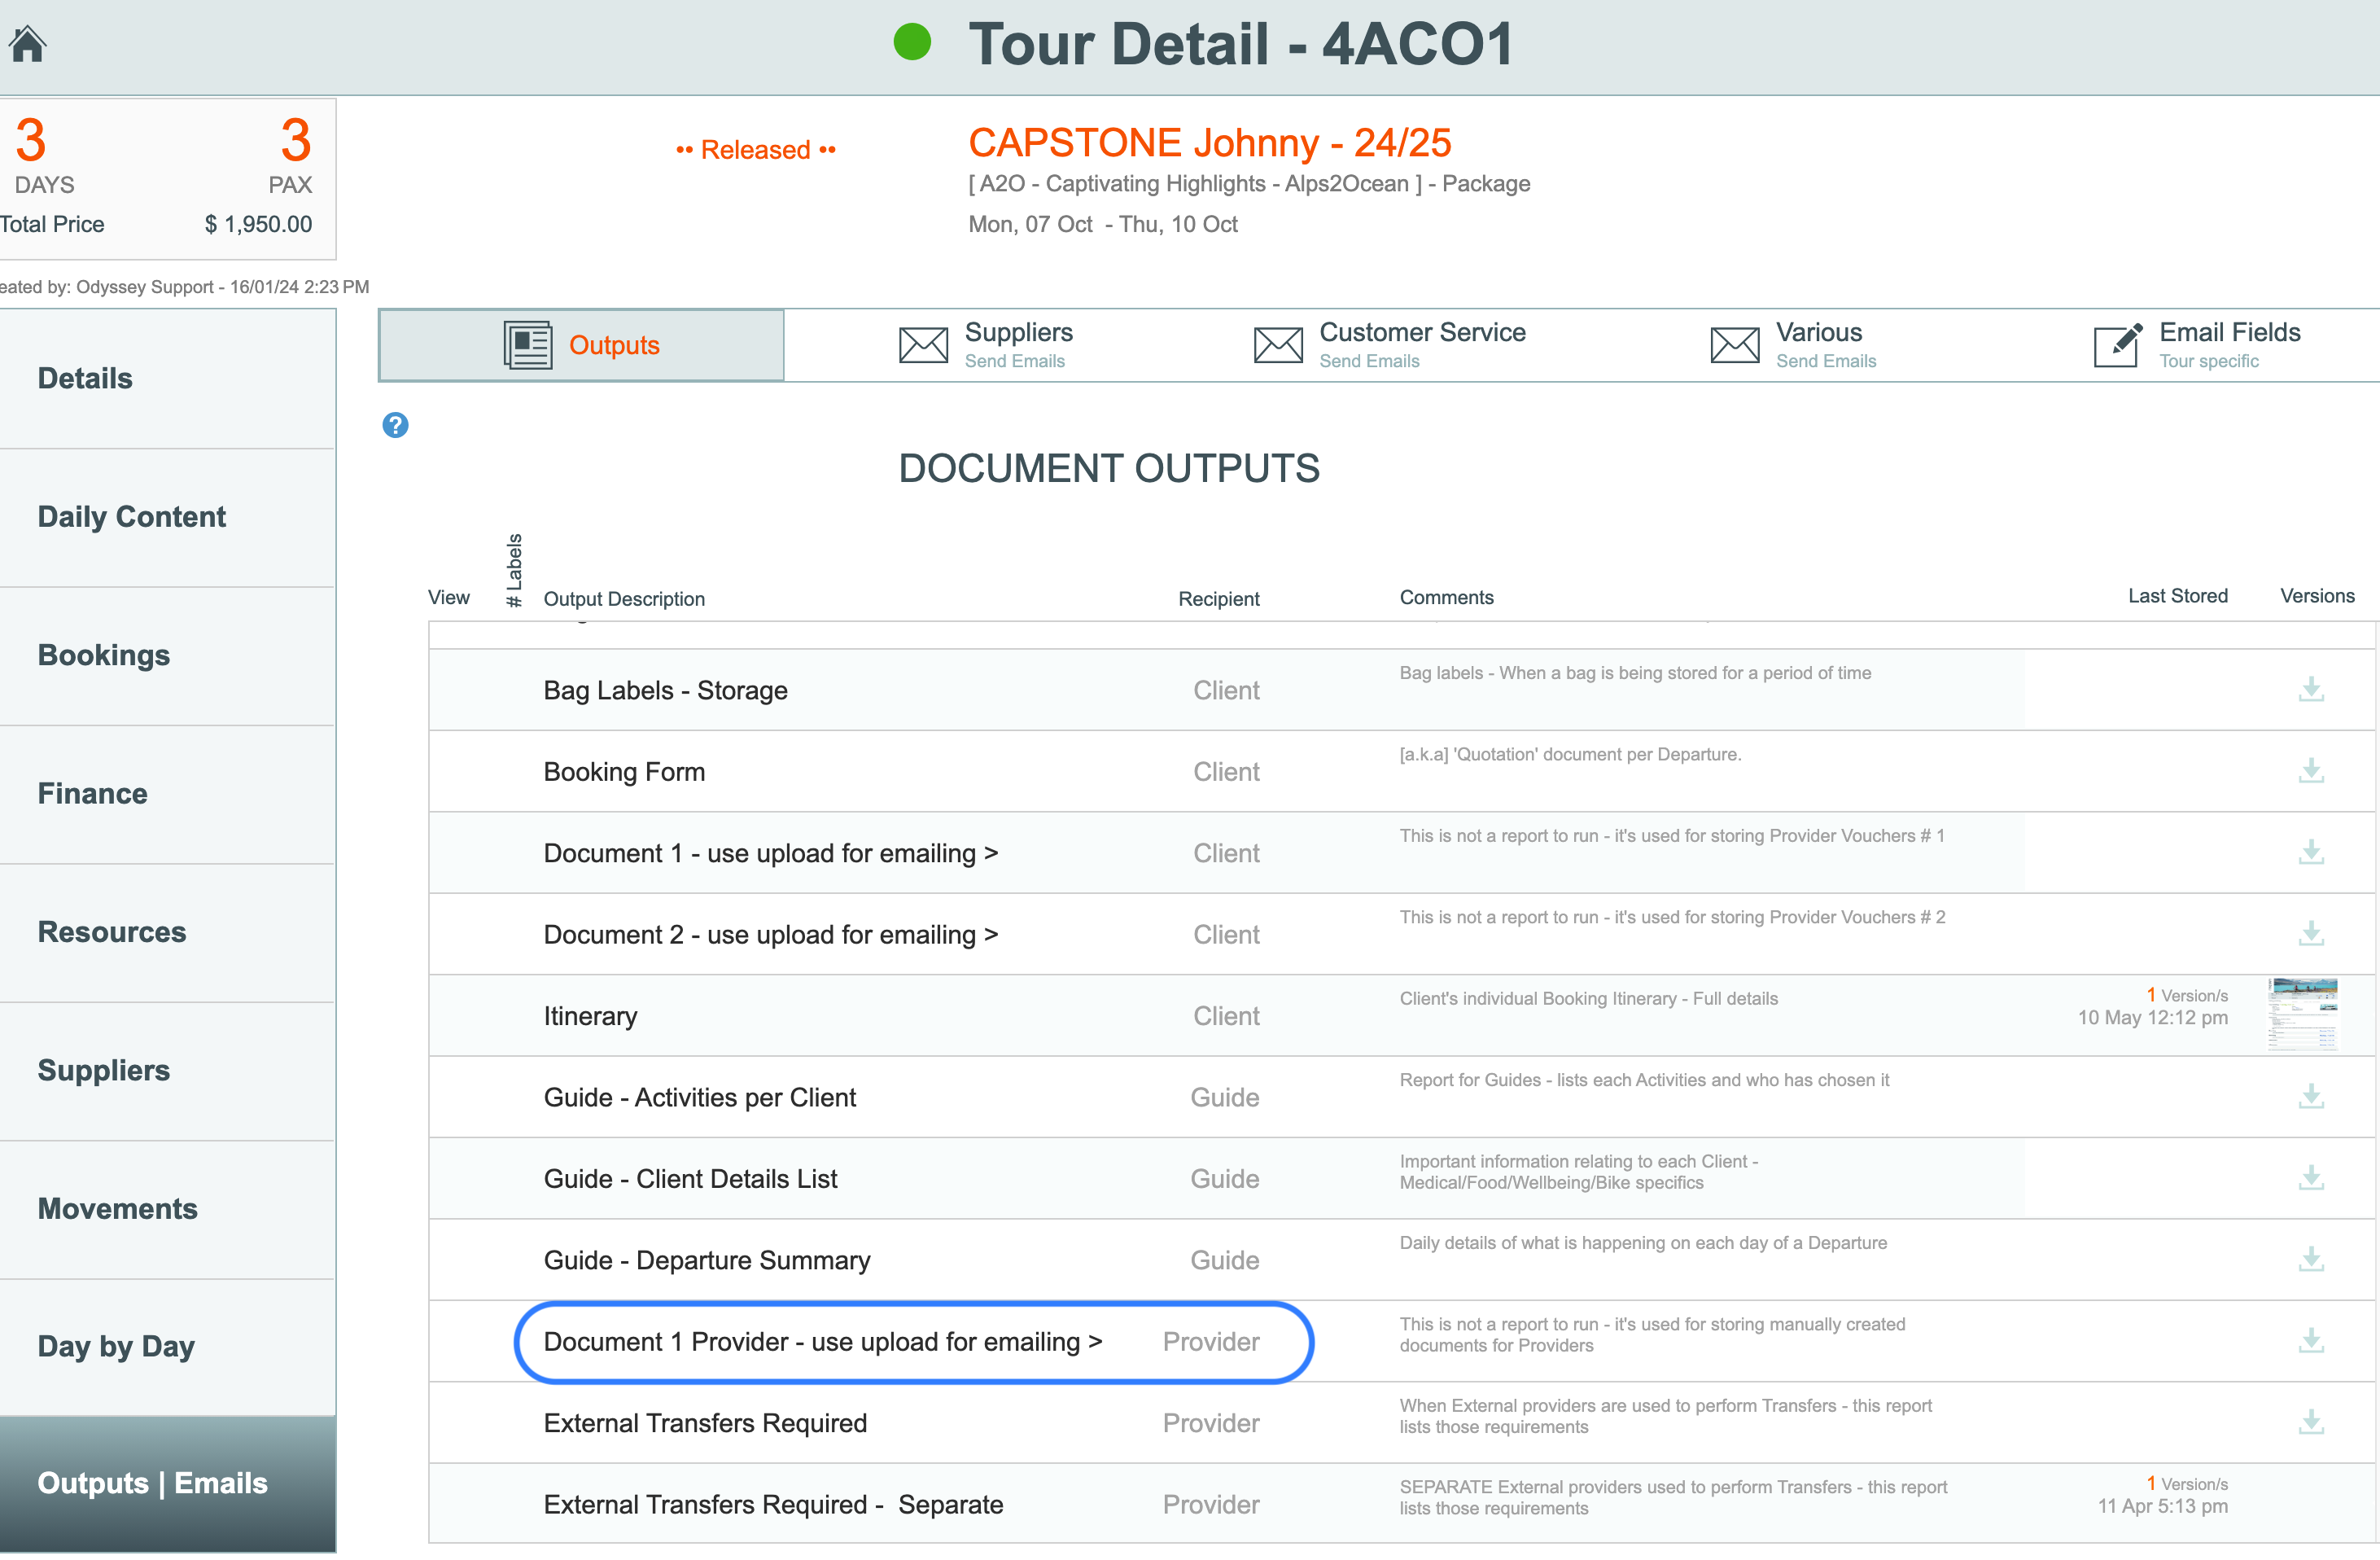
- Document 1 Provider
- Custom Shuttle /Transfer - Drivers Manifest
- store the outputs in readiness to email it to the client (eg Itinerary, and then push it to the mobile app) or Provider (eg rooming list)
- print the outputs (eg bag labels, guide list) or in the case of the Itinerary, push it to the mobile app
- even upload and store versions of paperwork created outside of Odyssey, for your own records
Examples of Reports can be seen here:
To PRINT or STORE an output report at Reservations level:
First, you need to VIEW the report:
- From the Main Menu | Departure screen, click on the Output|Emails tab
- A list of output options appear
- The list provides a Description of the output which kind of recipient it is intended for (Client, Depot, Guide, Internal, Provider), when it was last stored, and some commentary about the form.

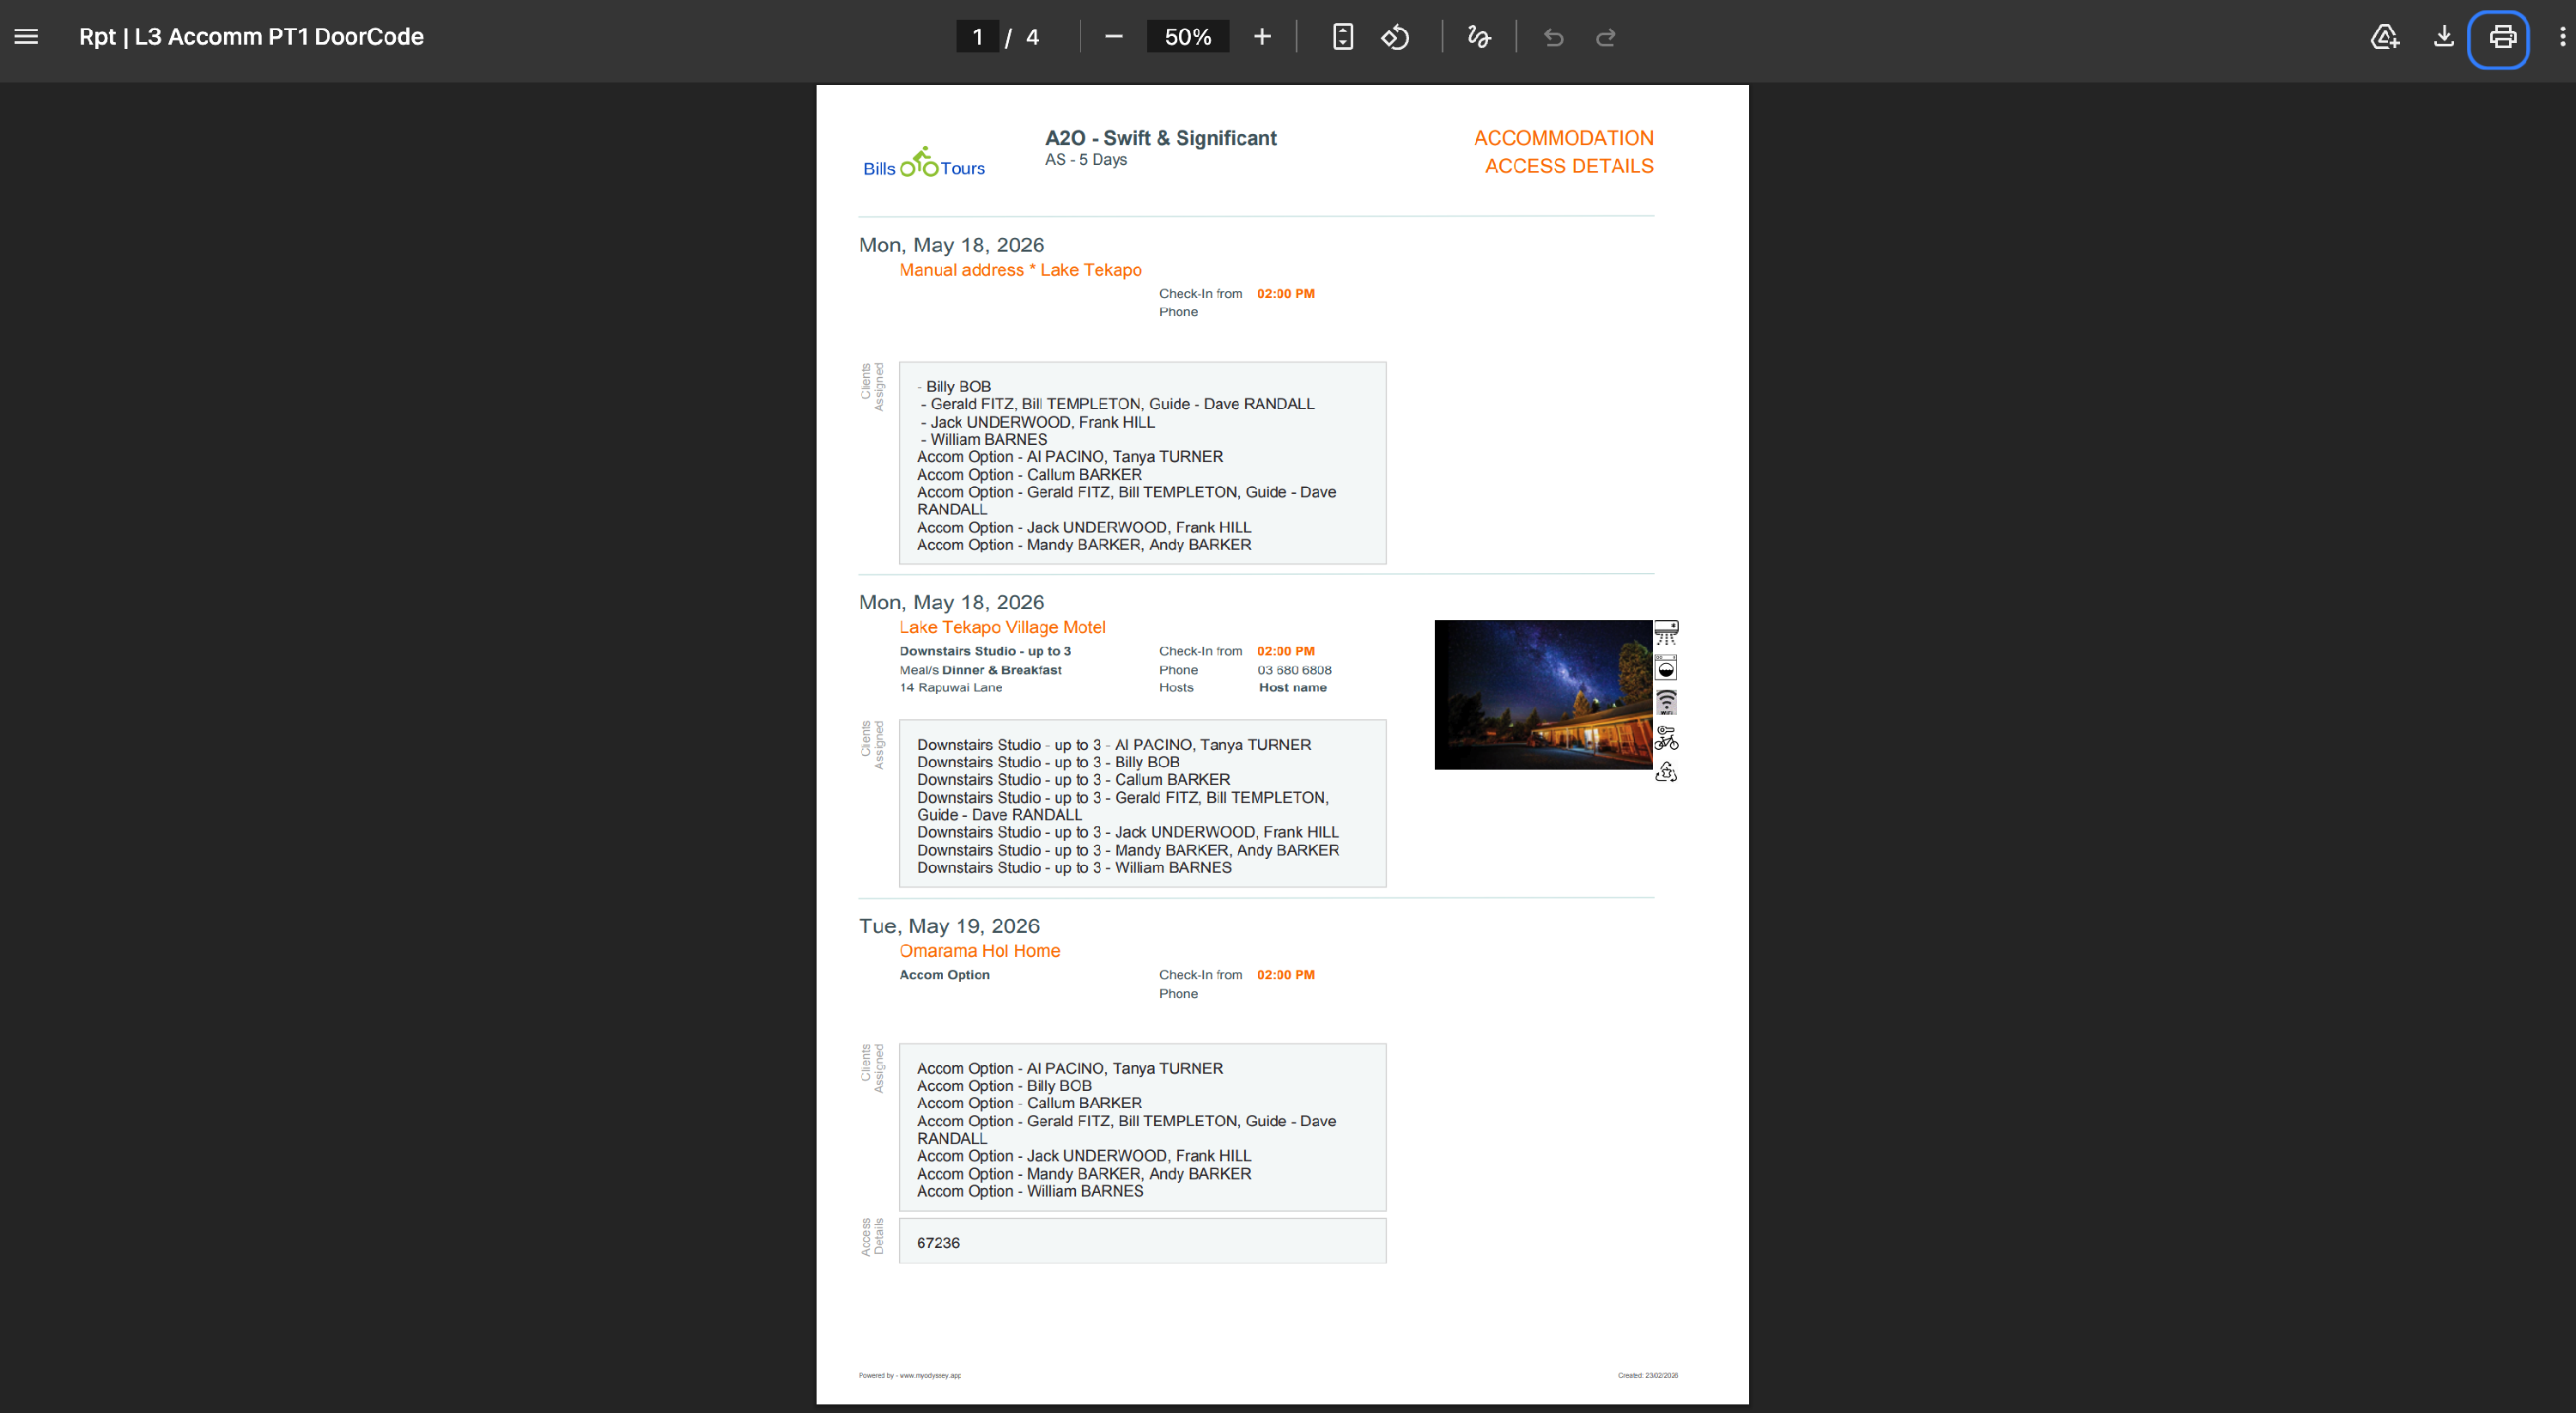
- Hover over the form you wish to view, and when it goes orange, click it
- A initial PRE-preview of the document (in this case, an accommodation list) will appear next:

- Click the Preview button


Note: If the formatted report doesn't appear, it could be that your computer's browser is set to prevent Pop Up's. See our support document on Setting Up Your Browser, or contact us, for help.
Learn more about managing files in Preview Here
To Store this document in preparation for emailing it
Attachments can be emailed from the Departure's Output/email tab.
To store the attachment, in preparation for attachment to an email,
- From the Departure | Output/email tab, click the Store button

Learn more about emailing attachments Here
Multiple versions of your output documents can be stored. Learn more about storing multiple versions of output Here
Printing Output reports
To print or download an output report
- From a Reservations level login, go to the Main Menu | Departure screen, click on the Output|Emails tab
- Hover over the report you wish to view, e.g. an accommodation list or a client details list, and when it goes orange, click it
- A initial PRE-preview of the document (in this case, an accommodation list) will appear
- Click the Preview button
- Click the printer icon at the top right hand side of the window, check the printer settings, then click Print
- Or, Click the down arrow icon at the top right hand side of the window to download the document to your own system

- change the Document name if required, and take a note of where the document is going to be stored.
- Change the location if necessary, by clicking on the blue arrows.
- Click the Save button

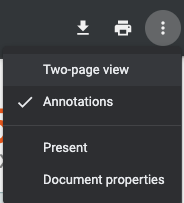
For more output options, click the three 'traffic light dots' button
or, for an alternative method of downloading your document, learn about Multiple versions of paperwork documents Here
- Tick the ' Two page view' setting to display your paperwork with two pages side by side on your screen, rather than one
- Annotations are comments and highlights often used in .pdf's. They are unlikely to be used in pdf's created by Odyssey.
- Tick the ' Present' option to take your output into full screen mode. Use the 'escape' key on your keyboard to return to normal mode.
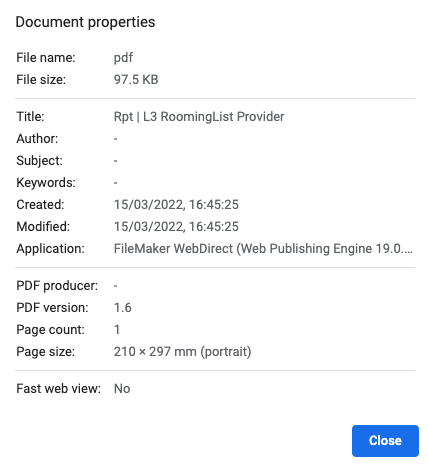
- Tick the ' Document properties' option to view the properties of the document, e.g. what size is the output, what file format, etc.
Uploading versions of Paperwork created outside of Odyssey

Document 1 and Document 2 - Customer Service / Client Recipient
- Odyssey provides you with the ability to upload, store, and email to clients, two unspecified documents of your own choosing. These documents could be stored on your hard drive (or cloud solution). We have named these Document 1 and Document 2, but the labelling of these documents can be changed in system settings.
- Both reservations users and depot level users can upload documents to use here. Your business could use these document placeholders for vouchers from providers, such as a boarding pass, pre-paid ticket, or gift voucher, or for emailing signed copies of documents to clients.

On either Doc1 or Doc2, after you have uploaded your image into this regular pop-up window, you'll also have the option to 'Push' it to the App as well.
If the WHOLE Itinerary has not yet been pushed, this will give you an error message and tell you to do that step INSTEAD. (eg; you would not have to come back here and do this step as well... since that is already part of the main 'push' option.)

Document 1 - Provider
- Odyssey also provides you with the ability to upload, store, and email to providers, an unspecified document of your own choosing. (Any format document except .mov). This could be a document that's stored on your hard drive (or cloud solution). We have named this Document 1, but the labelling of this document can be changed in system settings.
- This provides Odyssey users the ability to send a provider a spreadsheet of the booking requirements, which could be particularly useful where you have exceptionally large groups, thus enabling the provider to manage the bookings at their end in a spreadsheet format.
Other pieces of output
- Any of the other output records can also be used to upload manually created versions (outside of Odyssey) for attachment to emails
Uploading and storing
In the example below, we have used the Itinerary, but it could be any document.
- From the Output menu, click the "Manually add a PDF" button on the line which represents the kind of document you wish to upload, e.g. Itinerary, or Document 1, Document 2, etc.
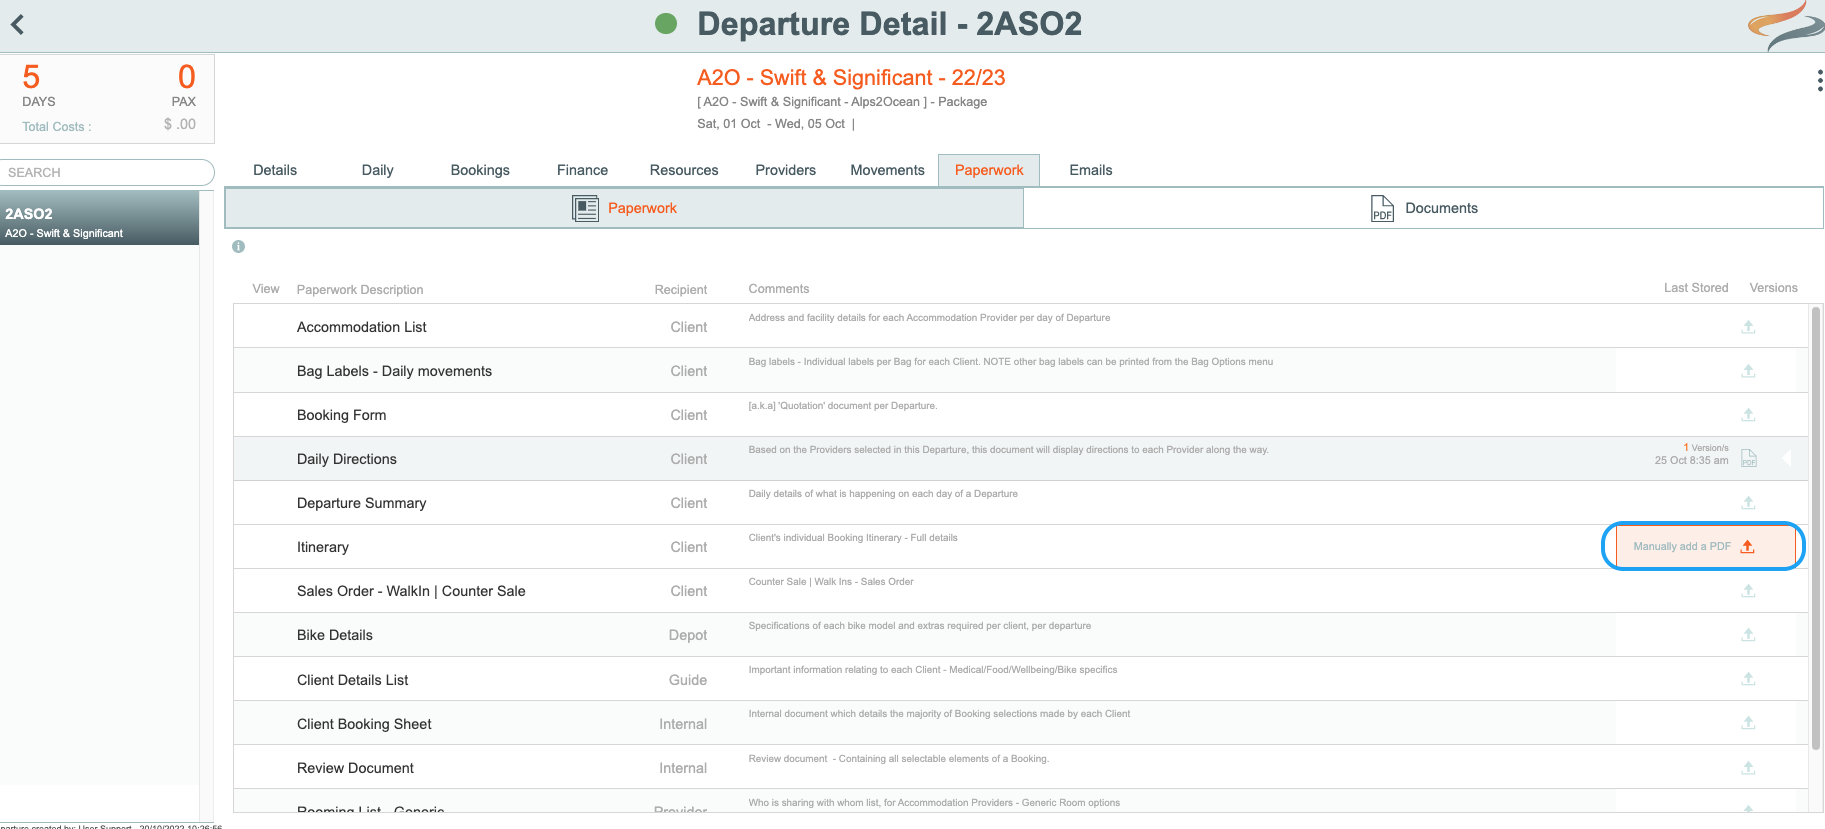
- If there are already files uploaded to the workspace, the "Manually add a document" button will reflect how many versions of the document are stored, and the last time the document was stored. Go ahead and click it anyway.

- A new window will appear, listing any previously stored files. Click the "Upload a document" button

- Click the Choose file button to enable you to browse your computer to locate the file you wish to upload

- When you have located the file, select it, and click the Open button

- Then click the Upload button

- Your document is now stored. Optionally, you can add a note to record why this version of the document was created or stored.
- A good use case example for using document 1 and document 2, could be to upload a voucher for a ferry trip, or a meal, or to upload an invoice or statement.
- In the case of a ferry trip or meal voucher, you can use the Push to App button to push these vouchers to the client's Ody Trips App

To view output - Depot level
From the Departure | Details tab, select an output option from the drop down list
